E-7
3.5 TRACKING (MOVING) PROCEDURE
The operator must be fully trained in the operation of this equipment.
When tracking the operator must be in a position to have an all round view of the
operation, a banks man or marshal should assist where this is not possible.
Ensure the site is clear of non essential personnel. Barrrier the area and post
warning signs where site conditions warrant this.
Tracking must only be carried out on firm flat ground.
Note This equipment must never be tracked on gradients that are more than:-
10 degrees Port to Starboard or 20 degrees Front to Back.
The machine must always be on flat, solid ground when operating in its
normal mode.
When engine is running at low revs the machine can be moved to the desired
location on site by following the procedures in the order listed below:-
1 Remove Mid-Grade Side Conveyor bottom
section locking pins
2 Activate 'L/H Lower Side Conv.
Up/Down' lever to raise the conveyor
bottom section
3 Insert locking pins to
lock bottom section in
raised position
WARNING:-
Never
try to move the machine without lifting
the Mid-Grade Side Conveyor bottom section FIRST!!!
L/H Lower Side Conv.
R/H Side of Chassis
Section 3 Page 7
E-7
TRACKING (MOVING) PROCEDURE
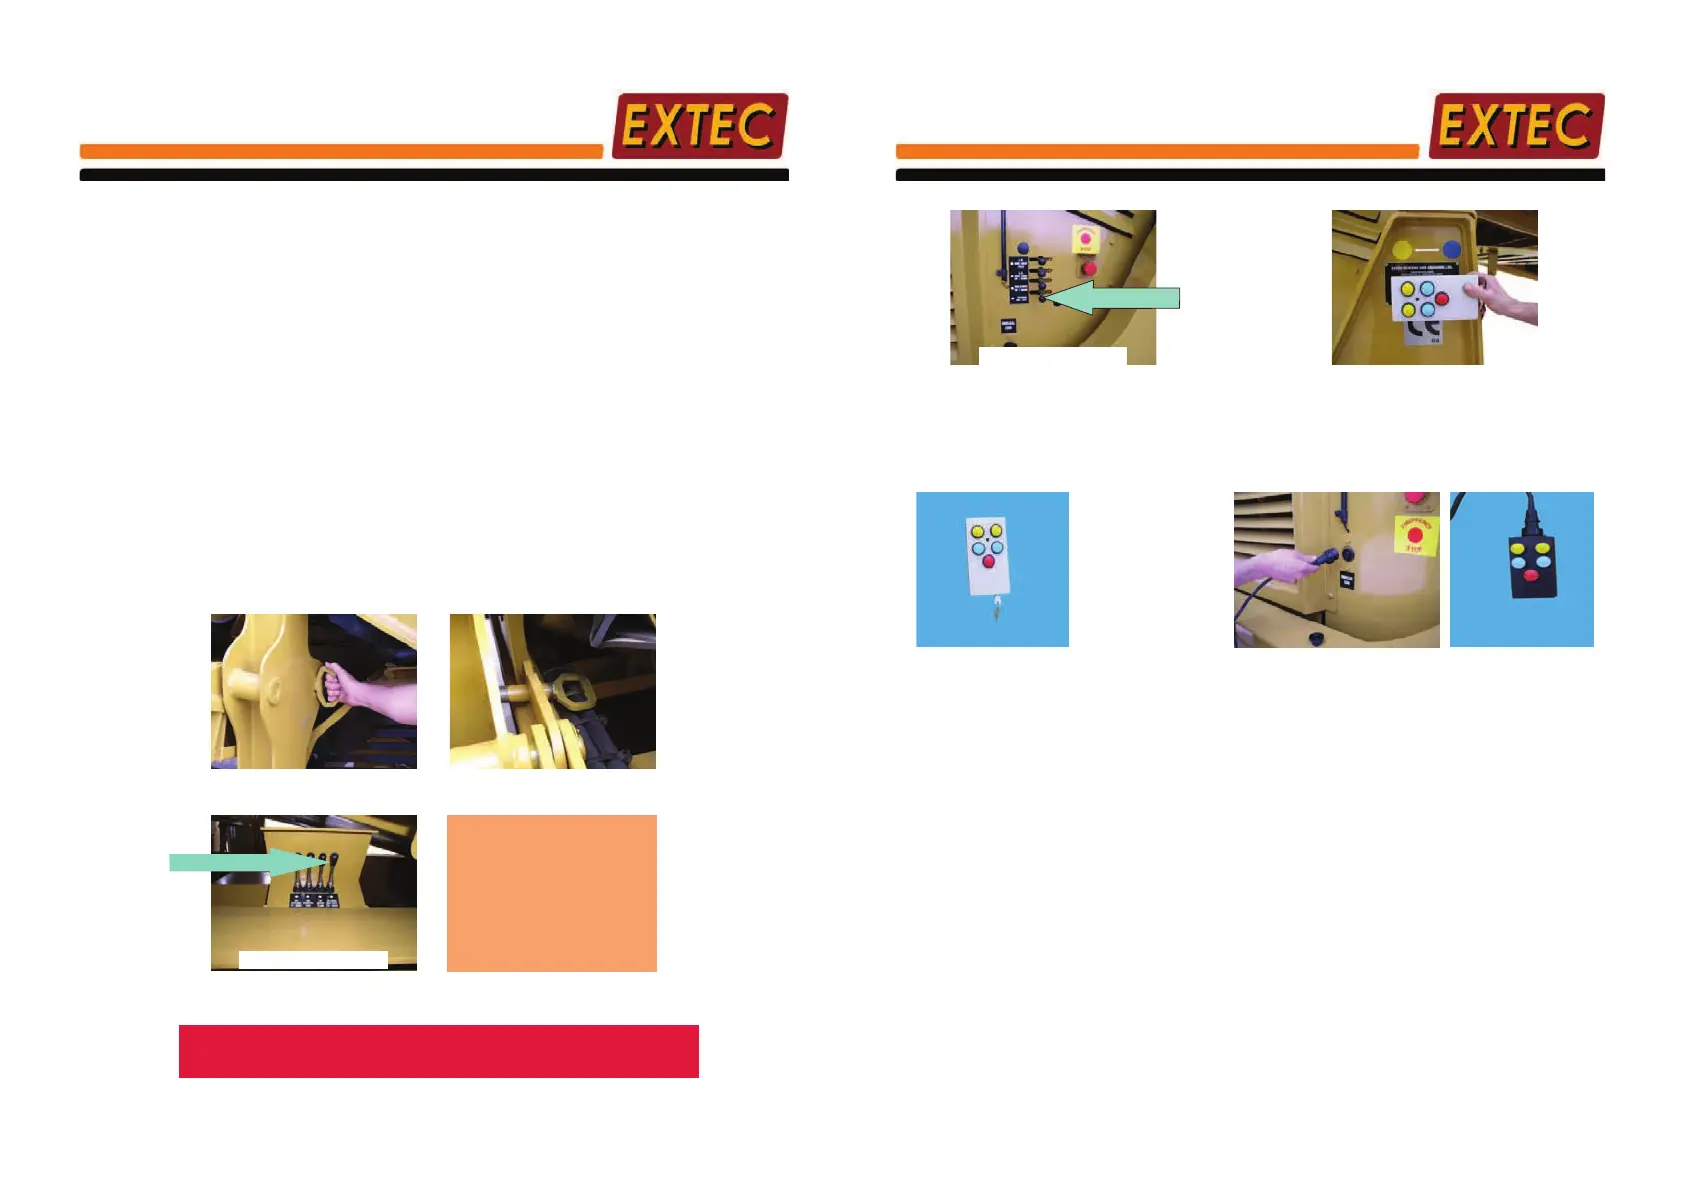
4 Activate lever to turn Tracks on
After following the instructions on the previous page, use either the Remote handset or the Hard Wire Drive to move
the machine to the desired position.
NOTE The Remote Handset must be fully recharged at regular intervals. Use the correct instructions for your
controller.
OR
Remote Handset
Plug in Hard Wire
Umbilical Socket
Hard Wire Handset
WARNING Under NO circumstances try to move the machine when ANY personnel are standing on
the machine.
For safety reasons, it is essential to check all around machine for obstacles or personnel which may
be endangered by moving the machine.
When moving machine, ensure that it is only moved over firm ground suitable for carrying the weight
of the machine. Prior to operating the machine, it is ESSENTIAL that both tracks are in contact with
firm level ground to avoid excessive vibration or rocking of the machine. DO NOT MOVE THE
MACHINE ACROSS EXCESSIVELY SLOPING GROUND.
NOTE
1. When operating the White Remote Handset, the yellow buttons are for forward movement and
the blue ones for reverse. (These correspond to direction indicator stickers on machine)
2. When operating the Hard Wire Handset, the yellow buttons are for forward movement and the
blue ones for reverse. (These correspond to direction indicator stickers on machine)
When the machine is moved to its desired operating position, prepare the E-7 for operation by
following the procedures laid out in the following pages.
Adhere to the Tracking colour direction
stickers when moving the machine
Tracks On/Off
L/H Side of Power Pack
Section 3 Page 8