E-7
1) Raise screenbox rear
4.7 SCREEN MESH REPLACEMENT
WARNING:- The machine MUST be switched off and ignition key REMOVED before making any
adjustments.
The screen meshes and punched plate can be changed if desired for different sizes of product or
to replace damaged or worn out meshes/punched plate. To fit the screen meshes/punched plate,
proceed in the following manner :-
SCREENBOX BOTTOM DECK MESH ACCESS
To aid in changing the screenbox
mesh & clearing any blockages,
the Screenbox can be raised and
lowered at the front and back
independently of each other.
2)Locate pin to lock teleleg in raised position
3) Raise Screenbox front
4) Locate both screen mesh change
lock-out legs
Mesh
change lock-out
SCREENBOX MESH REMOVAL/FITTING
Using the Ratchet's on either side of screenbox
retract the tension spring bar back to the end of
the sideplate slots. The existing mesh can now
be removed by lifting and unhooking from the
front mesh hook.
Screen mesh tensioning ratchet
BOTTOM DECK MESH REMOVAL
When finished, remember to release both
lock-out legs before lowering screenbox
Screenbox
Up/Down
Mesh Change
Up/Down
L/H Side of Chassis
L/H Side of Chassis
Section 4 Page17
E-7
SCREEN MESH REPLACEMENT
SCREENBOX MESH FITTING
Before changing screen mesh ENSURE the capping rubber is in good condition.
Insert mesh into the box on the bottom deck and anchor one end around the front mesh hook.
Rest the screen mesh on the cross supports and using the Ratchet's either side of the screenbox
extend the tension spring bar along the sideplate slots until the correct tension is achieved.
Restart the machine and run the screenbox motor, if the meshes rattle or make any noise, stop
the machine and apply further tension.
BOTTOM DECK MESH FITTING
TOP DECK PUNCHED PLATE FITTING
Insert punched plate into the box on the top deck and anchor both sides under the clamps. Using
an air gun or other siutable device, tighten the clamps, SIMULTANEOUSLY until the correct
tension is achieved. Restart the machine and run the screenbox motor, if the punched plate
rattles or makes any noise, stop the machine and apply further,
EQUAL
tension to both sides.
Top deck punched plate
SCREENBOX PUNCHED PLATE REMOVAL
Using a suitable device loosen the clamps on
either side of the screen box. When loosened
sufficiently the existing mesh can now be easily
removed.
TOP DECK PUNCHED PLATE REMOVAL
Punched plate
clamp
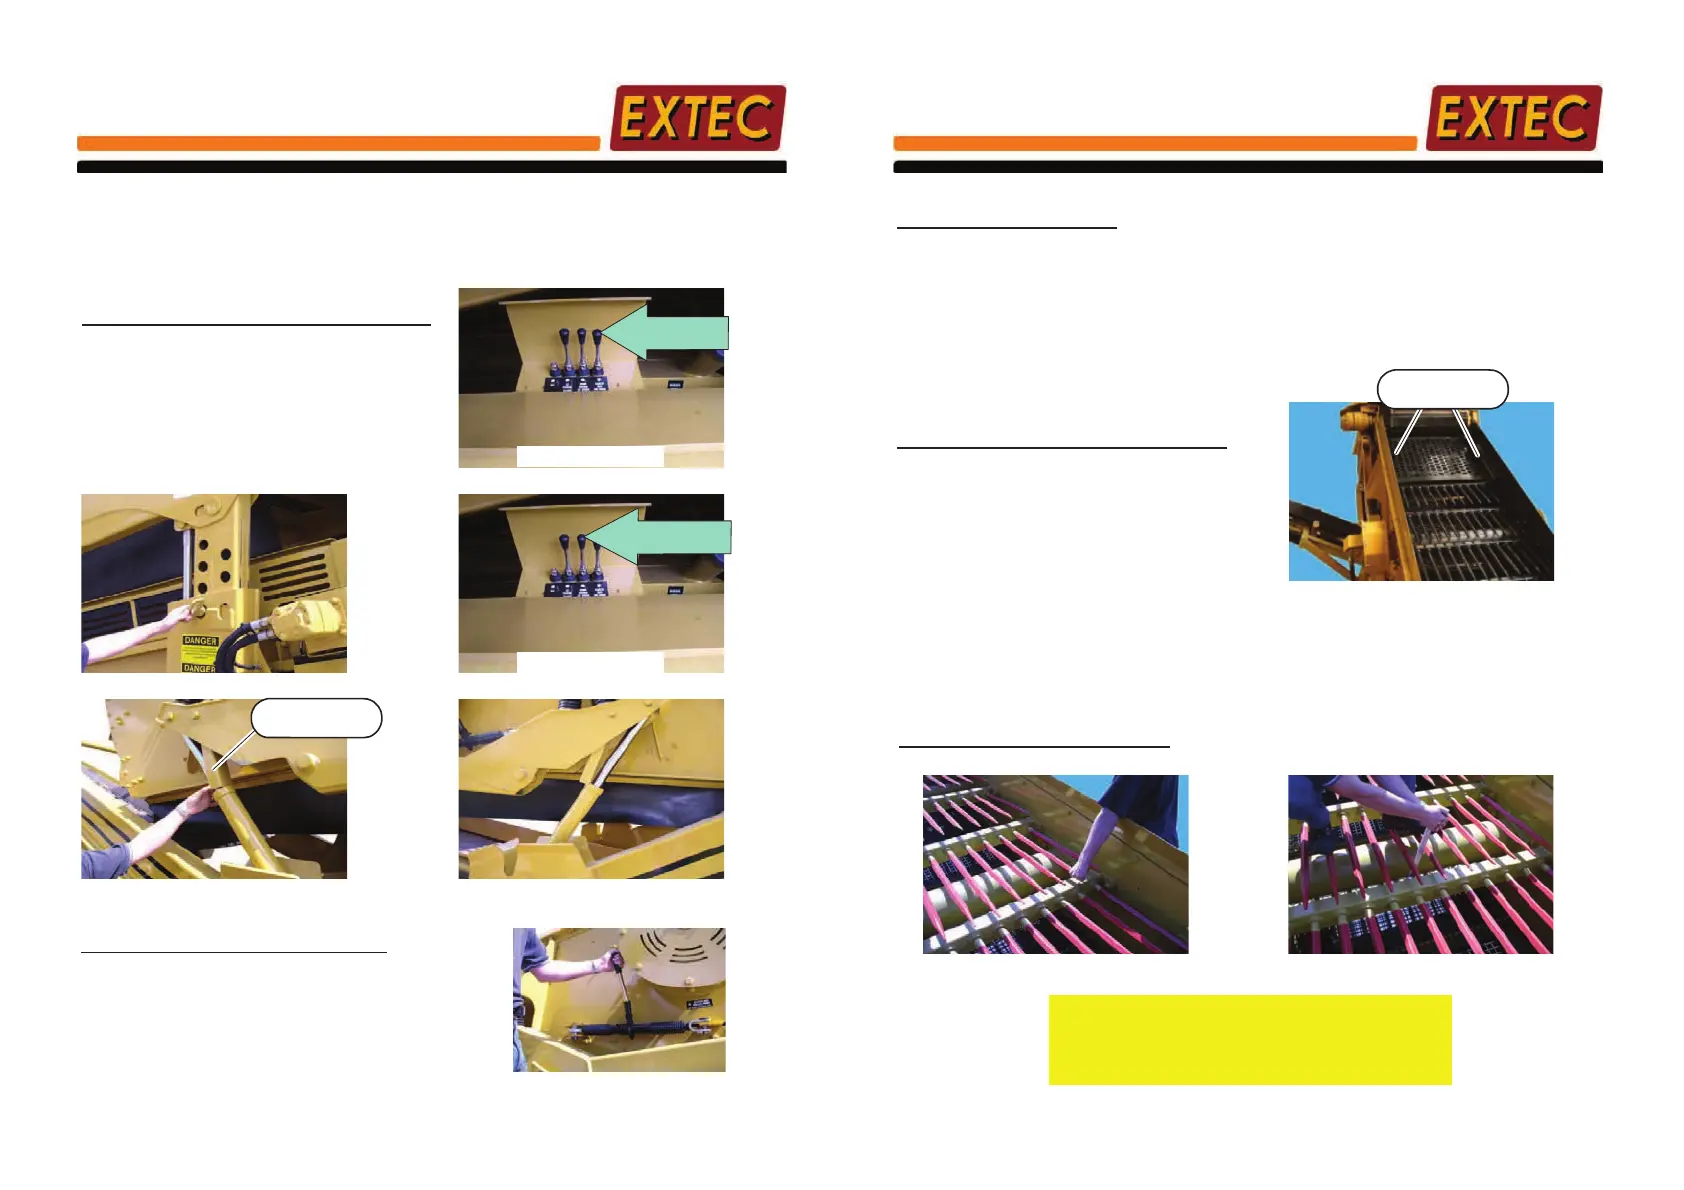
TOP DECK TINE CHECK/REMOVAL
Check Tine by shaking it as shown
If Tine is loose, tighten the nut on the
back of the crossmember as shown
Alternitavely, if Tine is damaged or bent, loosen
the nut on the back of the crossmember and
remove the faulty Tine. Insert a new Tine and
re-tighten the nut.
Section 4 Page18