3
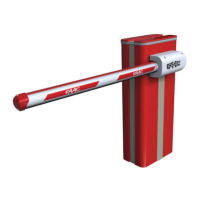
B680H AUTOMATED SYSTEM
The automated system consists of a white aluminium beam with
reflectors,optionalsignallinglights,acoveringcompartmentandsteel
uprightprofile.Insidethecompartmentthereisanoperatorconsisting
oftheuprightprofilewithahydraulicunitandtwoplungingpistons
fixedtoit,which,bymeansofarockerarm,rotatethebeam.The
latterremainsbalancedthankstoabalancespringfittedononeofthe
twoplungingpistons.Theelectroniccontrolequipmentisalsohoused
ontheupright,insideacompartment,andthewholeisprotectedby
theexternalcoveringcompartment.
Thesystemfeaturesanadjustableelectronicanti-crushing safety,
a device that guarantees stopping and locking of the beam in
anyposition,and aconvenient manualrelease foruse incase of
black-outorinefficiency.
1. TECHNICAL SPECIFICATIONS
1.1 Summary table
Power supply (V ~ / Hz) 90-240 V ~ / 50-60Hz
Electric Motor
36VdcBrushless
Absorbed power (W) 240
Absorbed current (A)
1,1Aat230V~
Motor rotation speed (RPM) 1000-6000
Pump capacity
3,2l/min(max)
Yielded torque (Nm) 0-370
Oil type FAAC HP OIL
Oil quantity (L)
~1,2
Anti-crushing System Electronicwithabsoluteencoder
Deceleration type Electronicwithabsoluteencoder
Operating ambient temperature (°C) -20 / +55
Rated Operating Time (ROT)
ContinuousDutyat+55°C
Compartment protection treatment EP SL LF PRIMER
Beam type
Roundedwithlightsandrubberbumper
Protection Class IP44
Compartment Dimensions
(LxHxP) (mm)
SeeillustrationFig.8
Weight (body + compartment) (kg) 65+20/85(total)
Opening and closing time (s),
including deceleration
1.5 - 2 m beam
6opening/9closing-8mbeam
a
Built-inashinglamp
b
Electroniccontrolequipment
c
Oilllingcap
d
Rightpistonbleederscrew
e
Hydraulicunit
f
Rightplungingpiston
g
Unitcoolingfan
h
Rightfeedtube
i
Leftfeedtube
j
Release lock
k
Leftplungingpiston
l
Left piston bleeder screw
m
Coveringcompartment
n
Encoder
o
Boxconnectingthemainpowersupply
p
Switchingpowersupply
a
Bearingstructure
b
Mechanical stops
c
Rocker arm
d
Drive shaft
e
Securingplate
f
Springguide
g
Balancespring
h
Preloadadjustmentringnut
1.2 Key Fig. 5
1.3 Key Fig. 6
2. ELECTRICAL PREPARATIONS (standard system)
SeedetailsintheillustrationFig.7.
3. BARRIER DIMENSIONS
All the dimensions contained in this manual are
expressed in mm
Forbarrierdimensions,refertoFig.8.Thecoveringcompartmentis
thesameforbothmodels,whilethebardimensionsdifferasshown
in detail at a(barS)andb(barL)-Fig.8
4. INSTALLING THE AUTOMATED SYSTEM
4.1 Preliminary checks
Forthesafetyandcorrectoperationoftheautomatedsystem,ensure
thatthefollowingconditionsaremet:
• Wheninmotion,thebeammustnotencounterobstaclesorying
power cables.
• Thecharacteristicsofthegroundmustguaranteesufcientsolidity
ofthefoundationplinth.
• No tubes or electrical cables should be present in the plinth
diggingarea.
• If the barrier body is exposed to vehicle transit, provide for
adequateprotectionagainstaccidentalimpact,whenpossible.
• Ensurethatthereisanefcientearthplateforconnectingthe
uprightprole.
Wall in the foundation plate so as to allow easy access to
the barrier door. The foundation plinth must be installed
keeping in mind the characteristics of the ground to
ensure perfect stability of the automated system.
4.2 Walling in the foundation plate
• AssemblethefoundationplateasshowninFig.9ref.a
•
SetthefoundationplinthasshowninFig.9ref.b
•
WallinthefoundationplateasshowninFig.9ref.bproviding
foroneormoresheathsforthepassageoftheelectricalcables.
For dimensional reasons, the cable passage sheaths
must be placed on one side of the space provided at
the base of the barrier (see Fig. 9).
•
Usealevelto ensure that the plate is perfectly horizontal.
Waitforthecementtoset.
4.3 Electrical preparations
Following the instructions shown in Fig. 7, prepare the ducts to
make all the control board electrical connections with the chosen
accessories.
Alwaysseparatethepowercablesfromthecontrolandsafetycables
(button,receiver,photocells,etc.).
Usethecable diameters shown in Fig. 7 and referred to in the
followingkey:
a
Barrier mod. B680H
b
Photocells
c
Keybutton
d
Flashinglamp
e
Radio receiver
f
MagneticLoops
4.4 Mechanical installation
• Fixtheuprightprofileontothefoundationplateusingthefour
providednuts(Fig.11).Rememberthatthehydraulicunitmust
usuallyfacetheinsideoftheproperty.
• Preparetheoperatorfor manual operation, as shown in
paragraph6/Fig.18(ManualOperation).
• Removeandsetasidetheventingscrew,asshowninFig.12
ref. b.
•
Settherockerarmhorizontally,thenremove,asshowninFig.
13 ref. a,theupperfixingpinofthepistononthebarsideand
insertonitthespringguideandbalancespring,asshowninFig.
14,followedbythepreloadadjustmentringnut,payingattention
tothedirectionitmustbeinsertedin(seeFig.14ref.a).
 Loading...