20
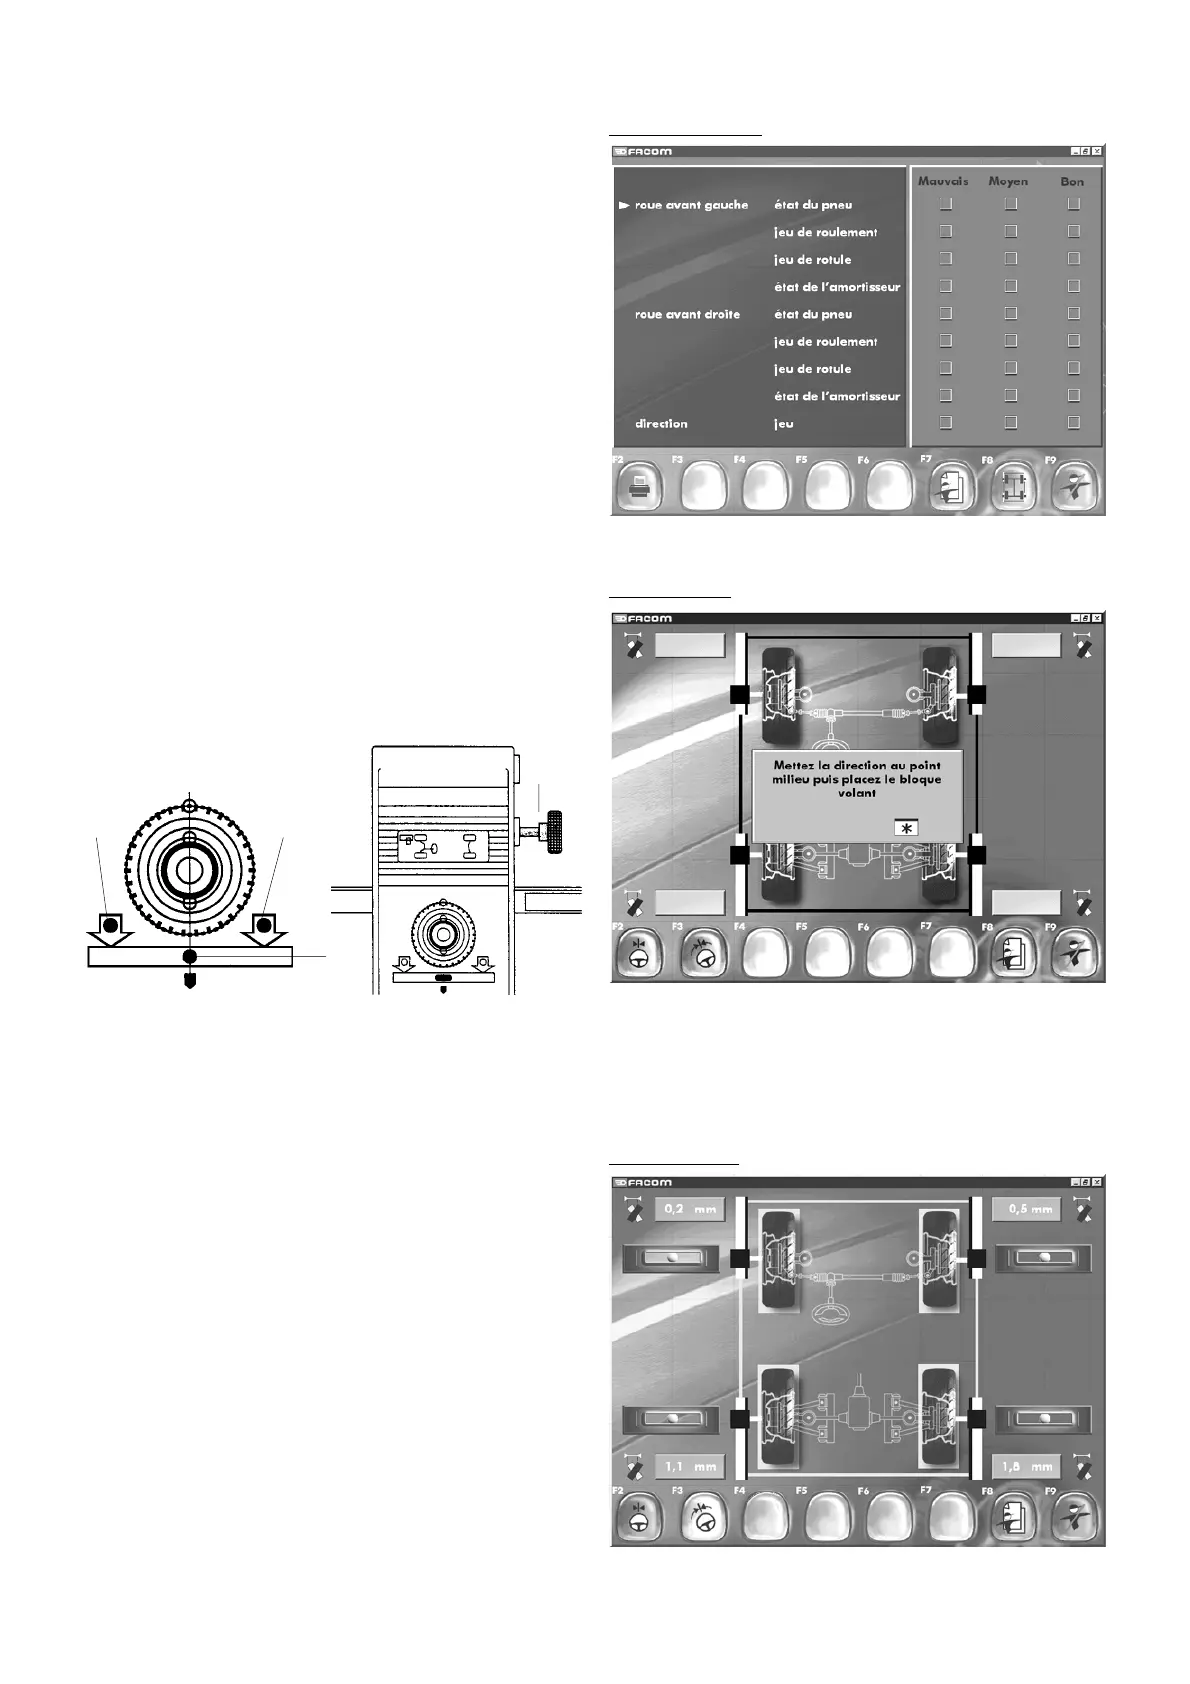
Visual inspection10.3 Visual inspection
"F2" "
Print out visual inspection
"
"F7" "
Customer identification
"
"F8" "
Measurement
"
"F9" "
End inspection
".
Using the arrow keys on the keyboard, you can enter your own
comments on certain points relating to the vehicle (bad, middling,
good). Two pages are available to be filled in, one for the front
of the vehicle and one for the rear. After printing out the visual
inspection, access the measurement mode by pressing F8.Using
the arrow keys on the keyboard, you can enter your own
comments on certain points relating to the vehicle (bad, middling,
good). Two pages are available to be filled in, one for the front
of the vehicle and one for the rear. After printing out the visual
inspection, access the measurement mode by pressing F8.
A
B
B
C
10.4 Measurement
Follow the instructions on the screen.
Level the heads.
Turn the heads in their carriers until the green lamp (A) lights
and
the red lamps (B) go out (the arrows indicate which direction to
turn the heads in).Tight the locking screw (C).
Measurement
On the screen, the image indicating the infrared data link must be displayed in green. If for any reason (unsatisfactory head
levelling, IF beam interruption, etc.) the link is broken, this image will be in red (if so, rectify the problem).
IMPORTANT: Inspections and adjustments can be performed only if the heads are operational.
10.5 Compensation
"F2" "
Centre steering
"
"F3" "
Steering sequence
"
"F8" "
Customer identification
"
"F9" "
End inspection
"
Compensation