24
Rear camber
Rear hanged wheel camber
Personalized report
10.8 Report
In one of the results screens, press F5 to go to the “
Personalized
Report
” screen. Two remarks bases are available:
One with preset expressions.
A personalized base.
F2 “
Selection of remarks
” lets you switch between bases. F3
and F4 are active only in the personalized remarks base.
F3 lets you add a remark to the personalized base. F4 lets you
delete it.
The two icons at the end of the data entry box allow the following:
show list of available remarks
(eraser) delete data entry in box
The garage identification data field relates to the inspection
report header (entered in the “
Other functions
” menu, option
“
Enter garage identification
”).
"F5" "
Return to customer identification
"
"F6" "
Print out remarks
"
"F7" "
Save inspection to log
"
"F8" "
Return to results
"
"F9" "
End inspection
"
11 - Adjustments
11.1 Rear wheel camber
In a results screen following the steering test sequence, the cursor
is placed opposite a default option (this position can be
configured by entering the “
Configuration of working mode
”
option. See section on adjustment.), which is theoretically the
rear camber. Select this by pressing Enter to obtain the next
screen.
"F3" "
Front adjustment
"
"F5" "
Wheel alignment
"
"F6" "
Hanged wheel camber
"
"F8" "
Read adjustment points
"
"F9" "
Return to inspection results
".
At the top of the screen, results in green or red are the actual
readouts for the wheel. The green figures represent the manu-
facturer data ranges, like the blue figures at the bottom of the
screen.
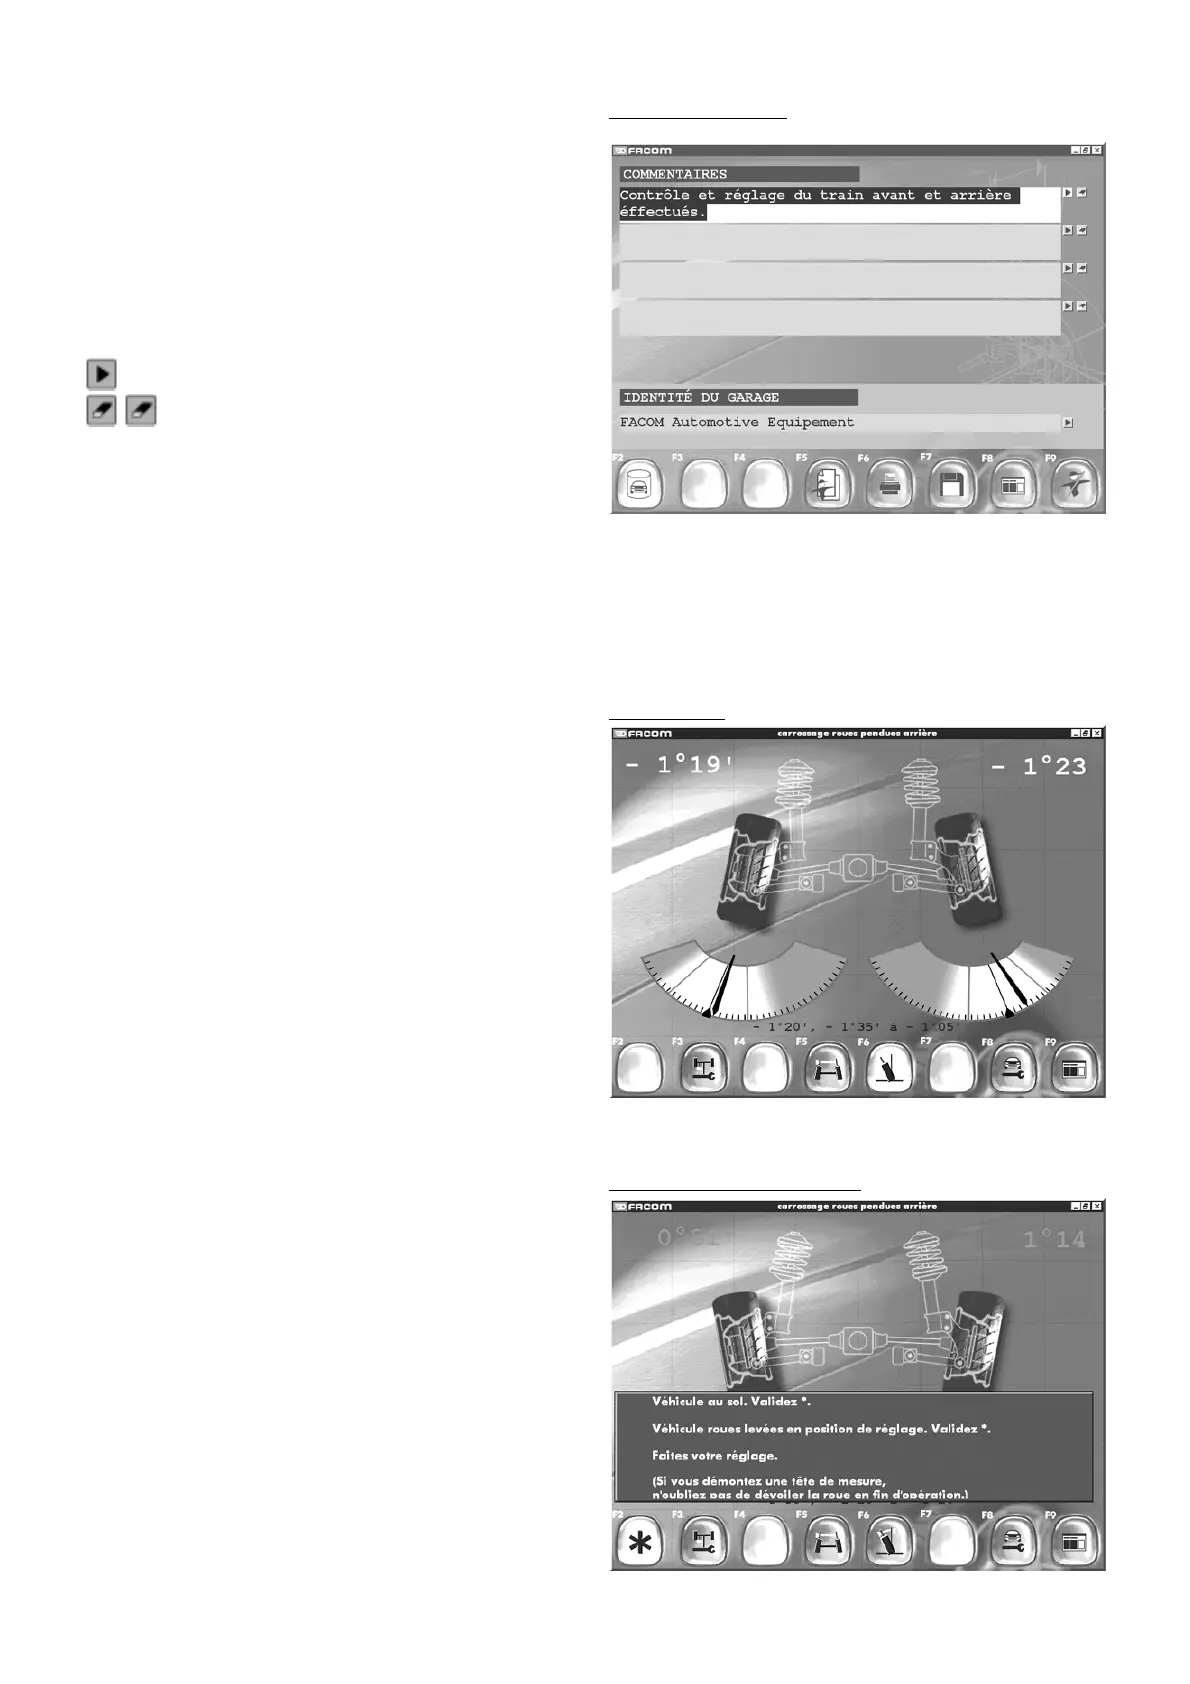
11.2 Rear hanged wheel camber
Confirm by pressing F6 to carry out a hanged wheel camber
adjustment.
Note:
The hanged wheel camber procedure is performed by lifting the
vehicle but without removing the wheels from the deck.
Follow the instructions on the screen.
Confirm by pressing F2. You will then see the next screen.