56
8 SERVICING PROCEDURES
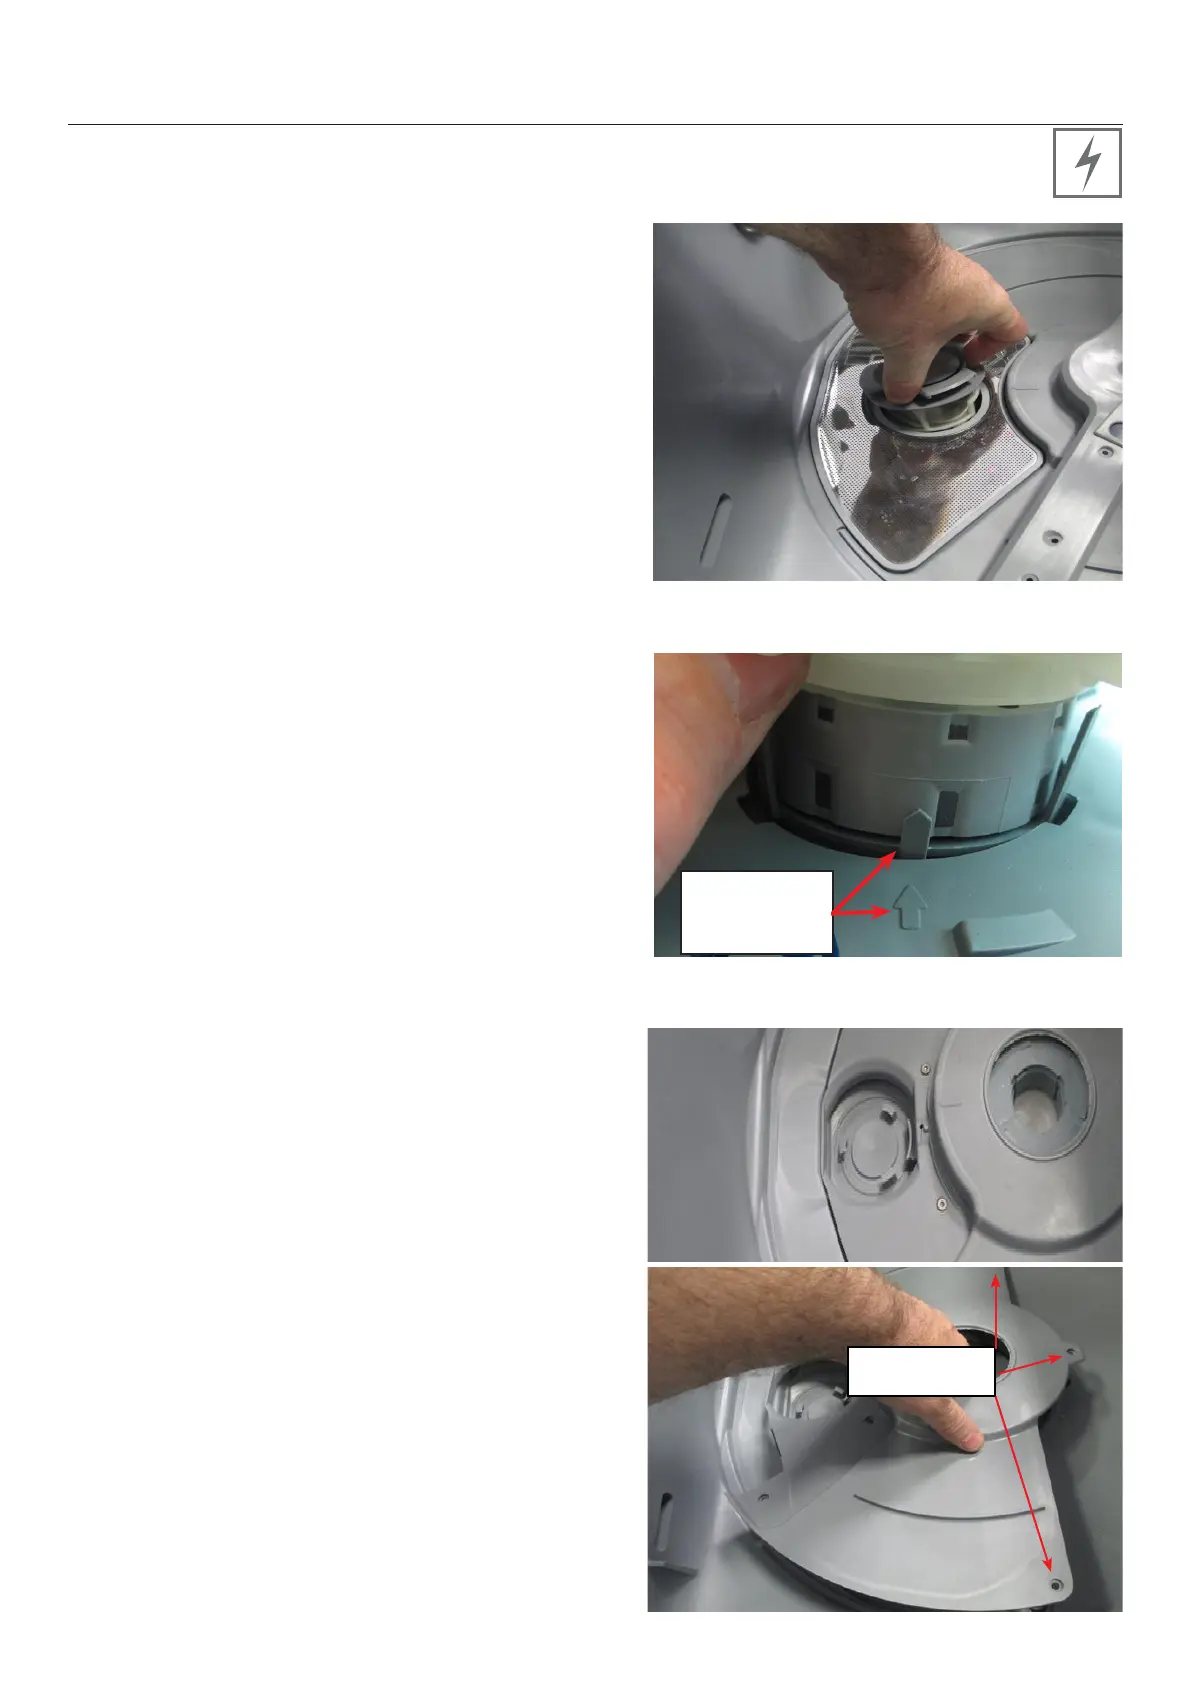
8.11 Removing the Motor Rotor
8.10 Removing the Filter Plate
1
Open the drawer and remove the cutlery basket, then
open the trap door.
2
Lift the front of the fixed tine plate rack to unclip it
from the base rack
3
Slide the fixed tine plate rack forward clear of the
rear anchoring loop and lift out.
4
Remove the drain filter by turning it anticlockwise
and lift upwards to release.
5
Lift the drain filter upwards to release.
6
Reassemble in reverse order.
1
Open the drawer and remove the base rack by
lifting it up at the back first.
2
Lift the spray arm off the motor rotor.
3
Using the 3 prongs on the motor rotor, rotate it
anticlockwise to release (can be very tight).
4
Lift the motor rotor upwards from the housing.
5
To reassemble, ensure the O-ring is correctly
seated and is not damaged, align the marking on
the rotor, to the marking on the housing.
6
The rotor will now locate down into the housing,
and to lock, rotate the rotor clockwise.
7
The 3 prongs of the rotor should align with the
pointing arrow markings on the cover.
align the 2
markings
8.12 Removing the Pump Cap Cover
1
Remove the lower base rack by lifting it up at the
back first.
2
Remove the filter plate (8.10) then remove the motor
rotor (8.11).
3
Remove the 7 torx head screws securing the pump
cap cover to the wash tub.
4
Pull the cover up to release, as the base of the cap
has a rubber seal which sits into a set channel to seal
the cap.
5
When reassembling, ensure the correct screws are
used in the correct location, the 3 machined finished
screws are used on the top of the housing.
3 machine
finish screws.
 Loading...