57
8 SERVICING PROCEDURES
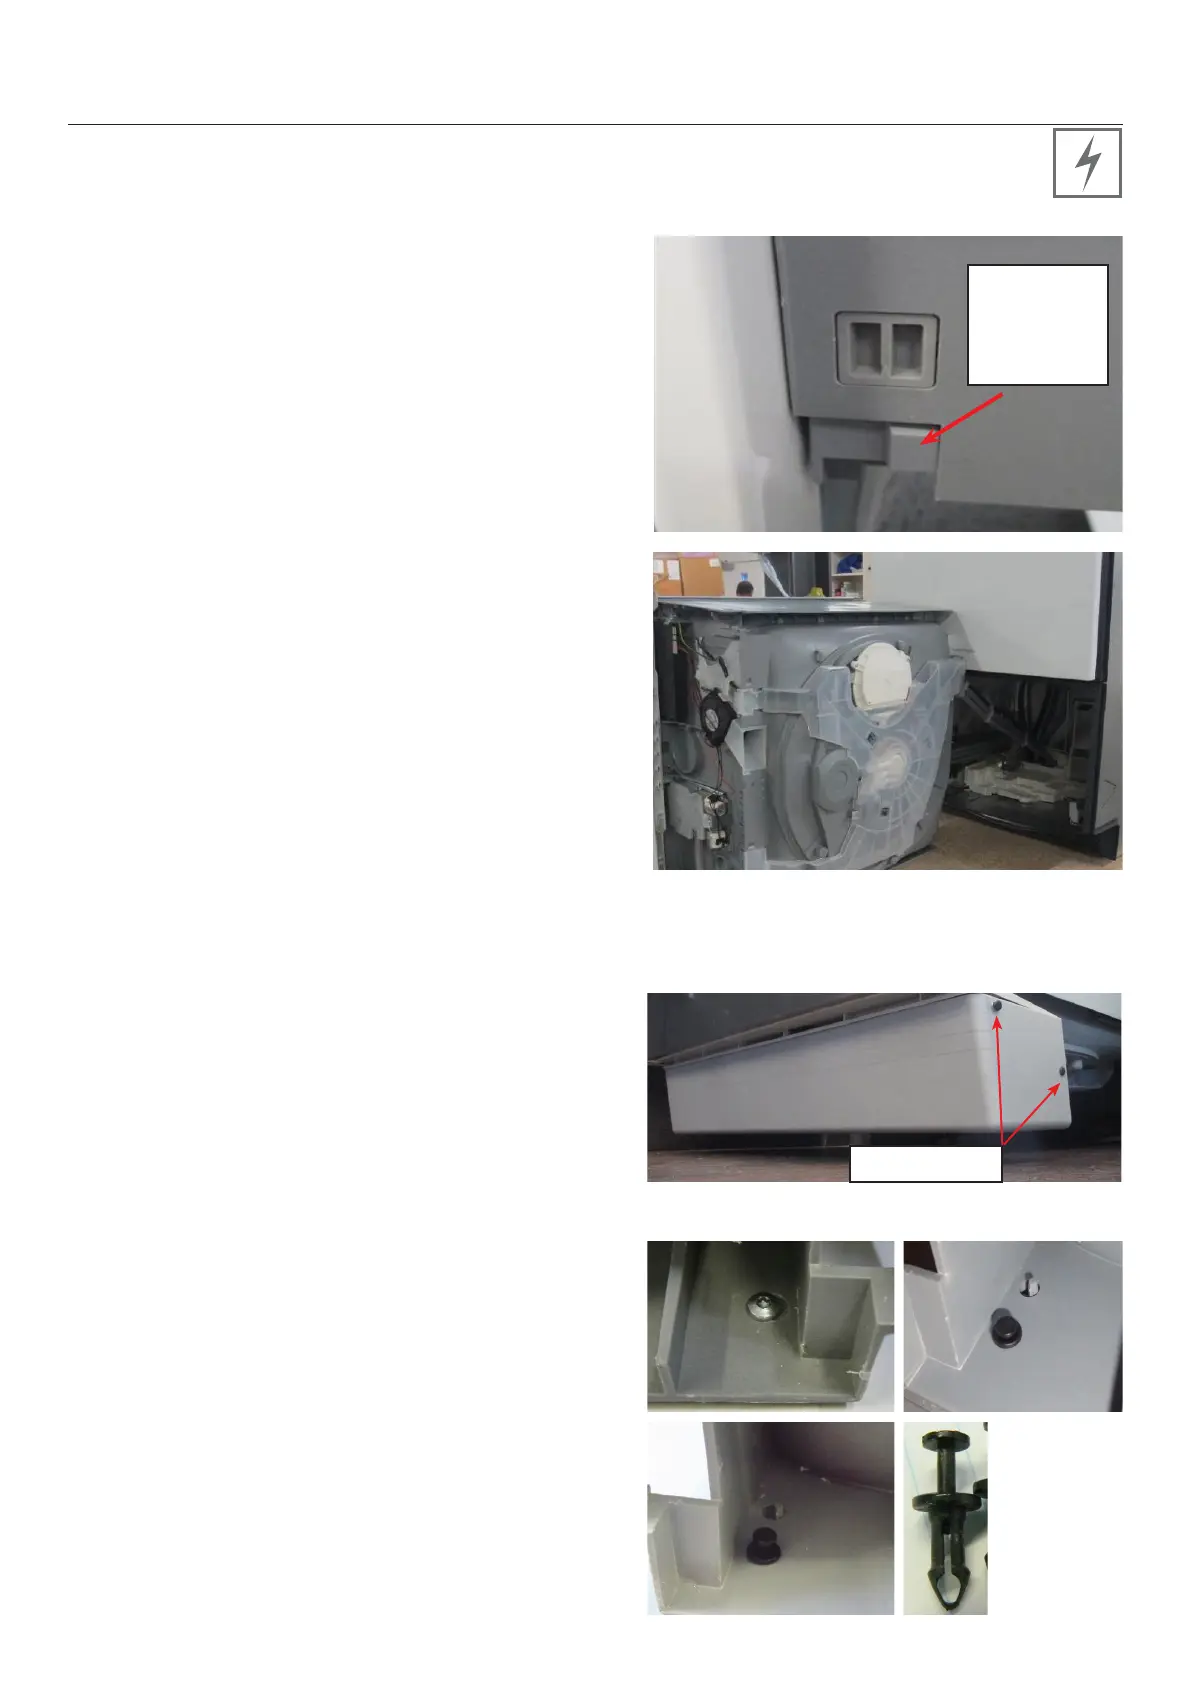
8.14 Removing the Kickstrip
1
Pull the bottom drawer open to gain access to
the side pins, 2 on each side.
2
Using a small pair of needle nose pliers, squeeze
the sides of the pin legs together and push the
pin back out of the hole. Trying to remove the
pins with a flat blade screwdriver risks breaking
the pins.
Side pins
8.13 Removing the Tub
Before removing a tub from the chassis, remove the
lower basket and spray arm.
A good suggestion is to also remove the door panel
and handle assembly to stop any damage.
Push the side clip inwards and push the rail back to
disengage.
1
Top tub : depress the right hand tub clip and
push it back about 30mm. Repeat for the left
hand side.
2
Bottom tub: remove the kickstrip (refer section
8.11) and lower tub cowling (refer section 8.15),
both optional.
3
If the cowling has not been removed, then the
tub clips need to be pushed back about 130mm
so the slide clears the cowling when the tub is
lifted.
4
Lift the tub off the slides and push the runners
back into the product.
5
Releasing the wire from the centre clip on the
link assembly allows the tub to be moved further
from the chassis (optional).
6
If the tub is being turned over for servicing,
rotate it counter clockwise, remembering to
remove the baskets first. Removing the handle
will prevent it from being damaged (optional).
7
If replacing the tub, all hoses and wiring harnesses
will need to be disconnected in order to remove tub
fully from the chassis.
8
Refit in reverse manner.
Push clip in
and slide rail
backwards to
disengage
1
Remove the lower door outer, refer to 8.1 and
kickstrip, 8.14.
2
Remove the torx screw on the right hand side of
the lower tub flange. (Image 1)
3
On the left hand side of the lower tub flange,
remove the plastic rivet by inserting a small flat
screwdriver and lift the head of the plastic rivet.
This rivet will be able to be removed from the
base flange. (Image 2 & 3)
4
The lower cowling will now drop down and pull
slightly forward to release the rear locating tabs.
5
To reassemble, locate the rear hooks, lift cowling
into place and ensure locating pin is aligned, fit
the plastic rivet and secure by pushing the rivet
head down. (image 5 on following page)
6
if replacing the cowling, remember to change over
the plastic insert.
8.15 Removing the Lower Cowling
1 2
3 4
 Loading...