9 Measurement
9.6 Display of measured values FLUXUS H721
2022-05-15, UMFLUXUS_H721V1-5EN
124
Auto activation
• Select the list item Auto activation.
•Select On if the offset of the sound speed obtained during the field calibration is to be used for the calculation of the
HPI physical quantity.
• Press ENTER.
For the verification of the offset, the auto activation can be switched off in case a service is required. In extreme cases, an
error of the HPI physical quantity is displayed.
•Select Off in case the offset of the sound speed is not to be used. The transmitter works with the measured sound
speed without any correction.
• Press ENTER.
•Select Default (Auto activation = Off) if no customized inputs are to be made.
• Press ENTER.
Deletion of samples
• Select the list item Clear samples.
•Select Yes to delete the samples.
• Press ENTER.
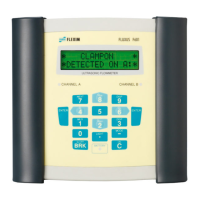
9.6 Display of measured values
The measured values are displayed during the measurement as follows:
By pressing or , additional physical quantities can be displayed during the measurement.
• Press to display the measured values in line 5. The designation of the physical quantity is displayed in line 4 by
pressing for several seconds.
• Press to display the measured values in line 4. The designation of the physical quantity is displayed in line 5 by
pressing for several seconds.
Toggling between the channels
If the measurement is started on several channels, the display of the measured values can be adapted as follows:
AutoMux mode
If the AutoMux mode is activated, the measured values of all activated channels (measuring and calculation channels) are
displayed consecutively. The next active channel is selected after 3 s. The toggle time can be changed in the menu item
Special functions\Dialogs/Menus\Toggle time.
HumanMux mode
The measured values of one channel are displayed in the HumanMux mode. The measurement on the other channels
continues.
• Press to display the next activated channel. The measured values for the selected channel are displayed.
Each measurement starts in AutoMux mode. Press to toggle between the modes.
Fig. 9.5: Display of measured values
1 – channel, program branch, status indicators
2 – display toggling between physical quantity and fluid
3 – measured value
4 – further physical quantity
5 – further physical quantity