71X Series
Calibration Manual
58
11. The unit will then reset power. The 713 is now out of the CAL mode and in the
normal mode of operation. Vent all pressure/vacuum.
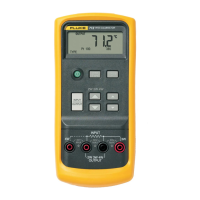
714 Calibration (Earlier than V2.0)
Temperature Measure
1. On the 714 Calibrator press and hold the
T and C keys, then turn on the 714 by
pressing and releasing the O key.
2. When the display momentarily shows CAL, release both the
T and C keys. This
puts the 714 into the Cal Mode. The 714 should display:
INPUT 0.00 mV
3. Connect the two-wire copper test lead (banana jacks to mini-connector) from the
NORMAL jacks of the Fluke 5520A to the TC jack on the 714 Calibrator, observing
correct polarity.
Note
Copper wire must be used during this step.
4. Set the Fluke 5520A to 0.0000 mV and press O.
5. Press any key on the 714 Calibrator. The display should read:
INPUT -------- mV
then change to:
INPUT 77.00 mV
6. Set the Fluke 5520A to 77.0000 mV.
7. Press any key on the 714 Calibrator. The display should read:
INPUT -------- mV
then change to:
OUTPUT mV
Temperature Source
1. Remove the copper test lead from the 714 Calibrator.
2. Press any key on the 714 Calibrator. The display should read:
OUTPUT ------ mV
After a few seconds, the display should change to:
TYPE J 0.0 °C
Thermocouple Block Calibration
1. Connect the Type-J thermocouple test lead from the TC jack on the Fluke 5520A to
the TC jack on the 714 Calibrator, observing correct polarity.
Note
Type-J thermocouple wire (not copper) must be used.
2. Set the Fluke 5520A to source Type-J thermocouple at 0.0 °C. Press O.
3. Press any key on the 714 Calibrator. The display will very quickly flash:
TYPE J ------ °C
then read:
TYPE J HOLD °C