Process Calibrators
Calibration
67
Note
The use of TEFLON tape at the pressure fittings strengthens the seal.
2. The lower display shows rAnGE. This is an indication to choose the correct model of
the 717 Calibrator. Choose the correct range. The appropriate range for the 717 is as
follows:
717 1G (1)
717 30G (30)
717 100G (100)
717 300G (300)
717 500G (500)
717 1000G (1000)
717 1500G (1500)
717 3000G (3000)
717 5000G (5000)
The upper display shows 30, which is the default pressure range. Pressing
c(≤ version
2.0) changes the sensor range to 100 PSI, pressing
h changes it back to 30 PSI. For a ≥
version 3.0 press a to uprange, hold to down range. Match the displayed range to the
measurement range of the 717.
3. After selecting the proper range, press
D on the 717 Calibrator.
4. Vent the system to ambient air to ensure 0.00 PSI.
5. The lower display indicates C 0 PSI and the upper display indicates the current
reading. When the unit is vented (step 5) the upper display will read 0.00 +/-
approximately 10 % of full scale. When
D is pressed, the lower display indicates
the next pressure to apply. Apply the requested pressure that shows on the lower
display and when the upper reading is stable, press
D. Repeat this until CHEC
appears on the display.
6. The CHEC mode allows for a quick check of the calibration constants that have just
been stored. Changes to the applied pressure reflect on the display. Press
D to
continue. The unit will then reset power.
7. The 717 Calibrator is now out of the CAL mode and into the normal mode of
operation. Carefully vent all pressure, press O to turn the calibrator off, and
disconnect all pressure fittings.
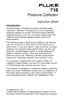
718 Calibration (Earlier than V2.0)
mA Measure
1. On the 718 Pressure Calibrator hold down both the
U and D keys. Press and
release the O key.
2. When the display momentarily shows CAL, release the
U and the D keys. This
puts the 718 into Cal Mode. The 718 should display:
CAL 0.000 mA
3. Connect the test leads from the AUX jacks of the Fluke 5520A to the mA jacks on
the 718 Calibrator (black to black and red to red).
4. Set the Fluke 5520A to 0.00000 mA and press O.
5. Press any key on the 718 Calibrator. The display should read:
----- 0.000 mA
then change to:
CAL 24.000 mA
6. Set the Fluke 5520A to 24.0000 mA.
7. Press any key on the 718 Calibrator. The display should read:
----- 24.00 mA