23
Operation - Manual Functions
Basic operation using default settings
Initial requirements
• Ensure the machine is turned on and has the appropriate air supply.
• When the Machine is switched ON, the system requires initialization to supply air to the table cylinder to
prevent rapid movement that can occur when the system is depressurized. Simply press the button on
the HMI to initialize.
• Using the touch screen Main menu, turn the heaters ON The heater button will show green .
Allow between 15 and 20 minutes for the heaters to reach operating temperature.
• Press on the main menu. Select on the load options screen.
• Raise the table to the top position and place your mould (mounted on a mould board) onto the table.
A sheet of wire mesh is supplied with the machine to assist with Vacuum air flow under the mould tool.
Fix the mould tool in place. Drive the table into the lower position by pressing the TABLE DOWN icon
on the operating screen.
• Open the material clamps and raise the clamp frame. Ensure the counterweights are set so that the clamp
frame is correctly balanced.
• Position a sheet of plastic over the aperture.
• Pull the clamp frame down and close the 2 material clamps. The plastic should completely cover the white
seals around the aperture. Adjust the toggle clamp screws to properly grip the plastic. The rear of the clamp
is spring loaded. The pre-load spring tension at the rear of the clamping frame can be adjusted by moving
the position of the two lock nuts – see section dealing with adjustment.
• When the heater has reached operating temperature the machine is ready for operation.
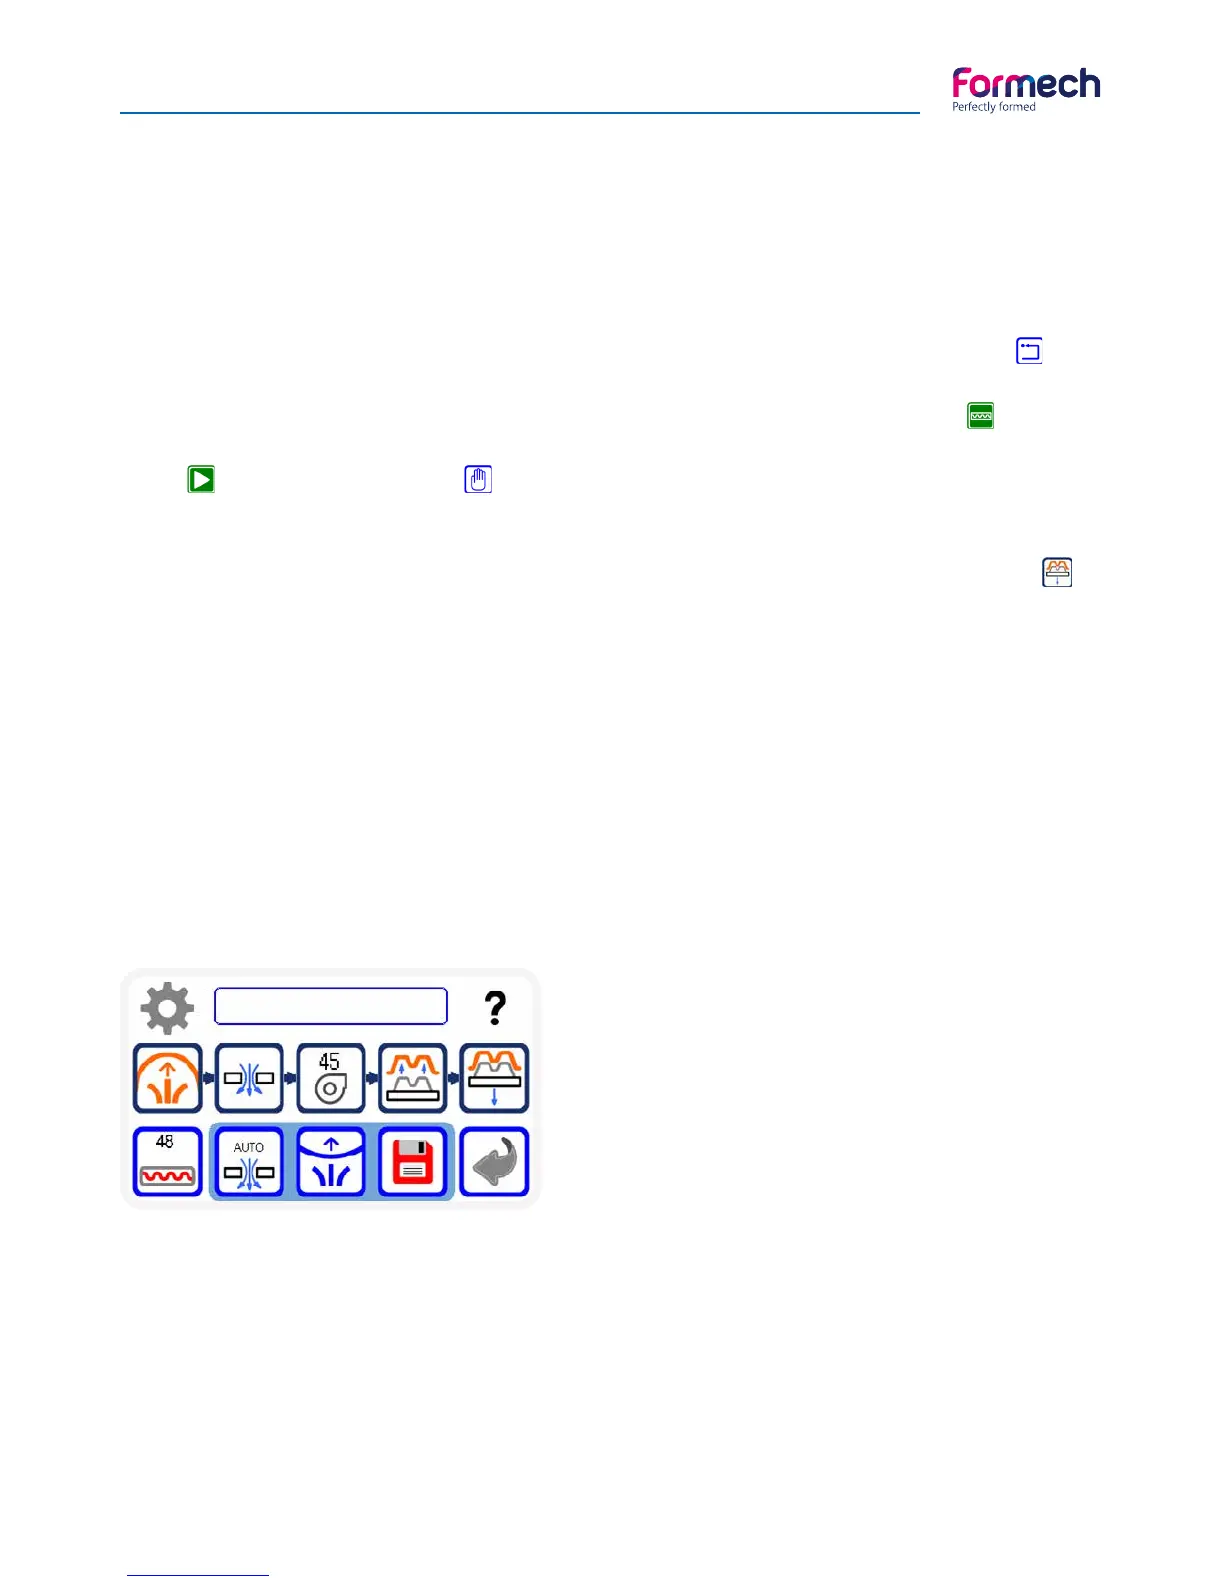
Manual operation screen
The Heater timer value on the HEATER button will count
UP when the heater is pulled forwards and stop when
pushed back.
The Fan timer value on the FAN button will also count UP
then this button is pressed and the fan will run. Press the
button again to stop.
The remaining operating buttons will function as stated
on the icon descriptions page 21.
Heater settings may be changes via the settings button.
The Auto-level and Auto-vacuum may be enabled as required – buttons will show green when enabled.
The Save button will use the settings of the timers shown and import them to the settings screen to edit and
save as required. The following section explains the vacuum forming process.