47
4. If this is not the case, please proceed as follows:
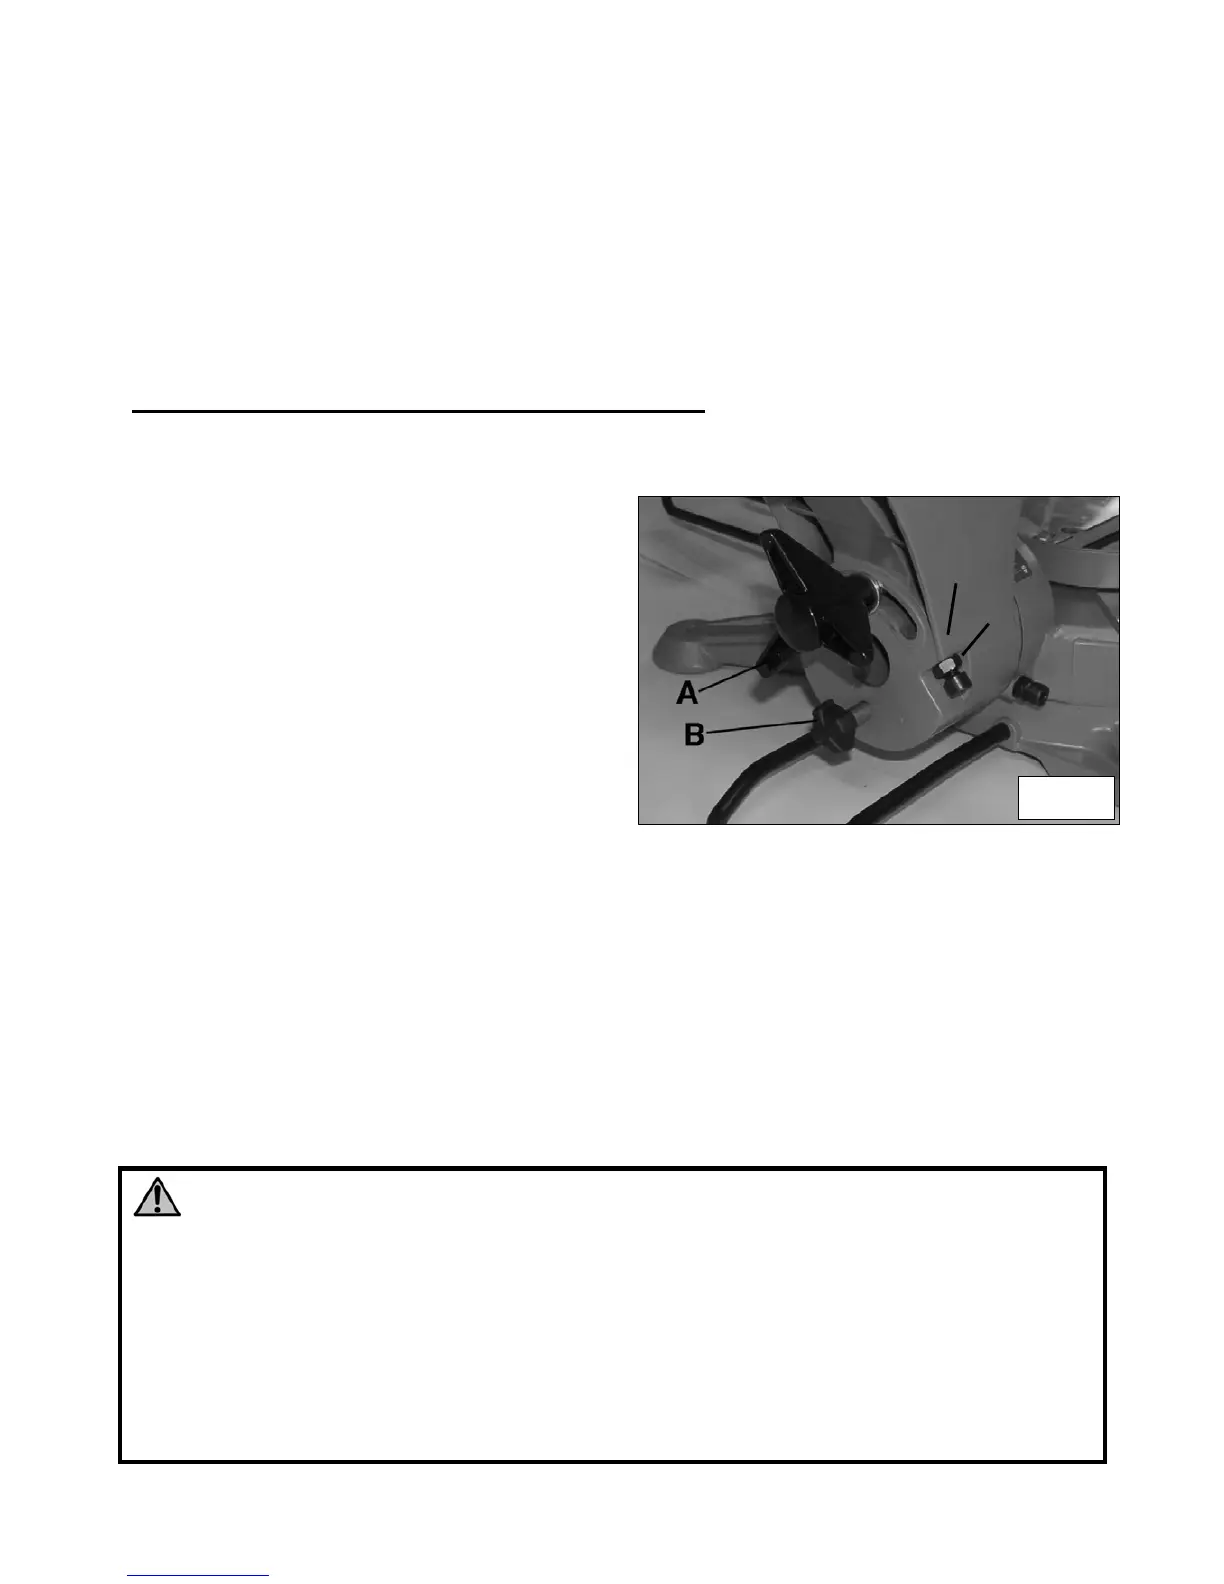
Loosen the bolts (A) Fig.10 (positioned on each side of the head bevel knob) to
release the two bolts (B).
Loosen the head bevel knob (C) and pull the spindle (D) towards you.
Position the square against the table.
Adjust the two bolts (B) modifying the inclination, until the two sides of the square are
in continuous contact with disk and table.
Tighten the head bevel knob (C) and the bolts (A).
Check again that the disk is perpendicular with the table
5. Make sure that the bevel indicator is aligned with 0°
SETTING THE BEVEL ANGLE AND THE STOP
You can tilt the head of the mitre saw from 0 up to 45°, left and right
1. To set the bevel inclination, loosen the
head bevel knob (A) Fig.11 positioned on
the back of the mitre saw.
2. To tilt the head on the left, loosen the knob
(A) then tilt the head from 0° to 45° until
you get the destre inclination, with the help
of the operating handle. Once set, tighten
the knob again.
3. To tilt the head on the right, loosen the
knob (A) and then pull the knob (B) to
unlock the unlock the inclination angle;
then tilt the head to the desired angle and
from 0° to 45° with the help of the knob
(A). once set, tighten the knob (A) again.
Note: the angle indicator must be aligned with the 45° sign on each side of the indicator, when
the knob (A) is completely loosen and the head is completely inclined on the left or on the right.
If you need to adjust it, proceed as follows
1. Loosen the knob (A) and tilt the head completely on the left.
2. Loosen the inclination stop bolt (C).
3. Adjust the inclination stop hexagonal screw (D) until the angle indicator is aligned with the
inclination sign at 45°.
4. tighten the inclination stop bolt (C).
5. Reposition the head at 0° and then pull the knob (B) to tilt the head to the other side. The
angle indicator must be aligned with the inclination sign at 45°
6. Reposition the head at 0° and make sure that the knob (B) is tighten again
WARNING ! to prevent the mitre saw from moving during this intervention:
- disconnect the feeder cable.
- block the head in the lower position and block the radial sliding movement
- Carry the machine closet o your body to prevent from injuring your back
Bend on your knees when lifting the machine
- Lift the machine from the transport handles or from the base. Do not carry it from the
power cable nor from the operating handle: you risk to damage the insulation or the
electrical connection, with serious risk to cause electric shocks or fire.
- Position the machine in not too crowded areas, where people are not supposed to
circulate nor rest. The wood chips ejected could injury people around the machine.
- Fix the machine on a stable surface, so that it can not tilt
Fig.11