56
Warning : When using power tools, always refer to the basic safety rules, fundamental to
prevent fire, electric shock and injuries. Also read carefully before using the machine and
keep them for the entire life of the machine.
DISK BLADE REPLACEMENT
Immediately replace the blade disk if worn-out or bad cutting. The bevelled or worn-out blades
can cause serious injuries to the user and make your machine loosing precision
WARNING!
- Before changing the blade disk, disconnect the feeder cable. The feeder cable
must remain disconnected for every repair or maintenance.
- to prevent injuries from ejection of chips, do not use blade diameter bigger or smaller
than 305 mm.
- do not use bevelled blades: it could be dangerous.
- only use cross-cut blades. If you use carbide inserted blades, make sure their toothing
angle is neutral or negative
Do not use deep toothed blades: these could flex and touch the disk protection
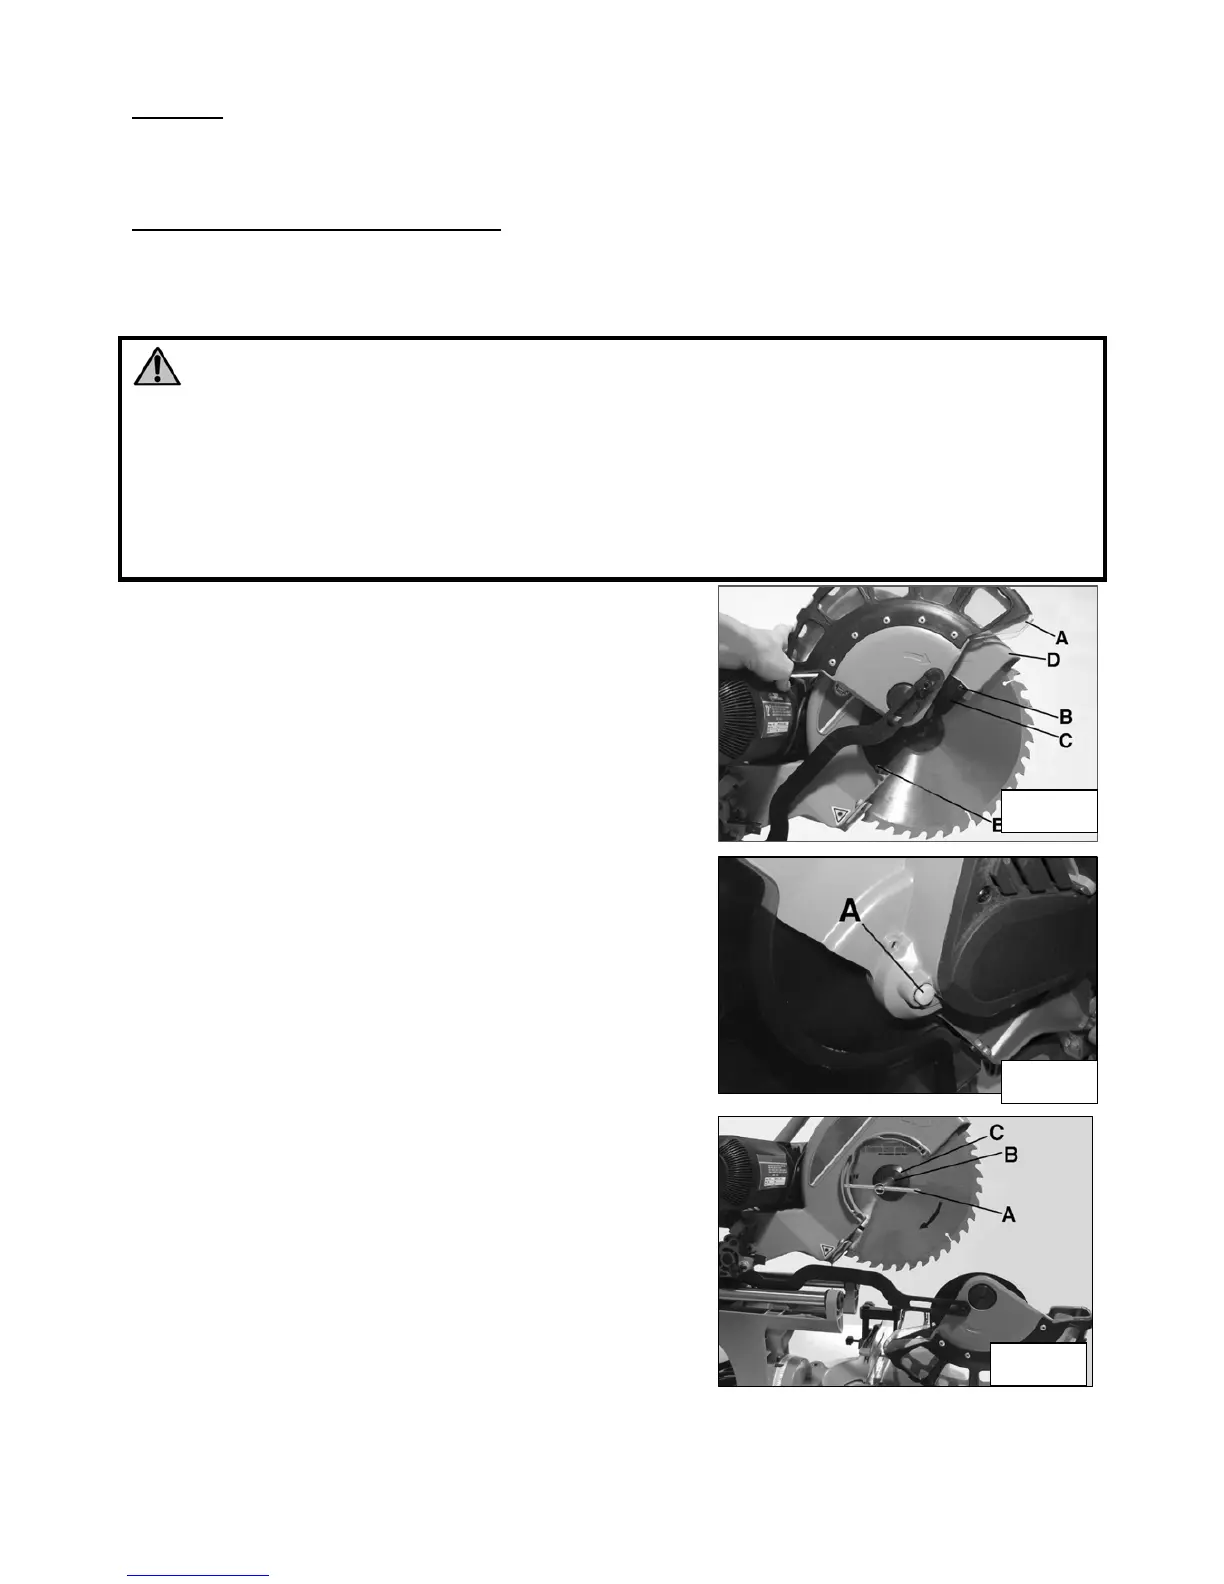
1. Lift up the head.
2. Lift the lower disk protection (A) Fig.19 with one
hand while with the other hand you unscrew the
two screws (B) blocking the disk protection plate
(C) and connecting the disk lower protection to the
disk upper protection (D).
3. Pull the plate towards the table keeping the blade
protection on the lower, then lay everything on the
table. This will allow you to reach to the blade bolt
Fig.21.
4. Push the blade’s stop button (A) Fig.20, then
hand-
5. rotate the disk until the shaft blocks.
6. Unscrew the shaft screw using the special key
delivered with (A) Fig.21.
Note : rotate the screw clockwise to unscrew and anti-
clockwise to screw.
7. Pull away the shaft washer (C) then take out the
disk.
8. clean the flange before positioning the new disk.
Only mount 305mm disks. Verify that the disk’s
direction of rotation (arrow on the disk)
corresponds to the direction indicated by the arrow
on the disk’s upper protection. Make sure the disk
is beyond the flange.
9. Put an oil drop on the internal and external
washers.
10. Place the new disk on the shaft; make sure that the
internal washer is correctly mounted.
11. Reposition the external washer
12. Push the stop button of the disk, insert the disk’s
screw and screw it up anti-clockwise, using the special key delivered with.
13. Reposition the plate and the disk lower protection described in point 2. insert and screw up
the screws (B) Fig.19.
Fig.19
Fig.20
Fig.21