Metering
17
4.6 Positioning and metering a letter
Caution! By simple preventive measures and spe-
cial care when positioning letters, you can avoid
gaps in the imprint, tearing the ribbon and damaging
the thermal print head:
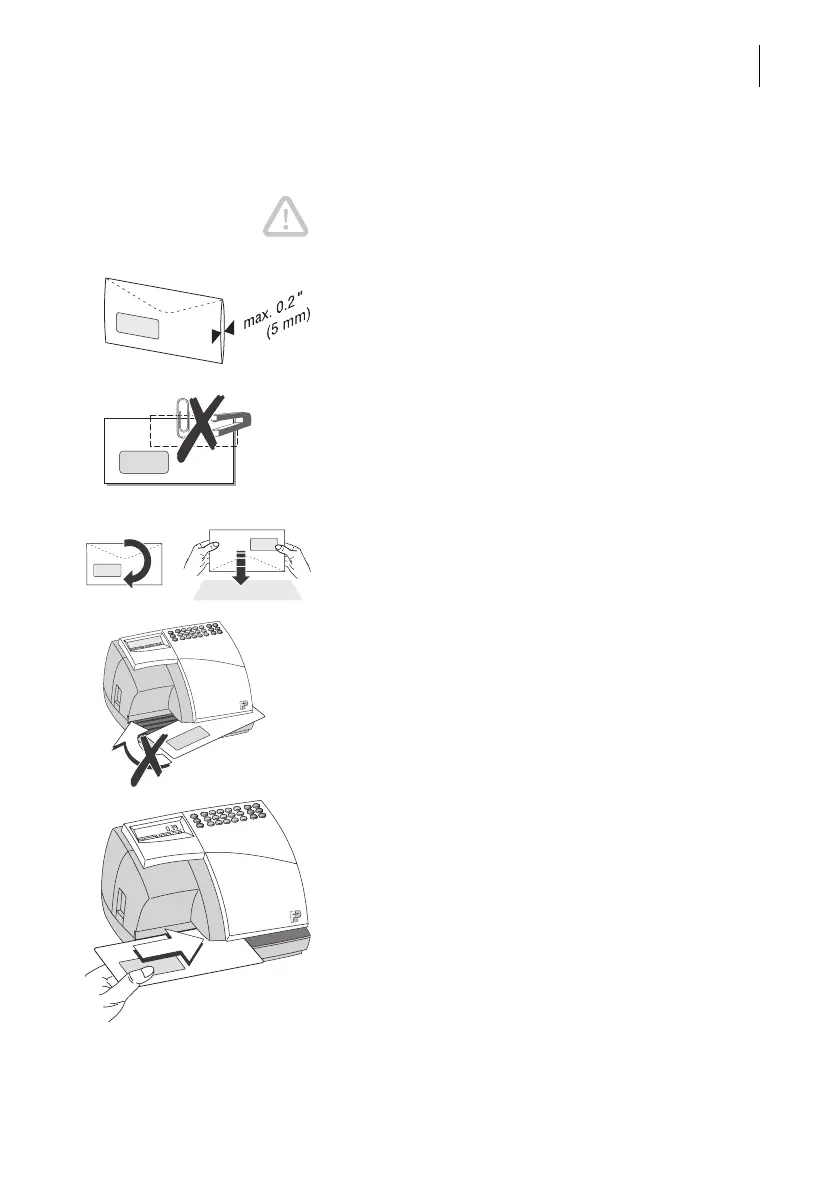
– You can meter letters up to a thickness of 0.2"
(5 mm). The difference in thickness in the printing
area in letters containing several sheets can lead
to an irregular imprint. In this case, meter the emp-
ty envelope or use FP labels.
– Use envelopes with as smooth a surface as
possible. This gives optimum imprint quality.
– Make sure you remove all staples and paper clips
from the area around the imprint.
– Before imprinting, knock the upper edge of the
envelopes against a smooth underlay. By aligning
the content of the letter with the upper edge of the
envelope you get an even surface to achieve bet-
ter meter imprints.
– During metering, it is best to let go of normal for-
mat letters (e.g. Commercial #6¾, #10).
Give large envelopes (e.g. #14) a little support.
– Under no circumstances should you attempt to
straighten the envelope whilst it is being printed.
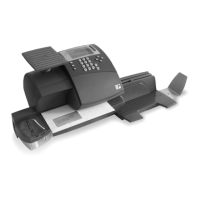
How to feed a letter
• Place the letter on the letter receiving tray:
– The side to be printed facing upwards, the
address field visible.
– The top edge must be flush with the letter guide.
• Push in the letter in the direction of the arrow until
the Optimail grips the letter.
As soon as the mail sensor detects a letter, a roller
presses the letter against the ribbon and print head
– the printing starts. The imprinted letter is ejected to
the right.