6.
Check the thickness of the brake linings. Re-
place brake linings on all brake assemblies on
the axle if any brake linings are worn to less than
approximately 1/4 inch (6.4 mm) at the thinnest
point.
Saddle Tank Areas Inspection
WARNING
When draining the air reservoir, do not look into
the air jets or direct them toward anyone. Dirt or
sludge particles may be in the airstream and
could cause injury.
NOTICE
If the water drained from the air reservoirs is
cloudy or oily, it may indicate a problem with the
compressor. If oil is allowed to contaminate the
air dryer, it will not remove the water from the air
02/03/2010 f470552
1
2
3
4
5
6
7
8
9
10
11
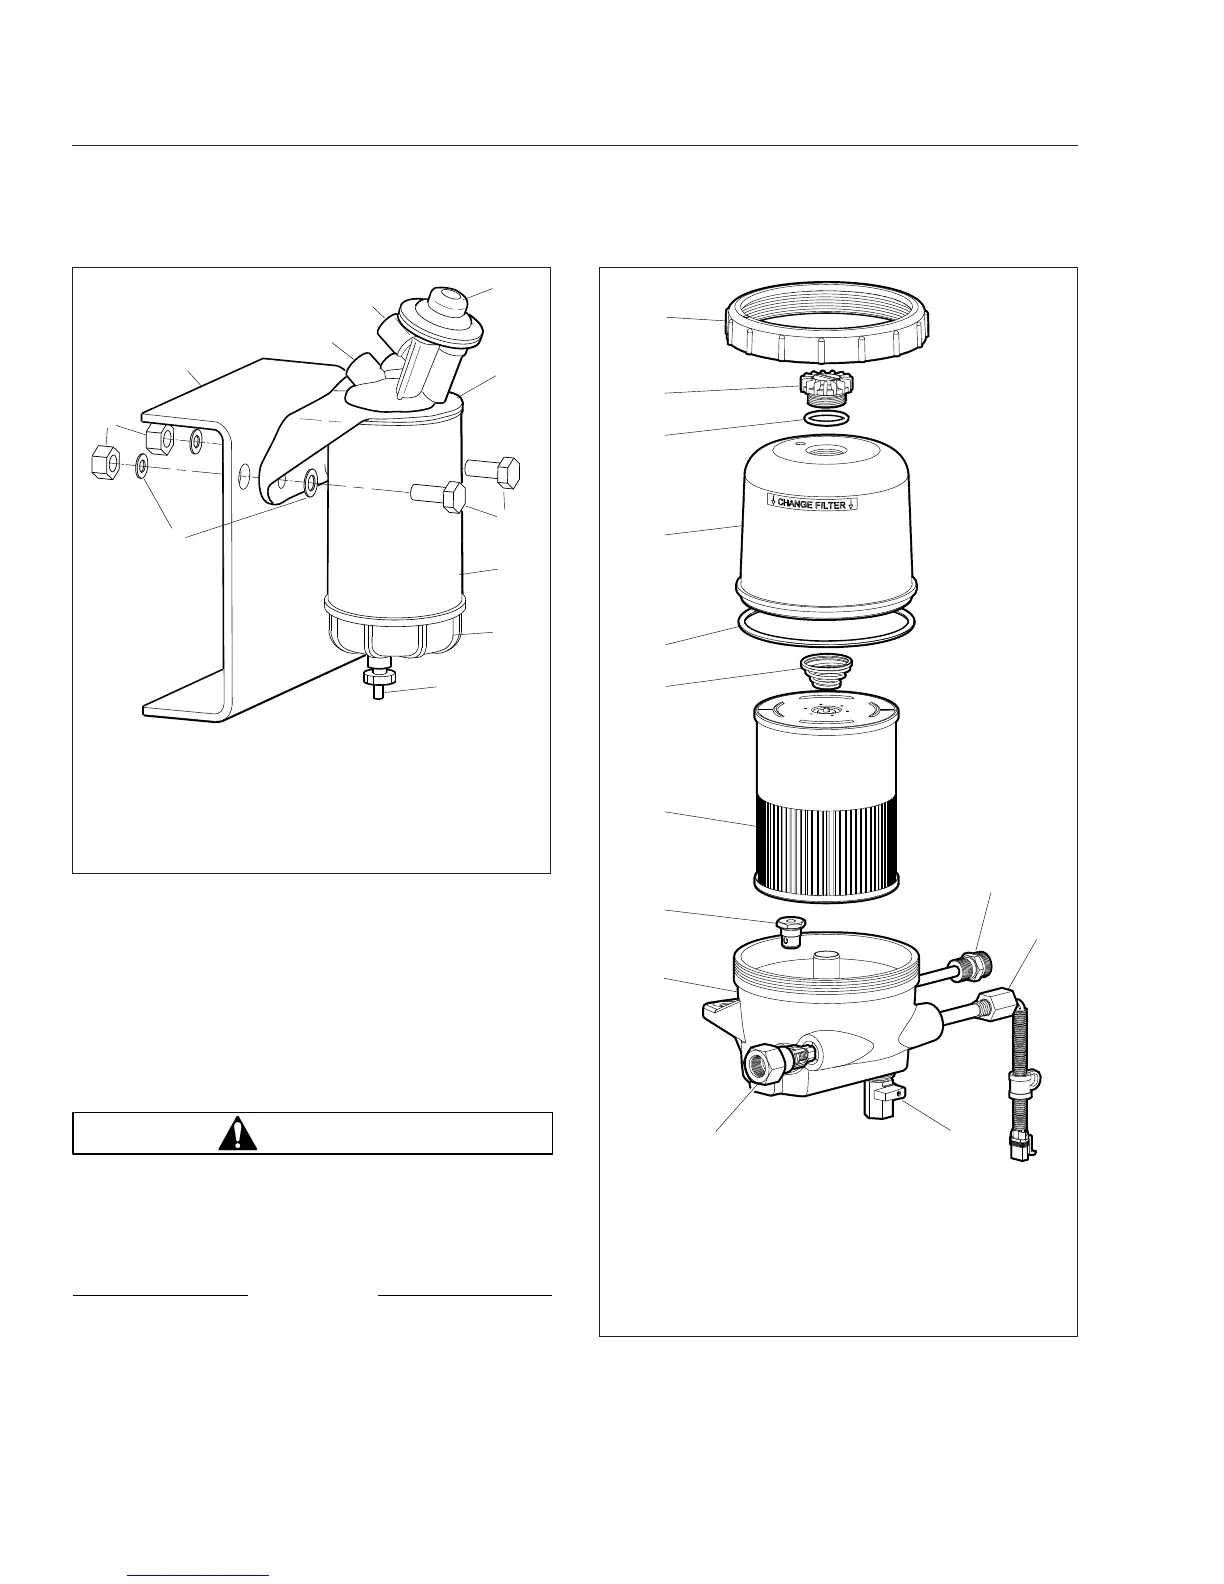
1. Washers (qty 2)
2. Nuts (qty 2)
3. Frame Rail
4. Fuel Outlet Port
5. Fuel Inlet Port
6. Priming Pump
7. Mounting Head
8. Mounting Bolts (qty 2)
9. Filter Element
10. Sight Bowl
11. Drain Plug
Fig. 20.10, Alliance Fuel/Water Separator Assembly and
Installation
05/05/2009 f470530
1
2
3
4
5
6
7
8
9
10
11
12
13
1. Inlet Port/Check Valve
2. Lower Housing
3. Bypass Valve
4. Filter Element
5. Spring
6. Cover O-Ring
7. Clear Cover
8. Vent Cap O-Ring
9. Vent Cap
10. Collar
11. 120VAC Pre-Heater
12. 12VDC Pre-Heater
13. Drain Valve
Fig. 20.11, DAVCO Fuel/Water Separator (Fuel Pro 482
shown)
Pre- and Post-Trip Inspections and Maintenance
20.11