123
EN
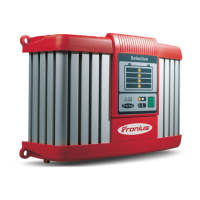
Remove the bushing sleeve (1) from
the axial fan cable
Undo the two 5x8 TX25 screws (3)
Remove the axial fan
Installing the axial fan:
Place the axial fan in position as
shown, with the direction of air flow into
the device
Fit the axial fan to the fan mounting
with two 5x8 TX25 screws (3)
[2.1 Nm]
Attach the bushing sleeve (1) to the
axial fan cable
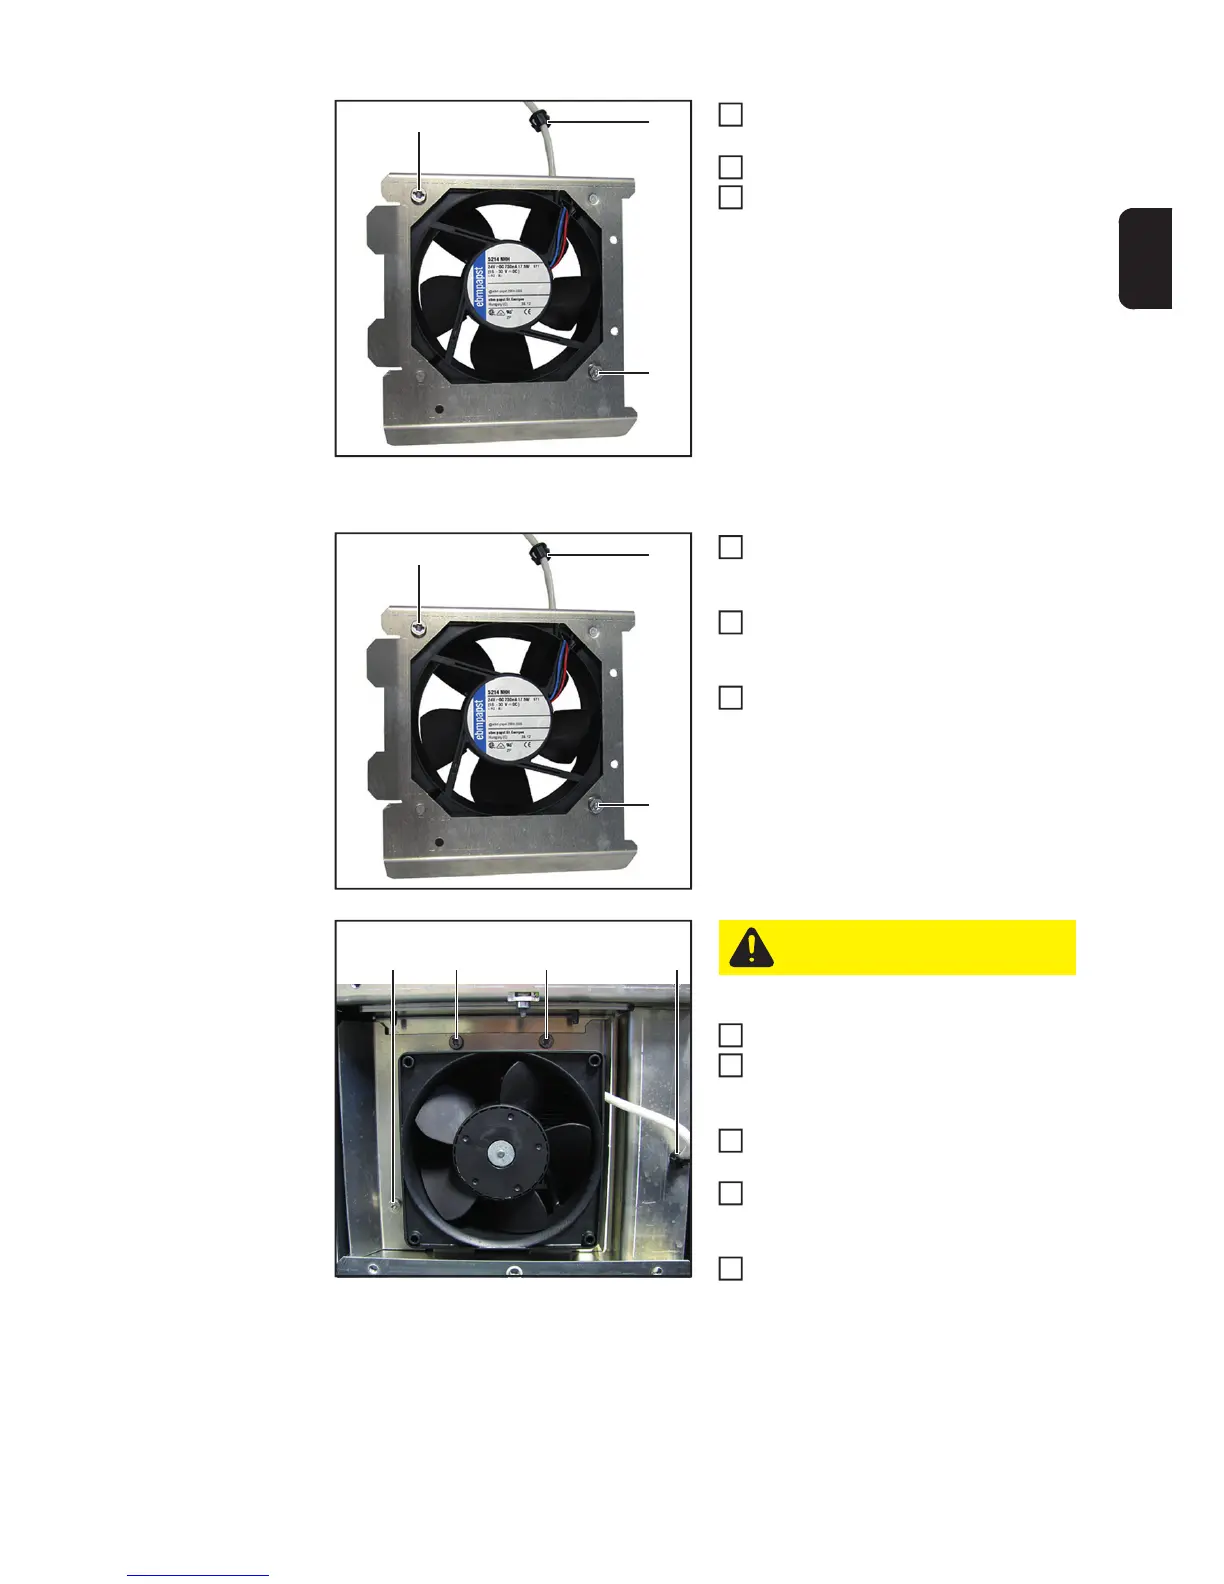
Insert the fan module into the device
Fit the fan module with three 5x12
TX25 screws (2)
[3 Nm]
Place the fitted axial fan cable bushing
sleeve into the recess provided (1)
Fit the axial fan cable on the primary
power module and place it in the strain-
relief device
Fit the front panel and the device frame
on the AC side (see the "Closing the
device" section)
(1)
(3)
(3)
6
7
8
(1)
(3)
(3)
1
2
3
(1)(2)(2)(2)
CAUTION! Be careful not to press
on the rotor when inserting the fan
4
5
6
7
8
 Loading...