121
EN
Replacing the P-
control/CFM PC
board
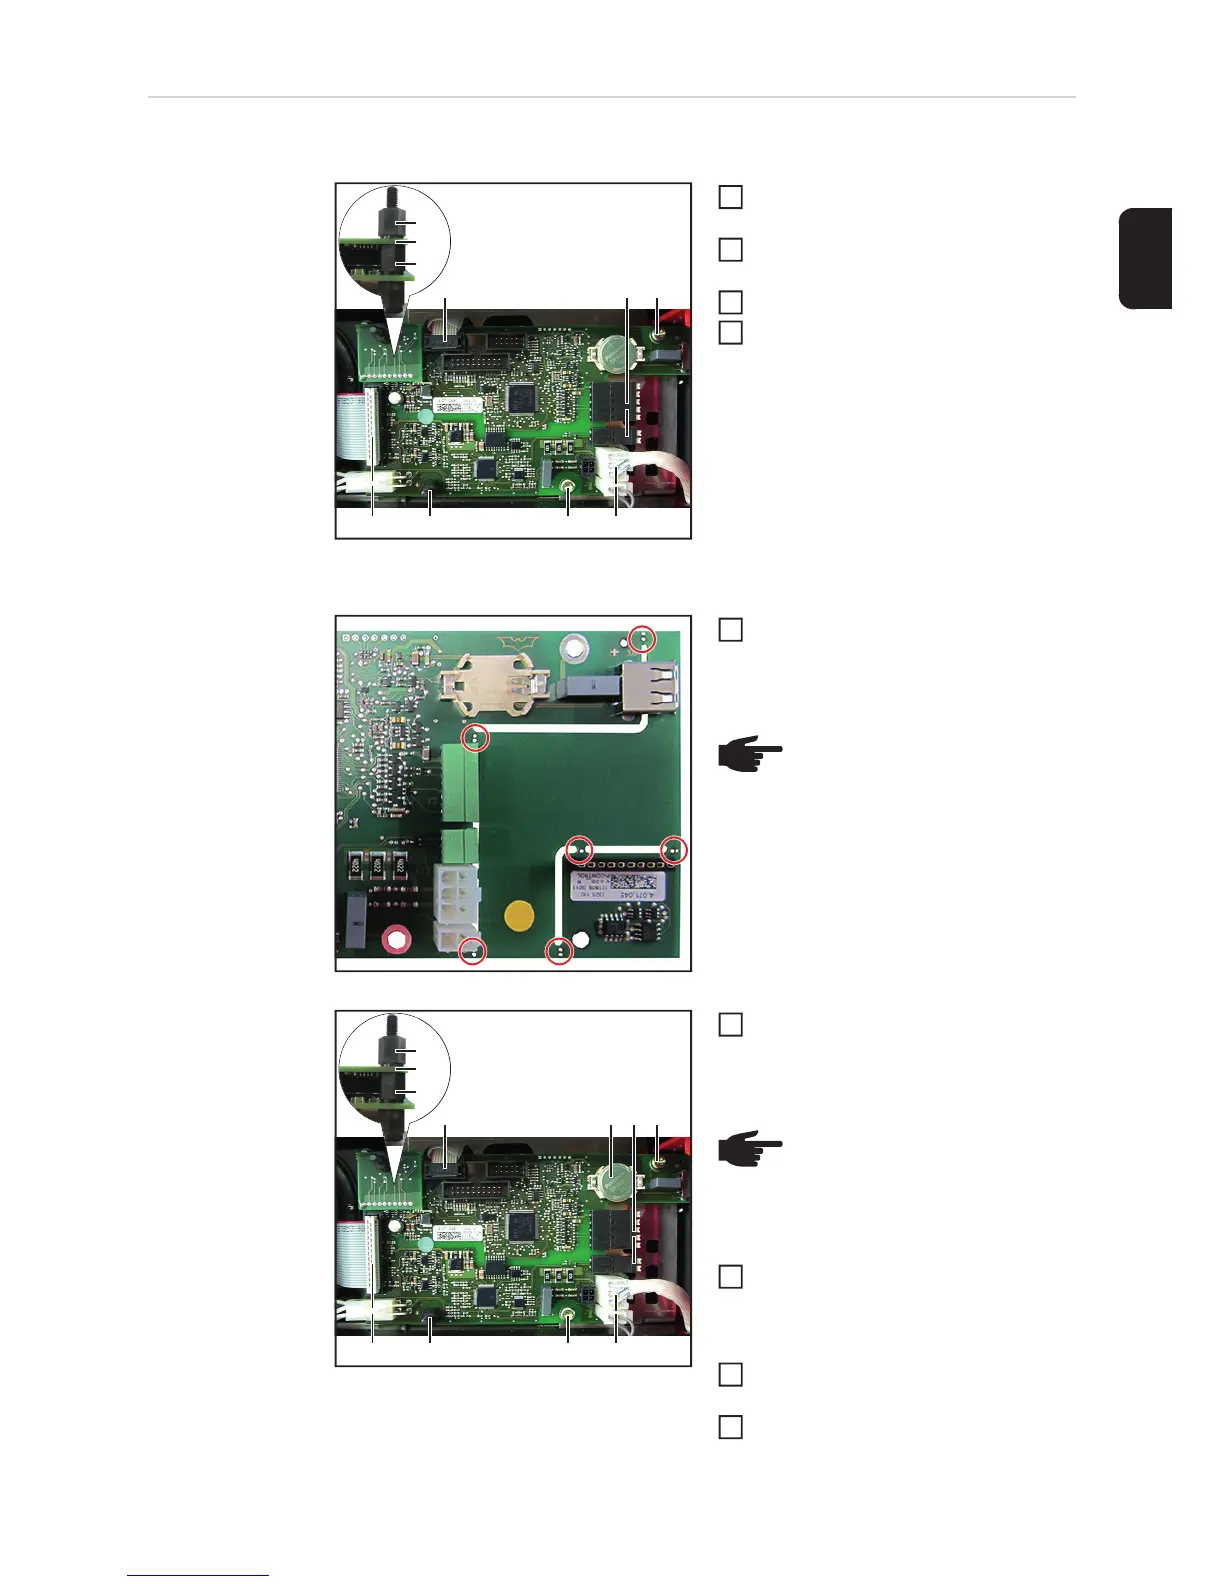
Removing the P-control/CFM PC board:
Remove the front panel (see the
"Opening the device" section)
Detach the CFM PC board (1), remo-
ving all the plastic spacers (2)
Undo all plug connections (3)
Undo the two 4x9 TX20 tapping screws
(4) and remove the P-control
Installing the P-control/CFM PC board:
Disconnect/break off the new P-control
and the non-recorded CFM PC board
at the marked points
Insert the new P-control and fit it with
two 4x9 TX20 tapping screws (4)
[1.5 Nm]
Fit the CFM PC board (1) with two pla-
stic spacers (2), being sure to follow
the correct sequence
[0.1 Nm]
Insert the battery (5) and fit all the plug
connections (3)
Fit the front panel (see the "Closing the
device" section)
(3)
(2)
(1)
(2)
(3) (4)
(2) (4) (3)
(3)
1
2
3
4
NOTE! If the CFM PC board is
faulty or damaged, please contact
the Technical Support team
1
(3)
(2)
(1)
(2)
(3) (4)
(2) (4) (3)
(3)(5)
NOTE! If only the P-control is be-
ing replaced, the previously de-
tached CFM PC board must be re-
fitted
2
3
4
5
 Loading...