132
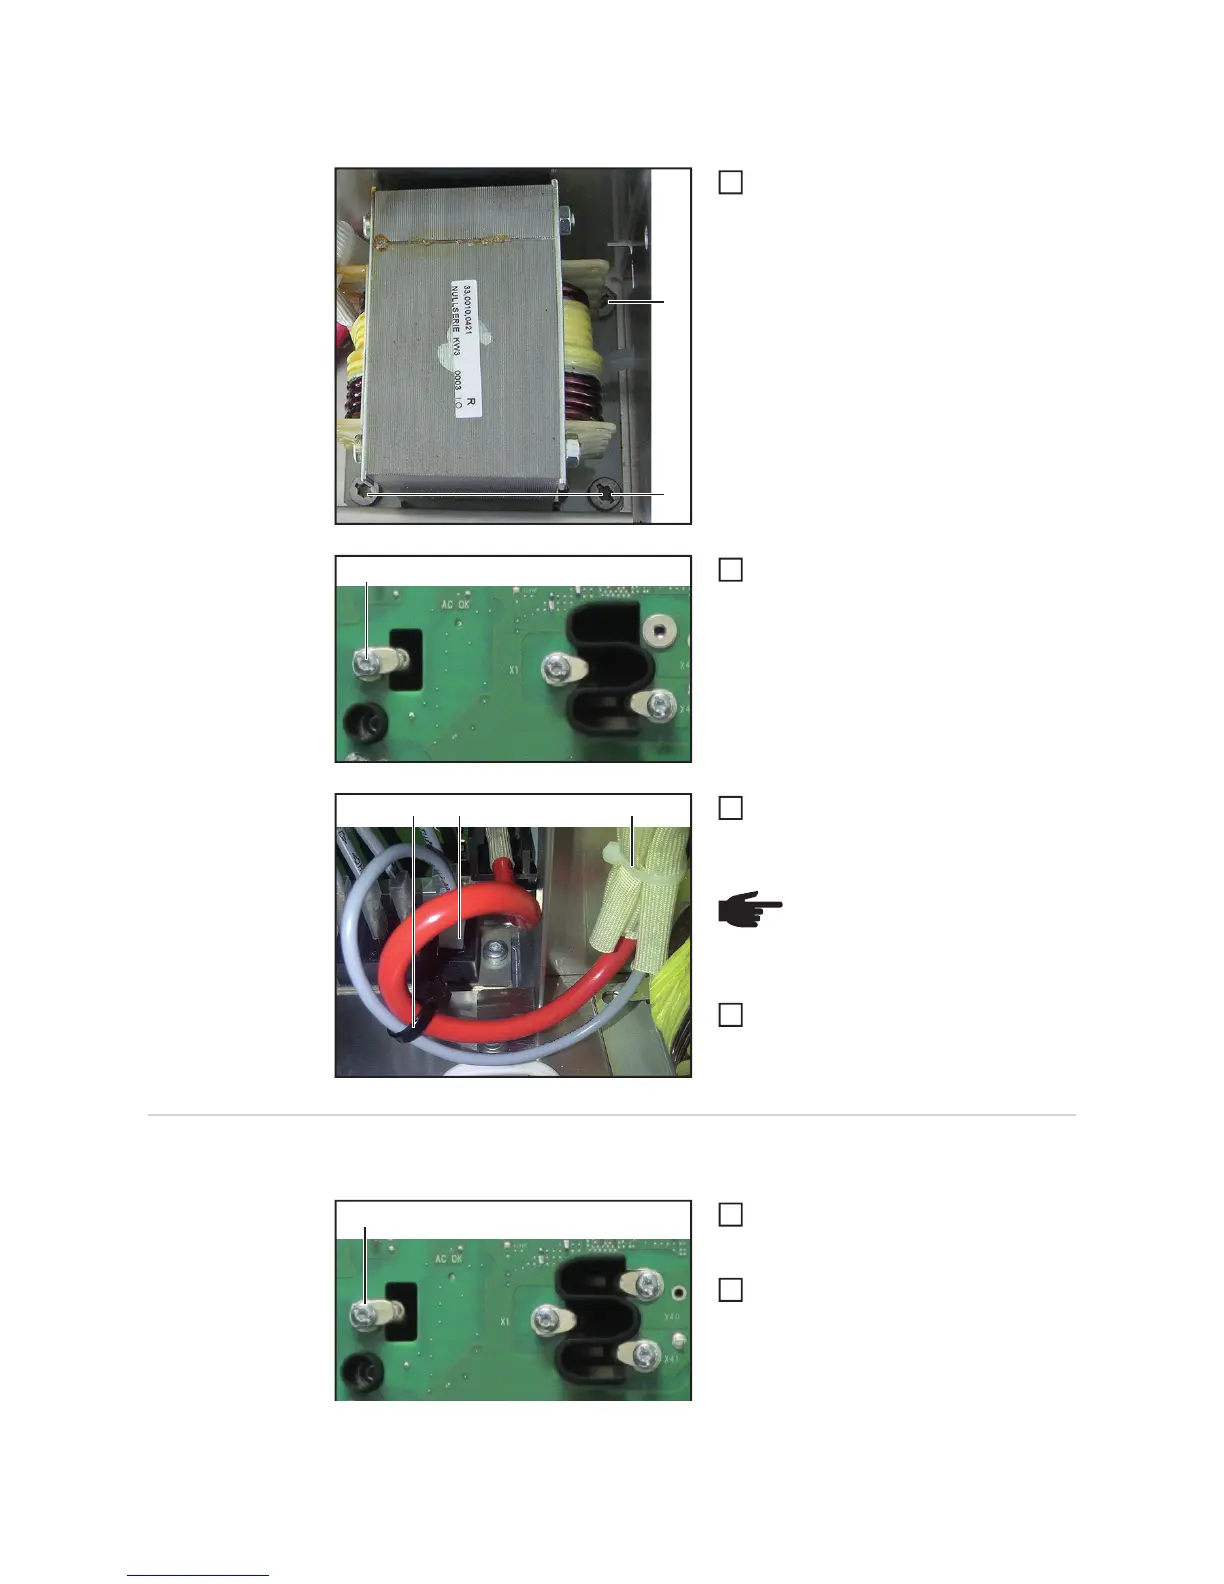
Installing the PFC inductor:
Fit the new PFC inductor with three
5x12 TX25 screws (3)
[3 Nm]
Thread the PFC inductor connection
through the primary power module and
fit with one 5x10 TX25 tapping screw
(1)
[4.5 Nm]
Connect the blade terminal (2) to the
primary rectifier
Close the front panel and the housing
cover (see the "Closing the device"
section)
Replacing the 16
kW PFC inductor
Removing the PFC inductor:
Remove the front panel and the
housing cover (see the "Opening the
device" section)
Undo the 5x10 TX25 tapping screw (1)
and thread out the PFC inductor
connection
(3)
(3)
1
(1)
2
(2)(4) (4)
NOTE! The PFC inductor connec-
tions must be bound with type 200
cable ties (4)
3
4
(1)
1
2
 Loading...