126
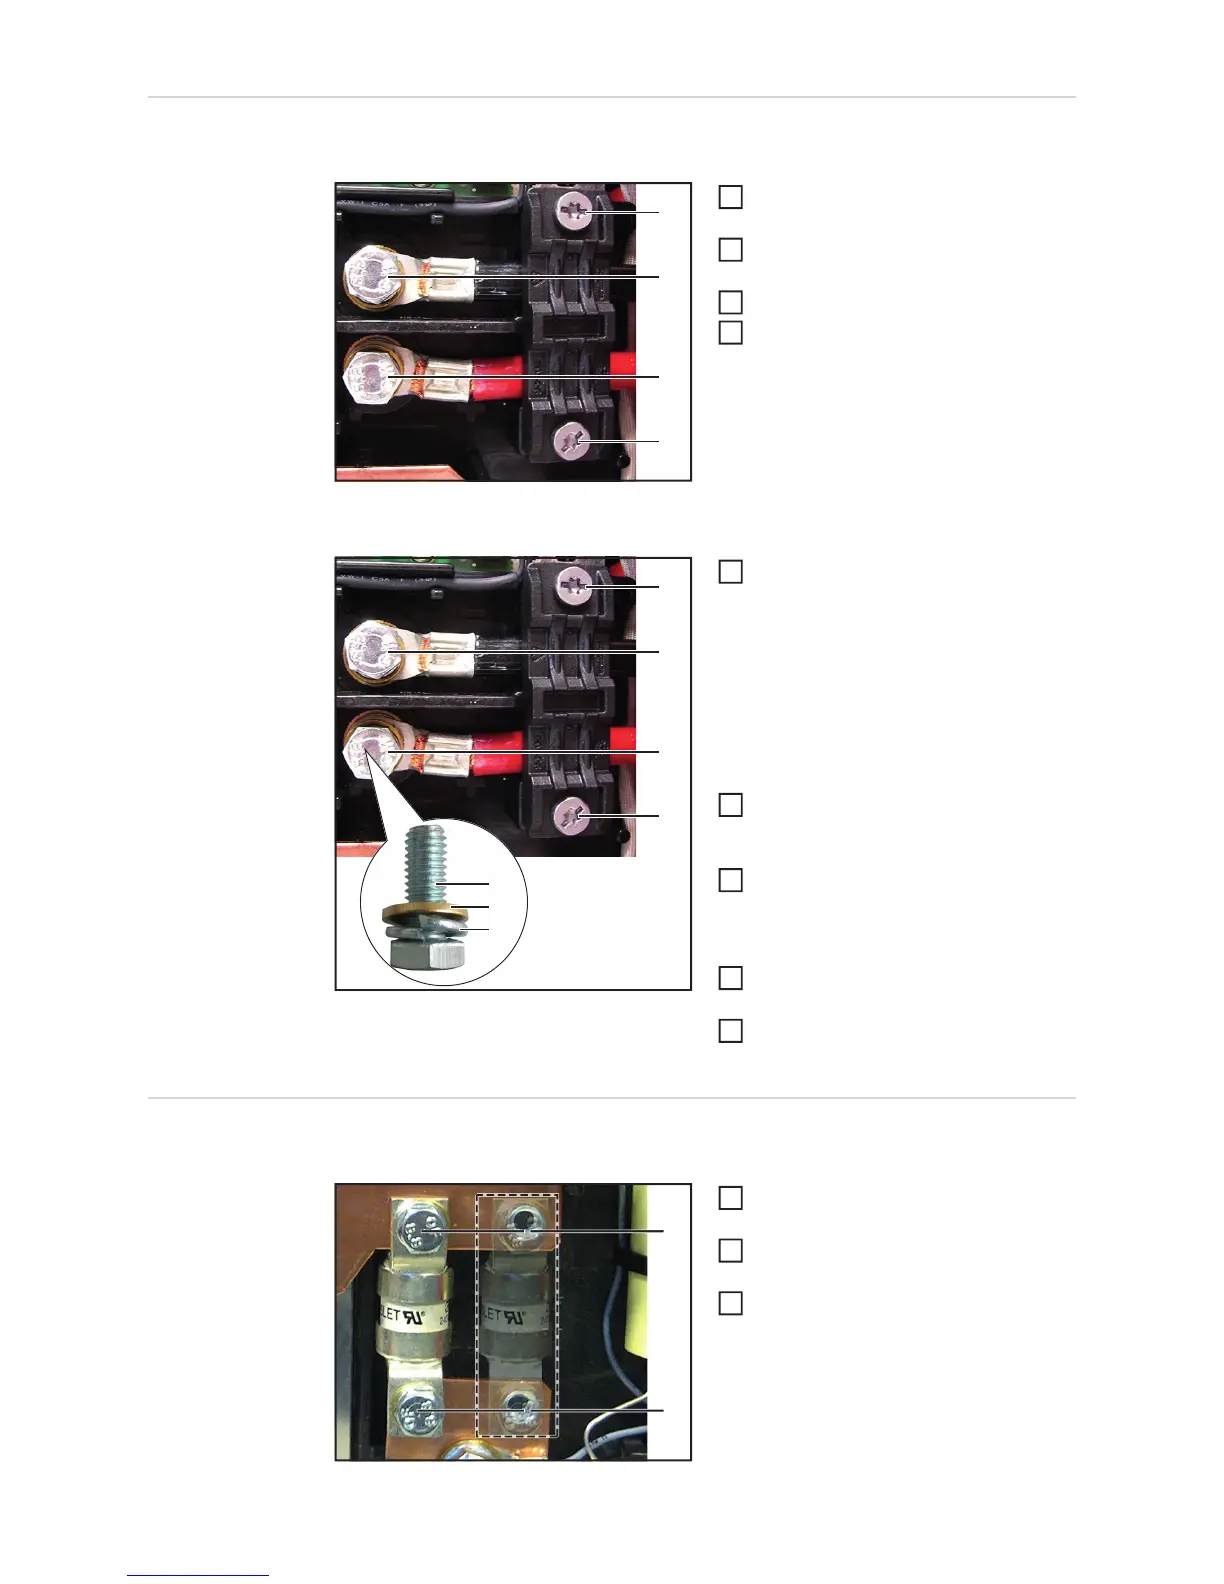
Replacing the
charger lead
Removing the charger lead:
Remove the front panel (see the
"Opening the device" section)
Undo the two PT5x25 TX25 screws (1)
and remove the strain-relief device
Undo the two M8x16 hexagon bolts (2)
Pull the charger lead through the DC
lead grommets
Installing the charger lead:
Direct the new charger lead through
the DC lead grommets, ensuring cor-
rect polarity
Screw fitting (2):
- M8x16 hexagon bolt (3)
- M8 brass washer (4)
- M8 lock washer (5)
Secure the charger lead in position
with two M8x16 hexagon bolts (2), en-
suring correct polarity
Position the strain-relief device correc-
tly as per the labelling and fit with two
PT5x25 TX25 screws (1)
[3.5 Nm]
Now finish fitting the charger lead
[20 Nm]
Fit the front panel (see the "Closing the
device" section)
Replacing fuses Removing fuses:
Remove the front panel (see the
"Opening the device" section)
Undo the two (four) M6x16 hexagon
bolts (1)
Remove the faulty fuse
(1)
(2)
(2)
(1)
1
2
3
4
(1)
(2)
(2)
(1)
(3)
(4)
(5)
1
2
3
4
5
(1)
(1)
1
2
3
 Loading...