128
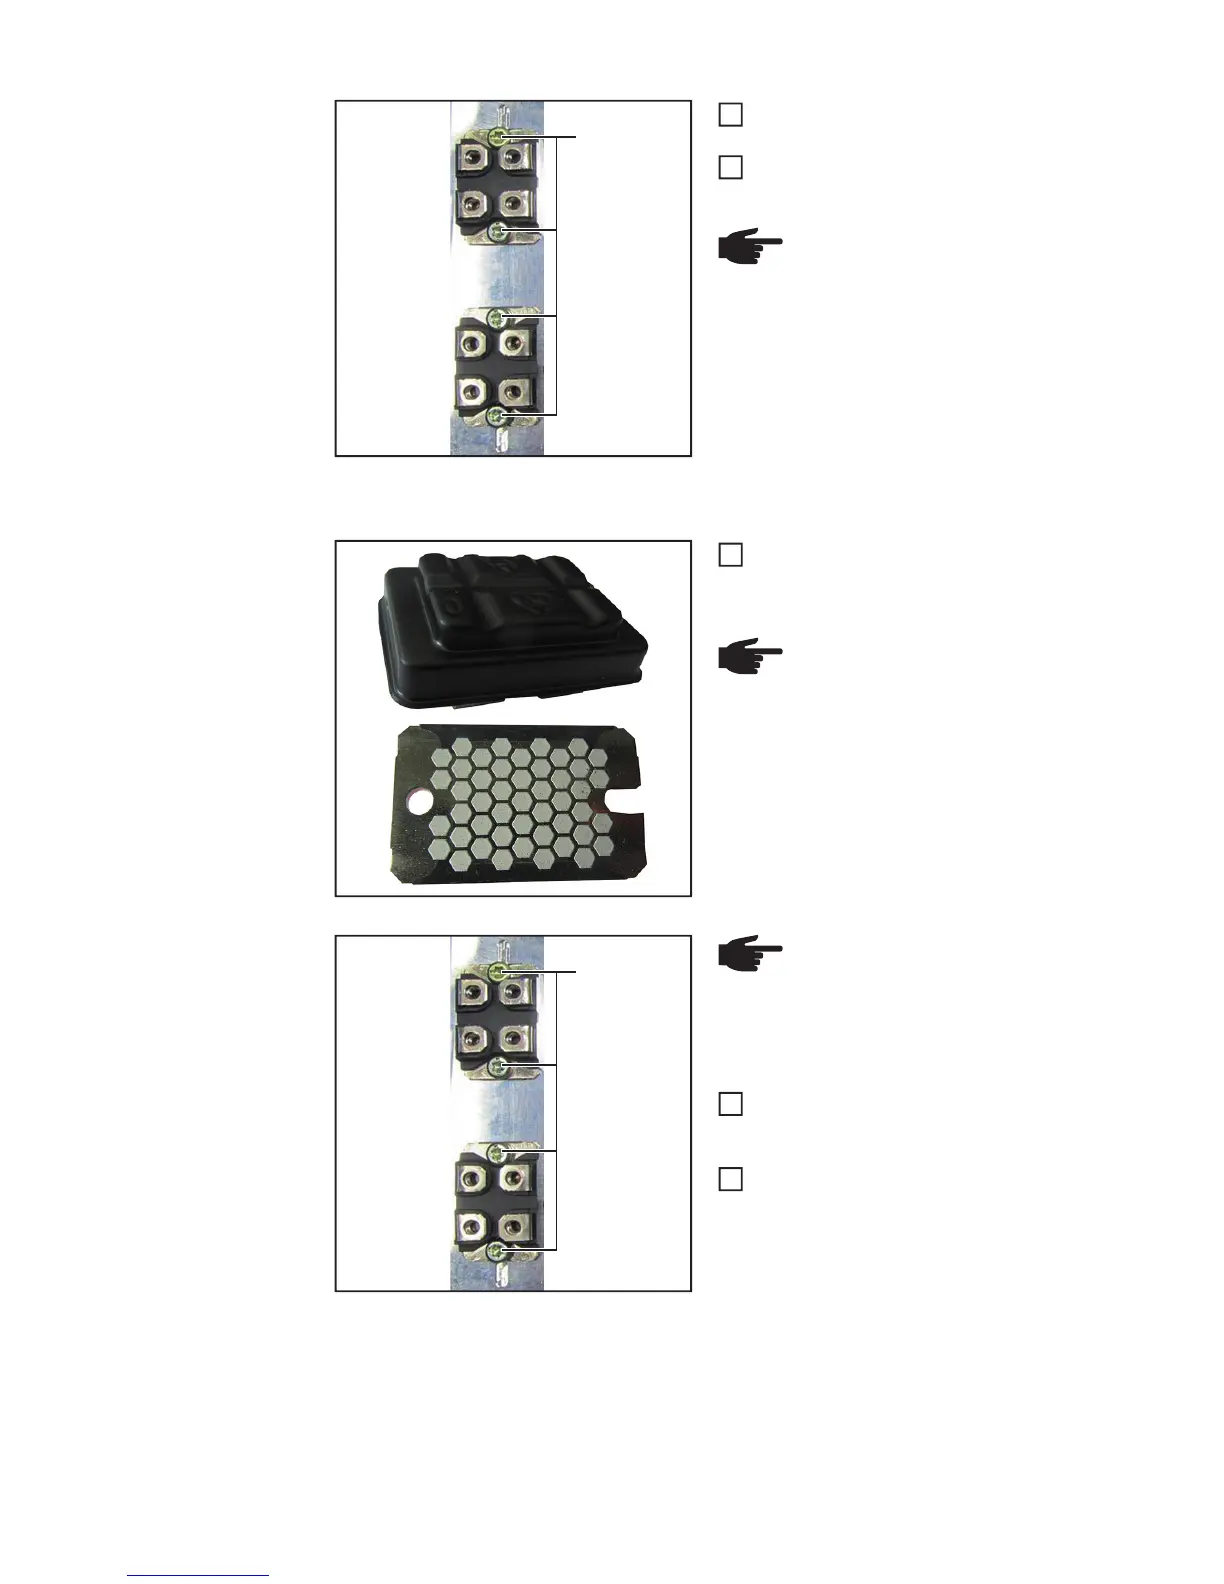
Undo the four 4x9 TX20 tapping
screws (4)
Remove the faulty secondary diodes
Installing the secondary diodes:
Remove the blister packaging from the
secondary diodes
Place the secondary diodes with the
applied heat conductive medium onto
the cooling element
Fit the secondary diodes with four 4x9
TX20 tapping screws (4)
[2.1 Nm]
(4)
NOTE! Once the secondary di-
odes have been removed, the
cooling element must be cleaned -
making sure to remove all the heat
transfer medium residue
8
9
NOTE! The PCM material of the
secondary diodes must not be
scratched or removed
4
(4)
NOTE! Position the secondary di-
odes so that the oblong hole on
the secondary diodes corre-
sponds to the groove in the cool-
ing element
3
4
 Loading...