6
Start of cycle
Gas pre-flow time
End of welding
Gas post-flow time
Pull back torch trigger and hold it down
Release the torch trigger
Arc ignition
Welding with
pre-set main current I
H
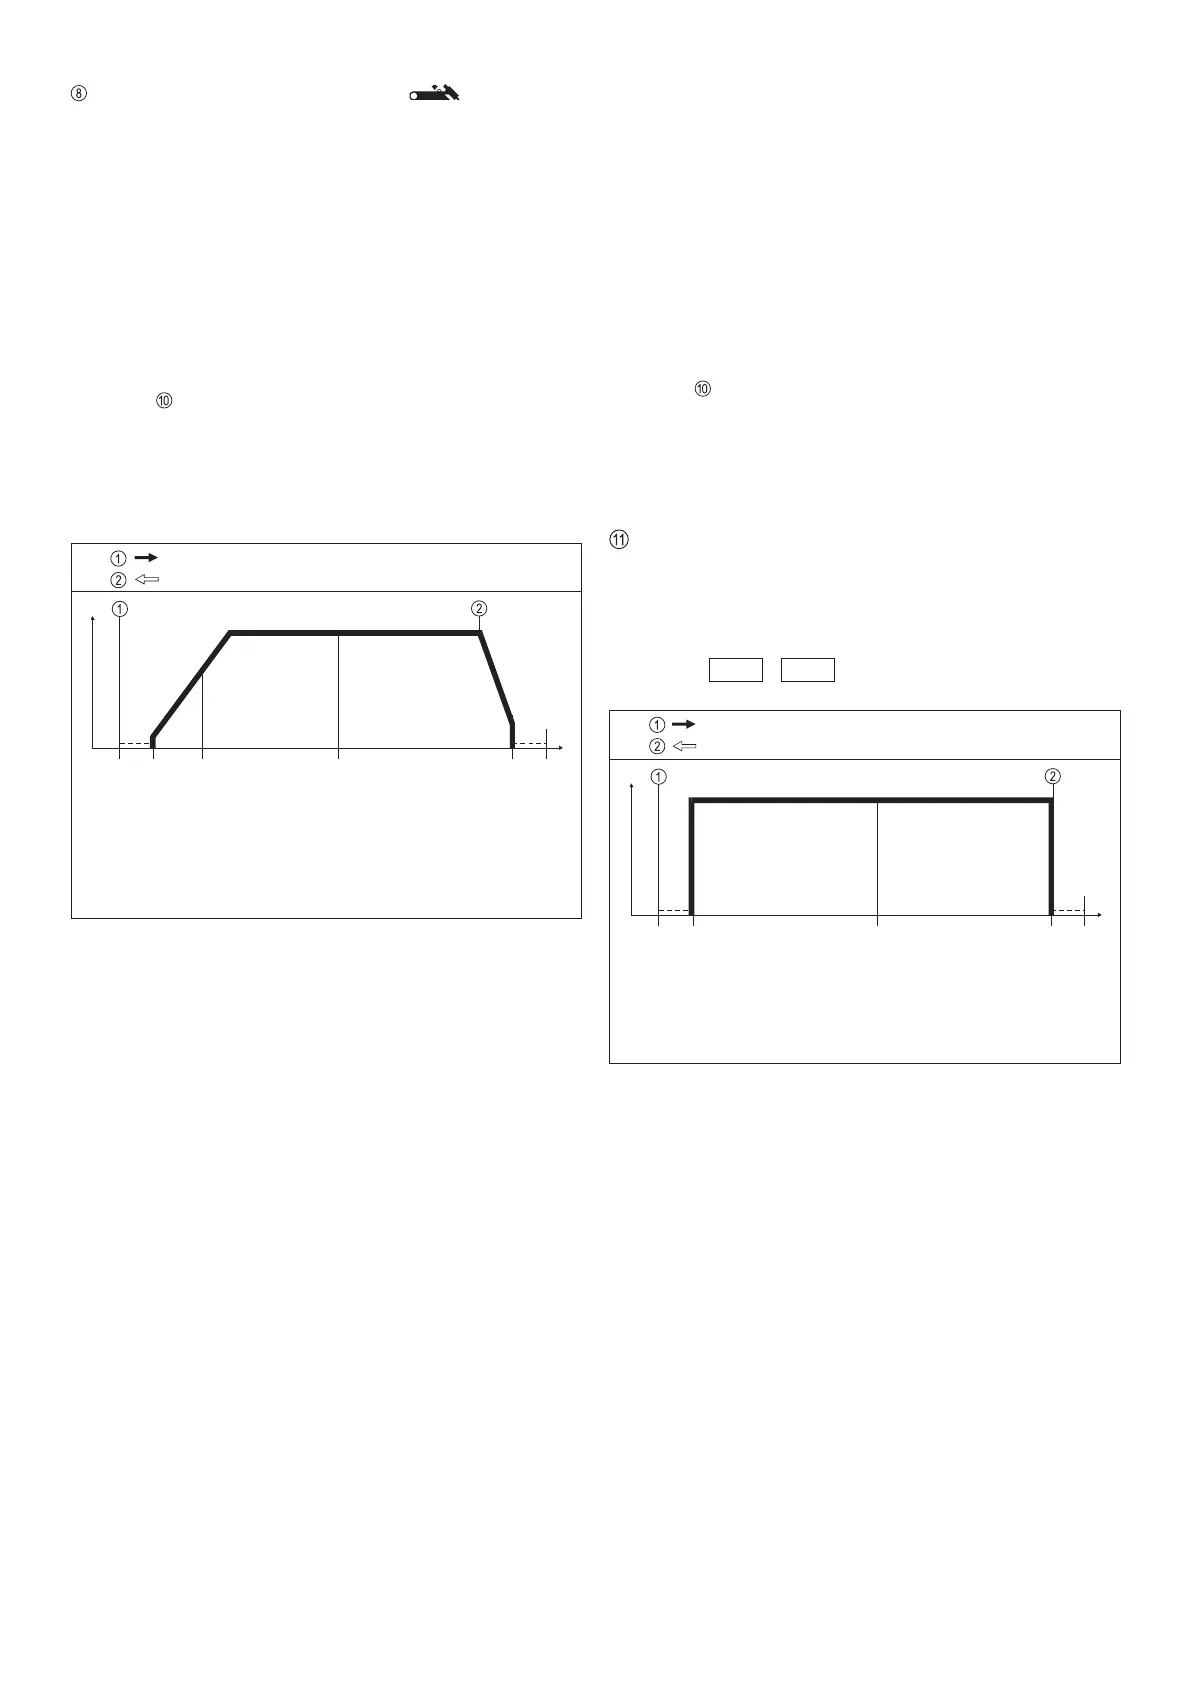
Fig. 6a Functional sequence in special 2-step mode
I
H
I
t
Start of cycle
Gas pre-flow time
Current rise via up-slope
End of welding with
Down-Slope off
crater-fill I
E
Gas post-flow time
Pull back torch trigger and hold it down
Release the torch trigger
Arc ignition with start arc I
S
Welding with pre-set
main current I
H
Fig. 6 Functional sequence in 2-step operating mode
I
H
I
t
LED INDICATOR FOR 2-STEP MODE
2-step mode (Fig.6)
l Activated from TIG torch trigger
l Mainly used for tack welding
l In the "PRESETTINGS LEVEL___" program level (TIG
parameters), StS must be set to OFF
Functional sequence:
1. Pull back and hold trigger
l Gas pre-flow time elapses
l Arc ignites at the pre-set start arc value I
S
(with HF ignition:
HF cuts out automatically after the ignition cycle)
l After ignition, the welding current rises via the internally pre-
set upslope to the welding current I
H
l LED lights up
2. Release trigger
l Arc goes out (with or without downslope)
l Internally pre-set gas post-flow time elapses
If a TR 52mc pedal remote-control unit is being used, the
machine automatically switches over to the 2-step mode.
Special 2-step mode (Abb.6a)
l Activated from TIG torch trigger
l Mainly used for tack welding
l In the "PRESETTINGS LEVEL___"
(see "Working with the program levels"), TIG parameters,
StS must be set to ON
Functional sequence:
1. Pull back and hold trigger
l Gas pre-flow time elapses
l Arc ignites at the pre-set start arc value I
S
(with HF ignition:
HF cuts out automatically after the ignition cycle)
l Welding current rises directly (without upslope) to welding
current I
H
l LED lights up
2. Release trigger
l Arc goes out (without downslope)
l Internally pre-set gas post-flow time elapses
If a TR 52mc pedal remote-control unit is being used, the
machine automatically switches over to the 2-step mode.
DOWN-SLOPE or current drop time
l For continuous adjustment of the current drop speed from
the main current down to the crater-fill current I
E
Range: 0,1 to 20 seconds
l When the Down-Slope potentiometer is used, the pre-set
value will be indicated for 3 seconds
e. g.: d S L 1.0
 Loading...


