24
(27) Frequency range switch
Operating mode:
Regulation of pulse current I
1
using a remote control
- Link the connecting socket [G] on the power source and the remote-control unit
socket (28) electrically with the remote control cable.
- Plug in the plug-in connections the right way round, and screw the coupling ring on
as far as possible.
- LED indicator (13) blinks up on the power source
- Set desired operating mode with function button (4)
- The appropriate LED-indicator (5), (6), (7) or (8) lights up
- Pre-select the frequency range (0.2 - 2Hz, 2 - 20Hz, 20 - 200Hz, 200 - 2000Hz) with
the range switch (27).
- The pulsing current I
1
is set continuously with setting dial (23)
- The setting for the background current I
2
is made as a percentage of the pulsing
current I
1
, with setting dial (25)
- To select the duty cycle use dial (26)
- Set the pulse frequency dial (24) to the desired value.
- Mean welding-current amperage is indicated on display A
- The downslope parameter is set directly on the power source.
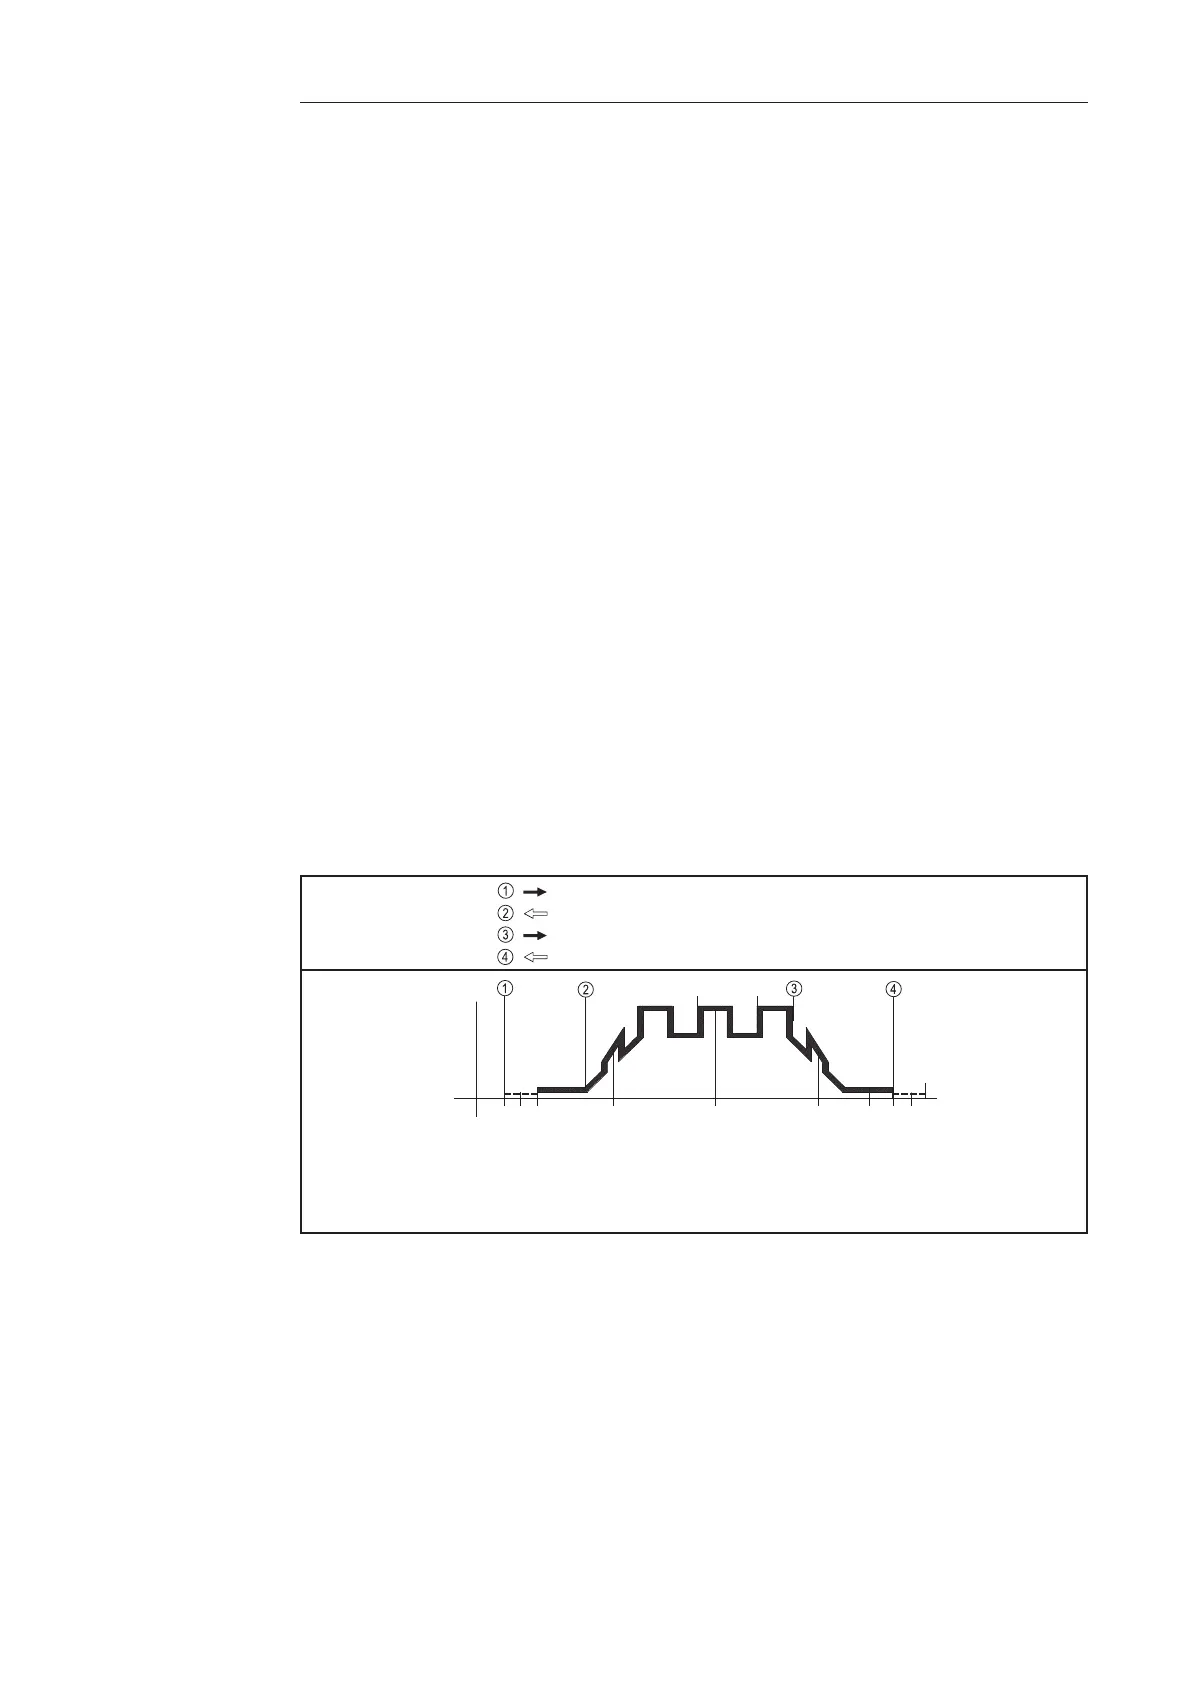
In the 4-step operating mode, the pulse phase begins as soon as the operator releases
the torch trigger in the up-slope. As can be seen in Fig. 12, pulsing also takes place in
the down-slope.
Important! If you wish to be able to switch from main current to crater-fill current while in
pulsed-arc mode (without interrupting welding), use:
- 4-step mode and a FRONIUS TIG torch with double control-switch function, or:
- special 4-step mode and a non-Fronius TIG torch
Please see chapter "Description of controls" for more details of the 4-step and special 4-
step operating modes.
TR 50mc remote
control pulsing
unit
(continued)
Gas pre-flow time
Fig. 24 Functional sequence in pulsed-arc welding operation using TR 50mc (4-step)
Release the torch trigger
Pull back and hold down the trigger once again
Release the torch trigger
Pull back torch trigger and hold down
I
1
I
2
f (Hz)
I
S
I
E
I
t
Start of cycle
Arc ignition
with start arc I
S
Pulsing current-rise
via up-slope
Pulsed-arc
welding operation
I
1
, I
2
/ f / Duty-Cycle
End of welding
Crater-fill current I
E
Gas post-flow time
Current-drop
(with pulse) via
down-slope
O
 Loading...


