5 Scan
322
Scan
5
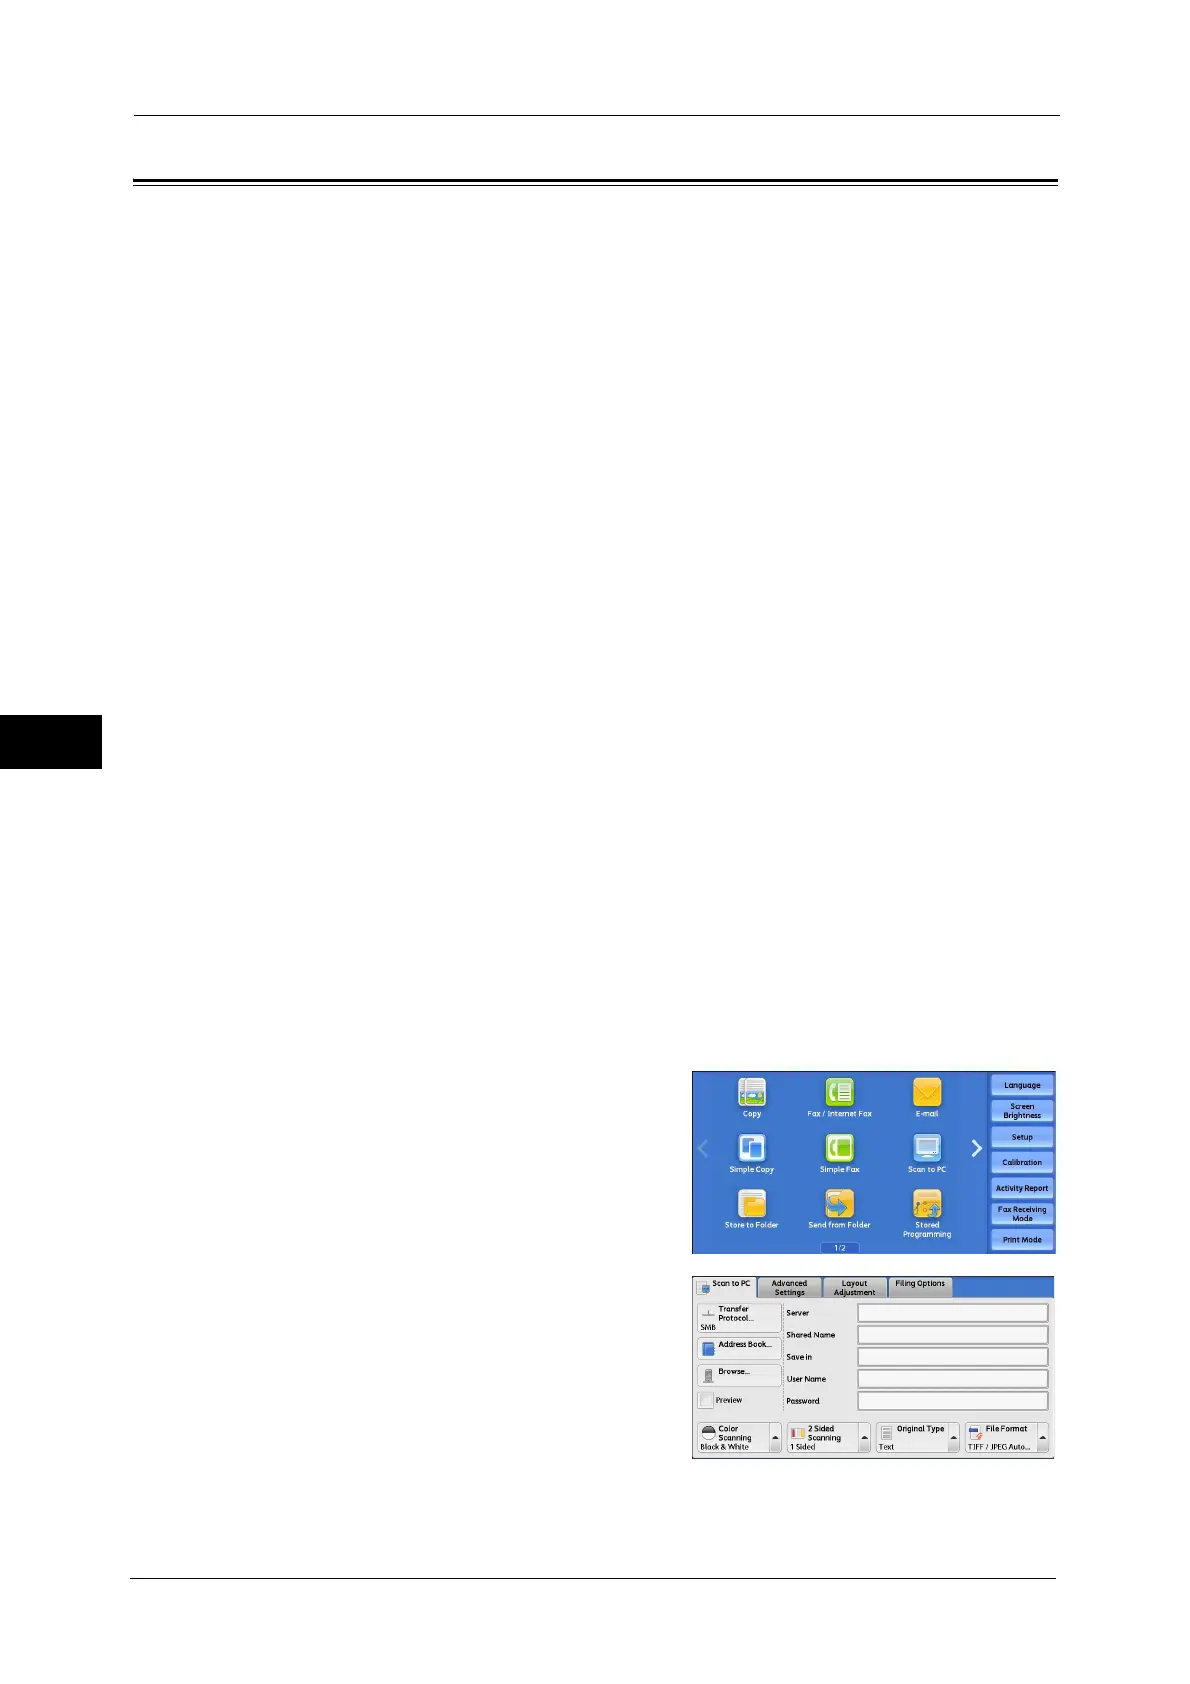
Scan to PC
This section describes the procedure to select features on the [Scan to PC] screen. The Scan
to PC service allows you to scan documents and send the scanned data to a network
computer via the FTP or SMB protocol. The following describes features available on the
[Scan to PC] tab.
Transfer Protocol (Selecting a Transfer Protocol)................................................................................................................ 323
Address Book ................................................................................................................................................................................323
Address Book (Specifying a Destination Using the Address Book [Type 1]).................................................................324
Address Book (Specifying a Destination Using the Address Book [Type 2]).................................................................325
Add New Address (Registering a Destination PC on the Address Book)........................................................................ 326
Specifying a Destination PC Using a One Touch Button....................................................................................................328
Browse (Specifying a Destination PC by Browsing Your Network) .................................................................................. 329
Specifying a Destination (Specifying a Destination PC Using the Screen Keyboard).................................................330
Preview (Previewing the Scanned Images during a Scan Job)......................................................................................... 332
Color Scanning (Selecting an Output Color)......................................................................................................................... 332
2 Sided Scanning (Scanning Both Sides of a Document)..................................................................................................332
Original Type (Selecting the Document Type)...................................................................................................................... 332
File Format (Selecting a File Format for Output Data).......................................................................................................332
Note • Before scanning, you must create a shared folder on your computer to save scanned data in.
Furthermore, if you use the FTP protocol, you must set the FTP service. For information on the
computer settings, refer to the documentation provided with your operating system. For
information on how to configure the FTP service on Mac OS X 10.7 Lion or OS X 10.8 Mountain Lion,
consult the official website of Apple Inc. For information on supported operating systems, refer to
"16 Appendix" > "Specifications" in the Administrator Guide.
• You can configure the Scan to My Folder feature in which the scanned document can be transferred
to a different destination according to an authenticated user when you select [Scan to PC] on the
Services Home screen. The authenticated user’s information such as the user name or storage
location of the scanned document, is automatically determined and displayed.
• You can customize the layout of the features displayed on the [Scan to PC] screen. For more
information, refer to "5 Tools" > "Scan Service Settings" > "Screen Defaults" > "1st Tab - Features
Allocation" in the Administrator Guide.
• You can set [First Tab] or [Address Book] for the screen displayed when you select [Scan to PC] on
the Service Home screen. For more information, refer to "5 Tools" > "Scan Service Settings" > "Screen
Defaults" > "Scan to PC Screen Default" in the Administrator Guide.
1
Select [Scan to PC] on the Services Home
screen.
2
Select a feature on the [Scan to PC] screen.
Note • Depending on the settings for [Scan to PC
Screen Default] in the System Administration
mode, the [Server Address Book] screen is
displayed. For more information, refer to "5
Tools" > "Scan Service Settings" > "Screen
Defaults" > "Save to PC Screen Default" in the
Administrator Guide.
• Fields displayed on the screen vary
depending on the protocol you have selected.
 Loading...

