FUJITSU DL3100
5-38 User’s Manual
5. Ensure to place the lever at position. Then press the
[Load/Eject] key to load the black marked form. The top edge
of the form will then align with the printer’s tear-off blade.
Press
Next
or
Back
until you see the black mark marginally
exposed out of the tear-off blade. Then press
OK
to allow the
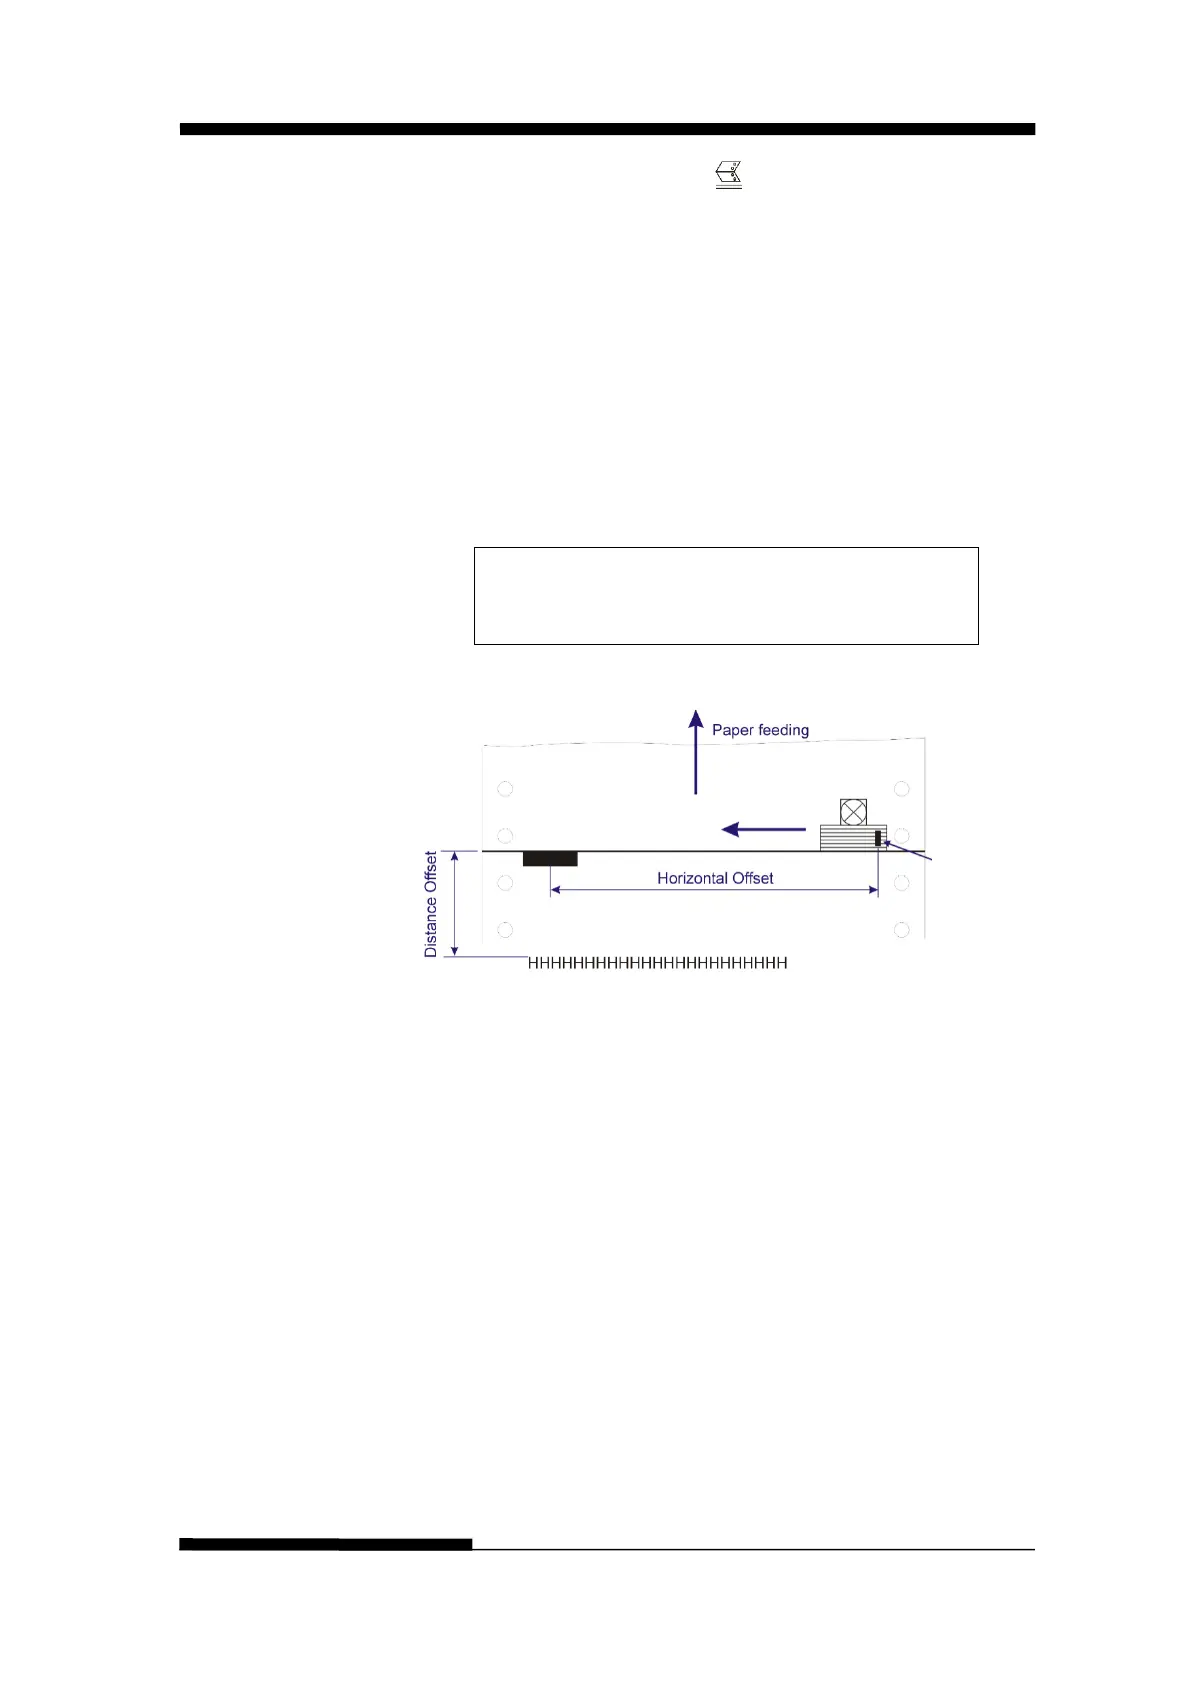
printer to scan the horizontal offset of the black mark relative to
the left edge of the page. (Meanwhile, the vertical position of
the black mark is measured and recorded.)
When the printer fails to scan the horizontal offset (see the
below picture), it prompts you to repeat the above
procedures. If scanning is successful, it prompts:
Successfully setup black mark parameters.
Distance Offset From Black Mark To Print Position
6. The last prompt above invites you to set the next parameter
--- vertical offset of the first print line from the black mark.
Like other setting dialogs, you have options:
1)to bypass this setting (by pressing Next or Back),
(WARNING: Not to skip or change the order in Black Mark
Setting.)
2)to accept the Distance Offset (by pressing OK),
3)to leave the subsequent settings (by press Exit),
4)to terminate the session and save modified parameter(s) (by
pressing Save and Restart).