6. WEB FUNCTIONS
6-5
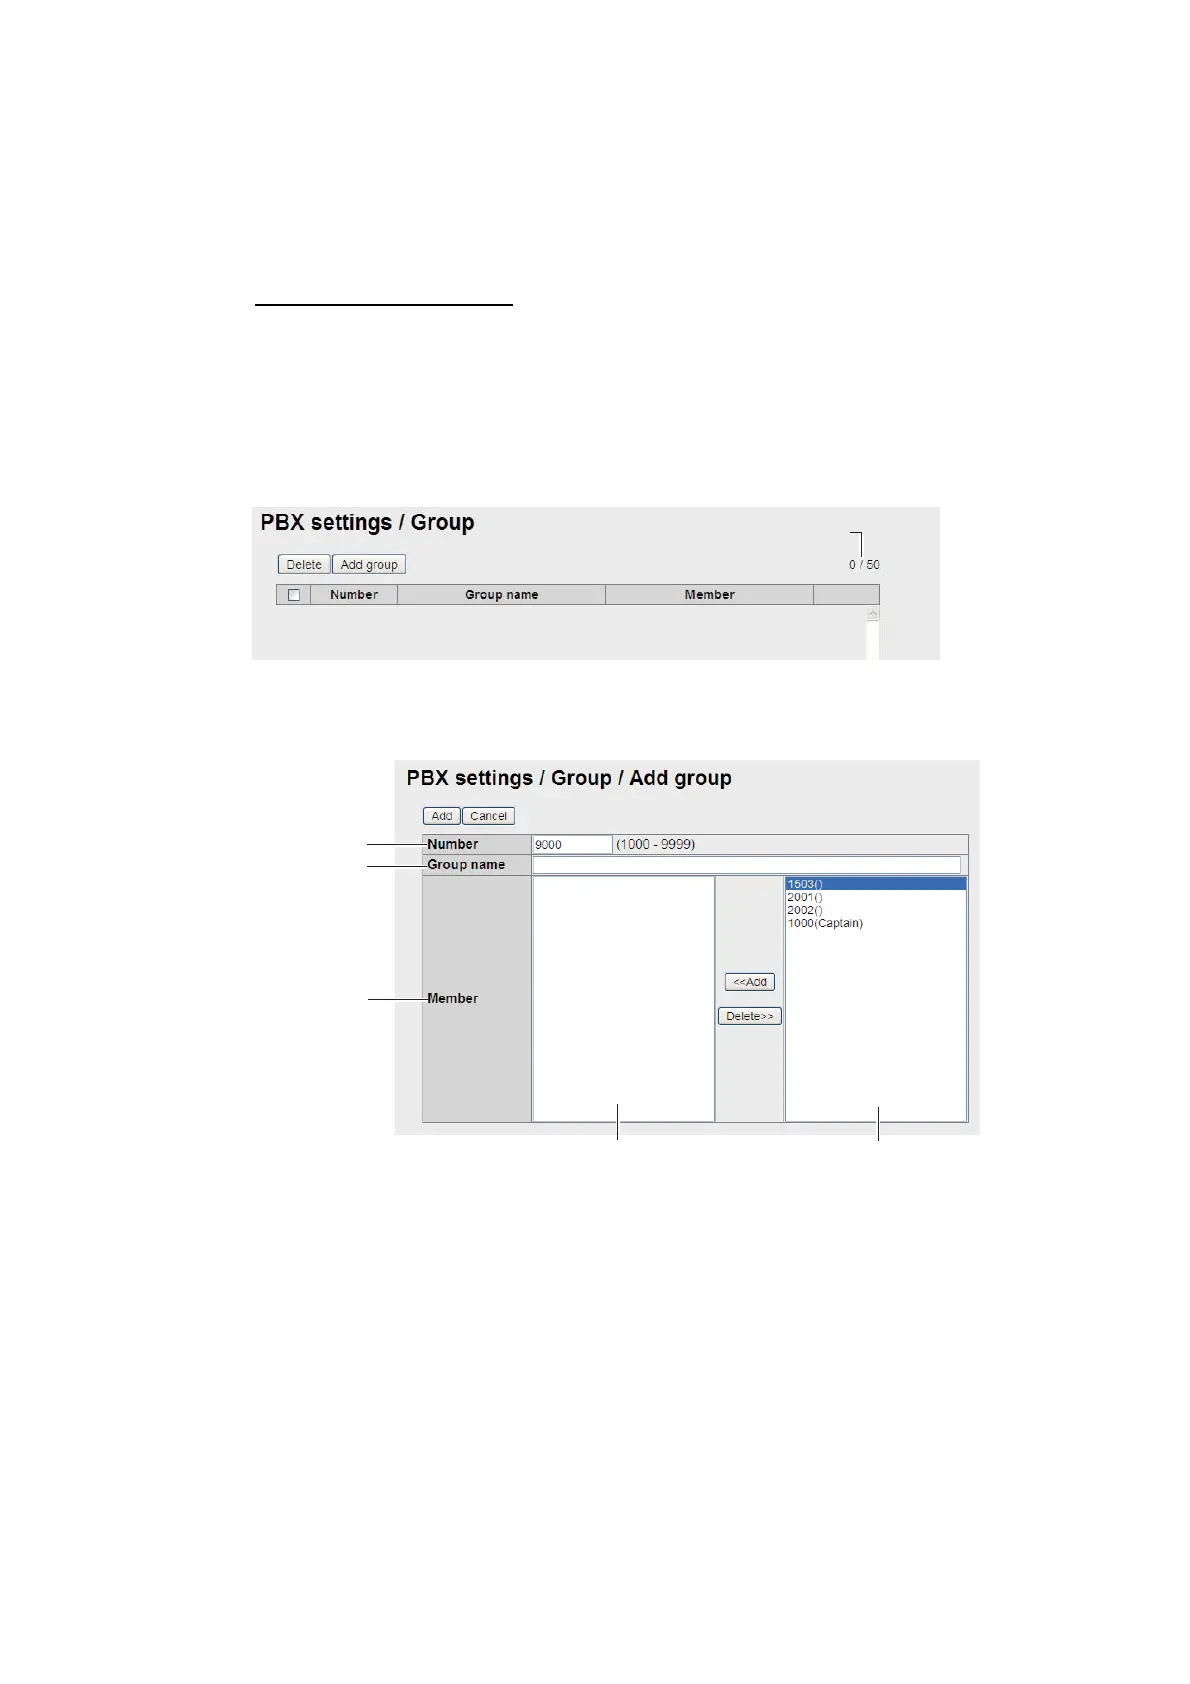
6.1.4 Group settings
Register numbers to a group and make a group call (internal only). For example, add
numbers 1001-1010 to group 9000, and all numbers from 1001-1010 can be called at
the same time. The first recipient to answer receives the call, and the other numbers
stop ringing.
How to register a group
A maximum of 50 groups can be registered. Only members registered on [Extension]
in [PBX Settings] can be registered.
1. Click [Settings] in the menu bar.
2. Click [PBX settings].
3. Click [Group]. The following Group screen appears.
4. Click [Add group]. The following New Registry screen appears. [Number] field dis-
plays the lowest 9000 number not in use. If using this number, go to step 6. If en-
tering a new number, go to step 5.
5. In the [Number] field, enter the group number (1000 - 9999).
6. Enter a name for the group in the [Group name] field (max. 50 characters).
7. Add members to the group as follows:
1) Click desired number in the available numbers list.
2) Click the [<<Add] button to add the selected number to the member list.
Note: If you added a wrong number, select the number in the member list and
click [Delete >> ] to erase the number from list.
3) Repeat steps 1 and 2 to add more members to group.
8. Click the [Add] button. The message "Completed." appears.
Note: The following messages are displayed when you try to register a number
that has already been registered:
Group count / Maximum count
Member list Available number list
Required input
Required input
Required input
(more than 1)
 Loading...