b. If there are several charging stations to be daisy-
chained with the same feeding cable, also
remove the knock-out for the outlet hole of the
second power cable.
c. Insert a suitable grommet in the knock-out hole.
2. If the connection to internet, or other charging
station, is decided to be via an ethernet cable,
prepare the inlet of the ethernet cable(s).
NOTE
It is possible to install the ethernet cable in several ways,
but there are dedicated break-outs for the ethernet cable
in the installation bracket. Maximum cable diameter for
the break-out is 8 mm. To seal the hole, either use a non-
silicone material or simply put a piece of tape on the
cable to achieve a firm fit. A cable-tie can be used for
strain relief.
NOTE
If the top cable entry positions are used, they must be
firmly sealed with approved IP54 cable grommets. The
cable grommets must also secure cable force strain
relief. The lower and rear positions are preferably
sealed using "skin type" cable grommets.
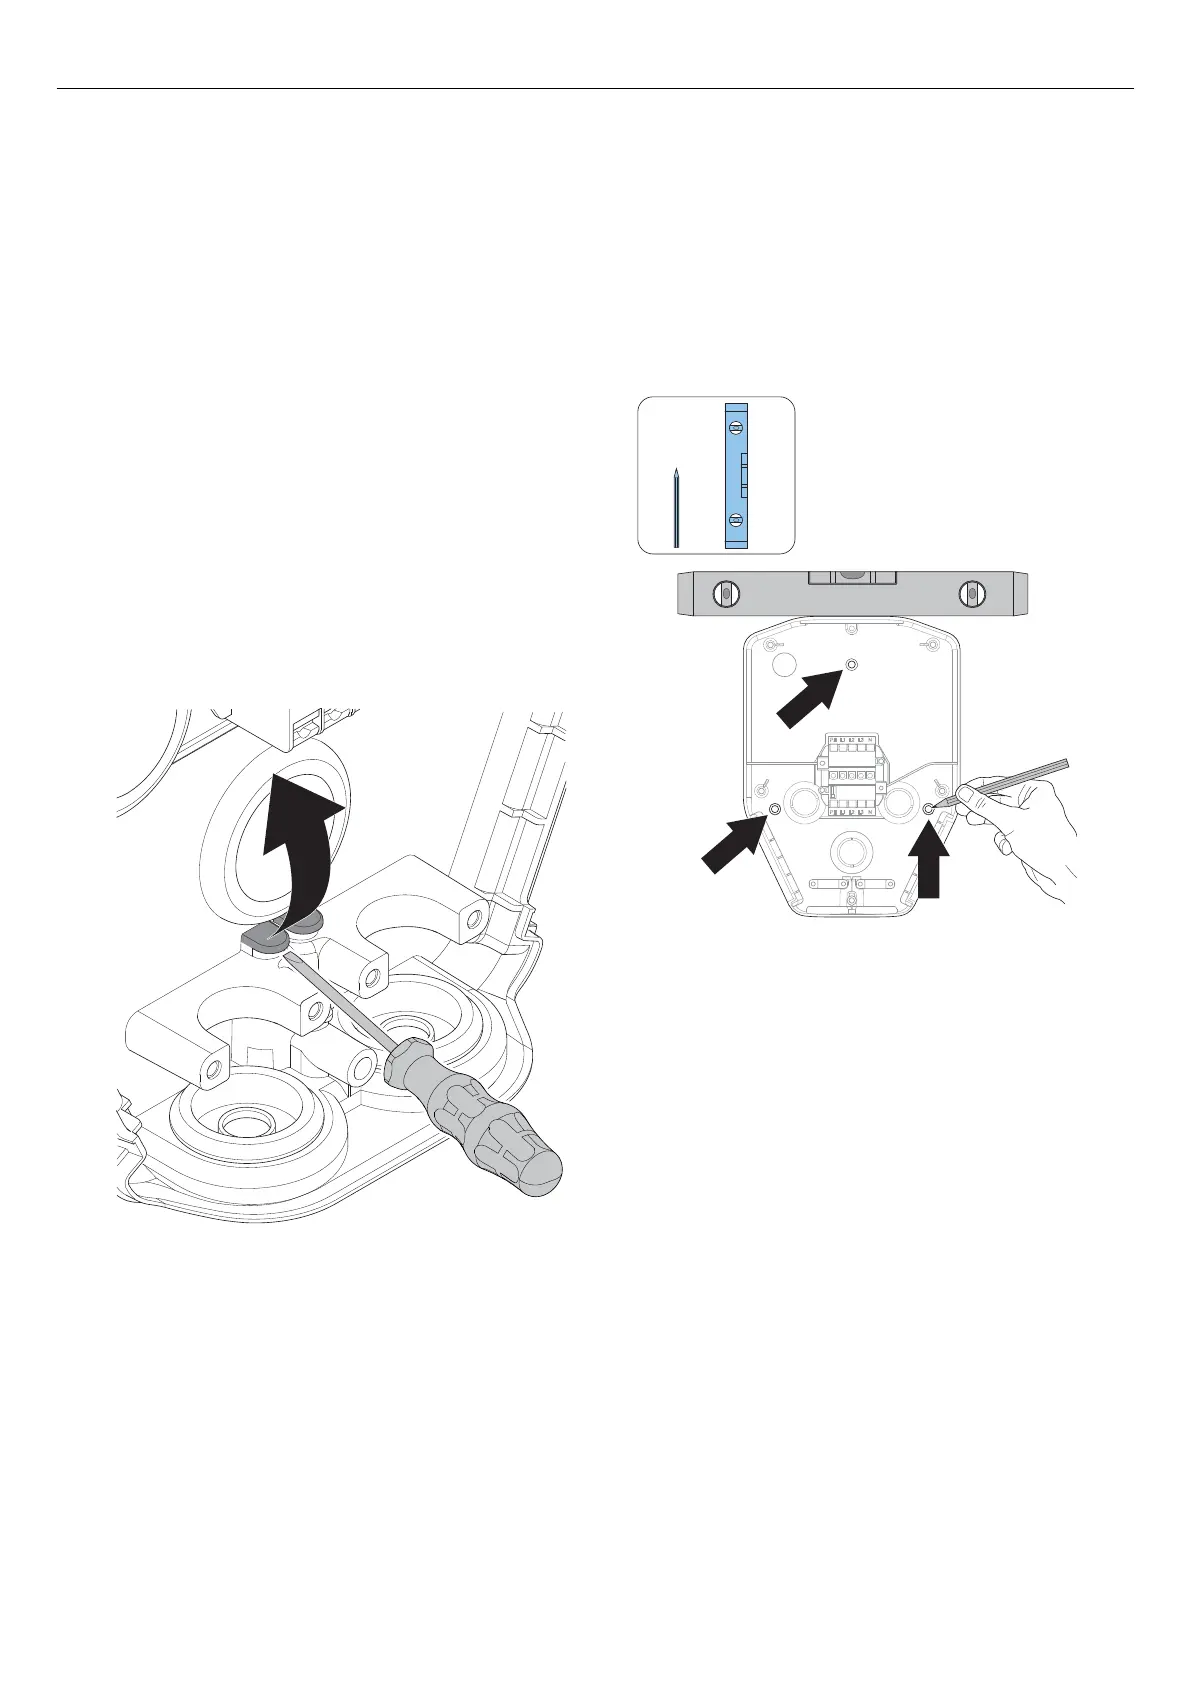
4.12.3 TO INSTALL THE INSTALLATION BRACKET
TO A WALL
1. Decide the position of the charging station. Refer to
4.4 To do a plan for the installation, page 20.
2. Hold the installation bracket as a template against
the wall.
3. Use a spirit level to make sure that the installation
bracket is straight.
4. Use a pen to mark the drill holes on the wall, if
needed. Refer to 3.5 Dimensions, page 16 for the
bracket hole positions.
5. Choose appropriate screws for the wall material. If
it is necessary, also choose appropriate plugs and
drill for the wall material.
28 Version: 1.3
Installation