24
Top Pa n el
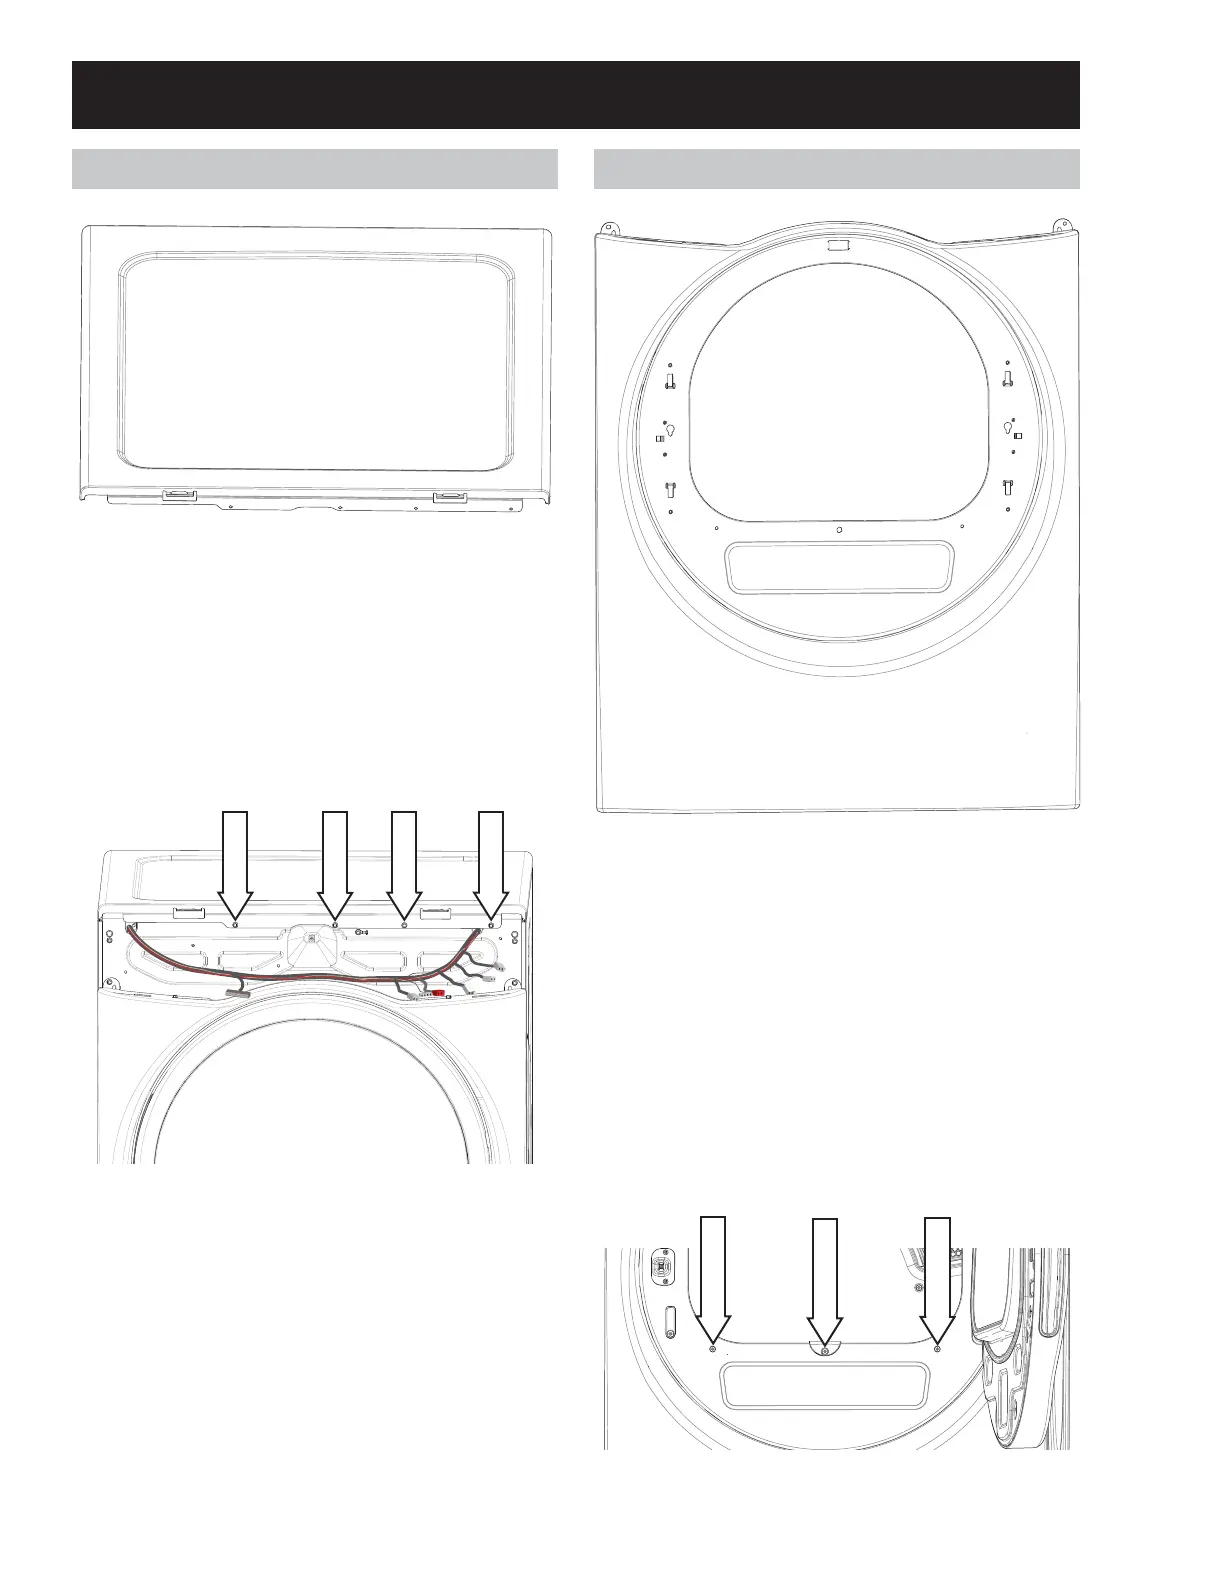
Top Pan el Rem ov al
1. Disconnect power from the unit .
2. Remove the control panel.
3. Remove the four 1/4 in. hex head top panel
screws.
1/4" hex
1/4" hex
1/4" hex
1/4" hex
4. Lift the front of the top panel up approximately
6 inches, then push the top panel backward
slight ly, then lift the panel to remove.
Fr on t Pan el
Fr on t Pa nel Remov a l
1. Disconnect power from unit .
2. Remove the door assembly.
NOTE: It is not necessary t o remove the door un-
less the front panel is being replaced. However,
removing the door will reduce the weight of the
front panel.
3. Remove the three #2 Phillips screws located near
the lint trap.
#2 Phillips
#2 Phillips
#2 Phillips
Structural Components
See To p Pa n el Lo c a t i o n o n p a g e 16 .
See Co n t r o l Pa n e l Rem o v a l o n p a g e 2 0 .
See Fr o n t Pa n e l L o c a t i o n o n p a g e 16 .
See D o o r Rem o v a l o n p a g e 2 8 .