26
Re a r Pa n e l Rem o v a l
1. Disconnect power, water supply and gas (gas
units) from the dryer.
2. Remove the control panel.
3. Remove the top panel.
4. Remove the water valve.
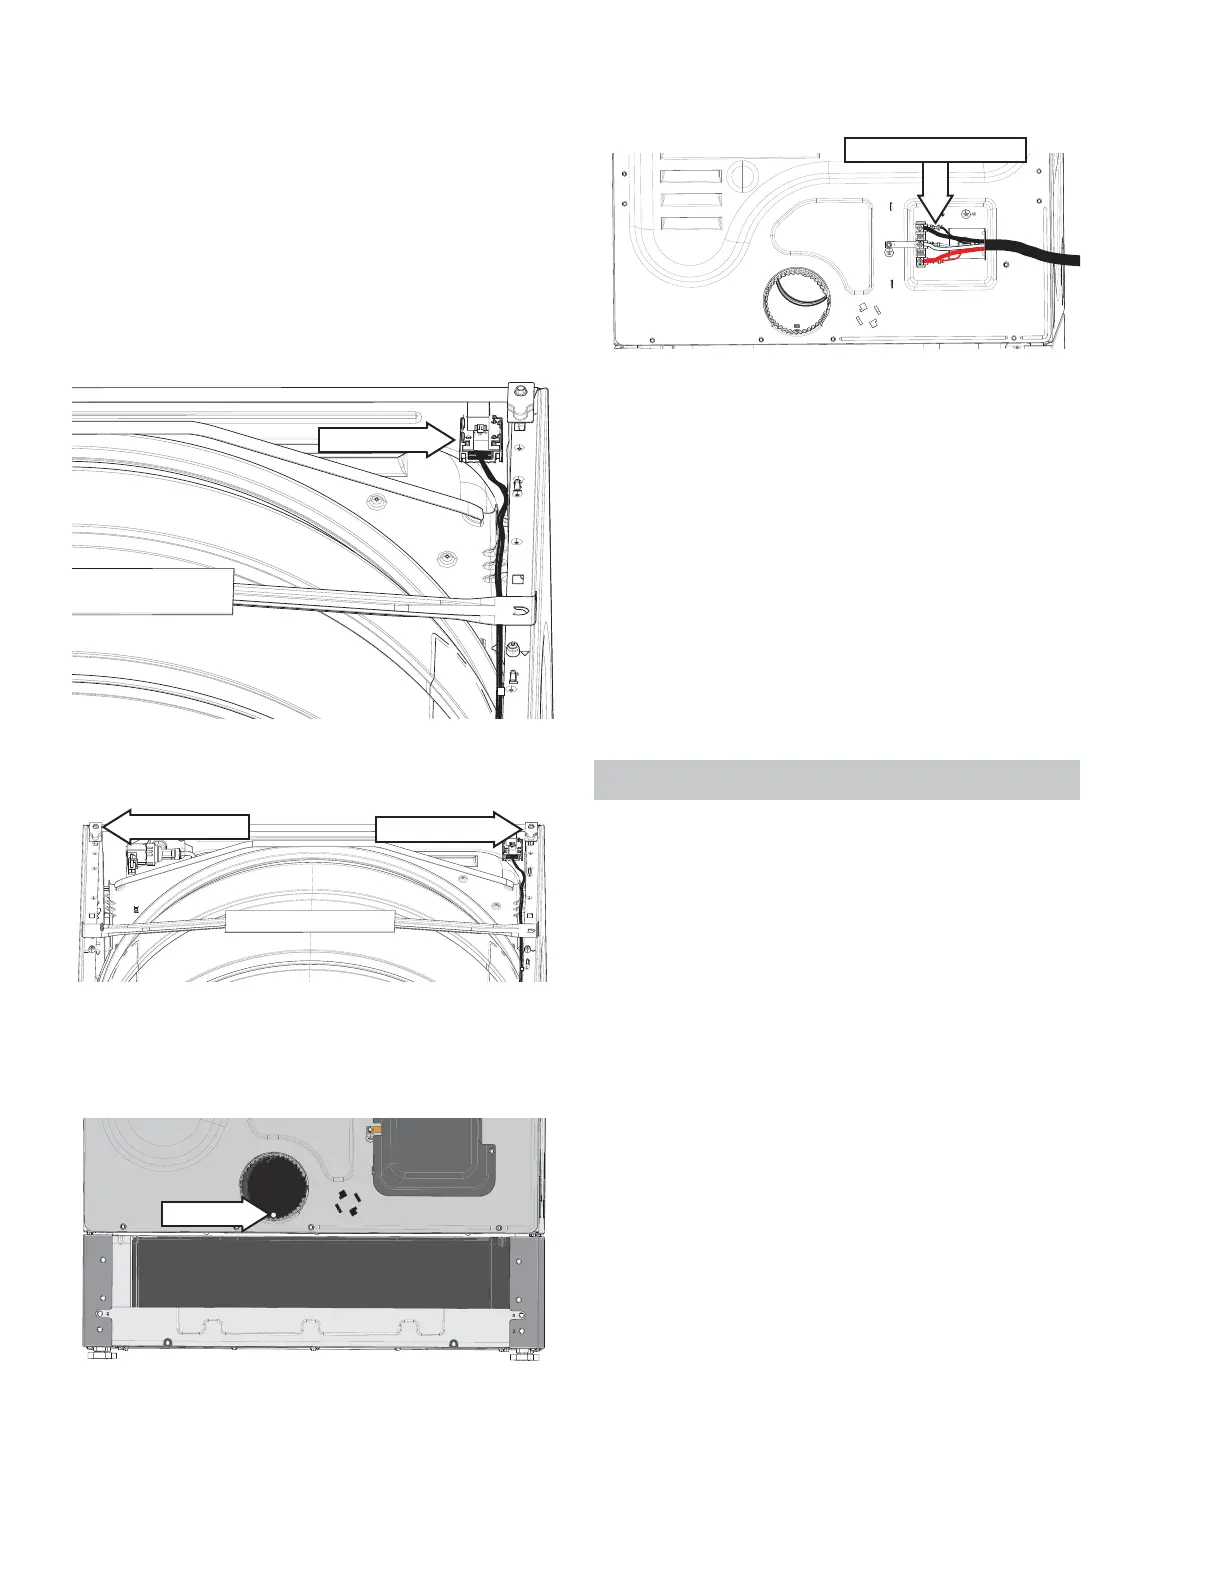
5. Disconnect the RJ45 board wire harness located
on the back right side of the dryer.
RJ45 Board
6. Remove the two rear pin supports.
Pin Support
Pin Support
7. Remove the dryer vent from the exhaust duct ,
then remove the 1/4 in. hex screw just inside the
exhaust duct .
1/4" hex
8. If removing the rear panel to access other com-
ponents, skip to step 12.
9. Remove the terminal block cover.
10. Remove the power cord from the terminal block.
11. Disconnect the internal machine wiring from
the terminal block and carefully push the wires
through the rear panel.
Remove Small Wires
12. Remove the sixteen 1/4 in. hex rear panel
screws.
NOTE: When reinstalling t he rear panel, ensure t he
following:
• The vent duct is engaged to the blower.
• The water valve end of the steam tube is not
covered by the rear panel.
• No wires are caught between the rear panel and
the side panels.
• The water valve hose and harness are recon-
nected.
• The RJ45 harness is reconnected.
Side Panels
Th e sid e p a nel s a re i den t i ca l , a n d ea c h p an el h as
knockouts in the front and rear. The front knockouts
cannot be used because the motor and heater as-
sembly block access to the front knockouts.
Si d e Pa n e l Re m o v a l
1. Disconnect the power, water supply, and gas
(gas un i t s) t o t he dr yer a n d m ove t he dr yer t o an
area that allows room to access the front and
back sides of the dryer.
2. Remove the control panel.
3. Remove the top panel.
4. Remove the front panel.
5. Remove the front control assembly bracket.
6. Remove the trap duct .
7. Remove the front drum support .
8. Remove the drum.
9. Remove the rear panel.
See Co n t r o l Pa n e l Rem o v a l o n p a g e 2 0 .
See To p Pa n el Rem o v a l o n p a g e 24 .
See W a t er Va l v e Rem o v a l o n p a g e 4 9 .
See Co n t r o l Pa n e l Rem o v a l o n p a g e 2 0 .
See To p Pa n el Rem o v a l o n p a g e 24 .
See Fr o n t Pa n el Rem o v a l o n p a g e 24 .
See Fr o n t Co n t r o l As s em b l y Br a c k et Rem o v a l
on page 25.
See Tr a p D u c t Rem o v a l o n p a g e 38 .
See Fr o n t D r u m Su p p o r t Rem o v a l o n p a g e 34 .
See D r u m Rem o v a l o n p a g e 35 .