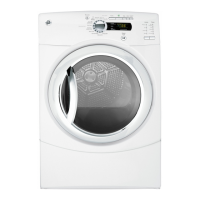
30
Door Seal
Door Seal Removal
Th e d oo r sea l i s h el d i n p l ac e b y t a bs o n t h e b ac k
side of the seal. Pull the seal tabs out of t he door
frame to remove.
Door Frame
Door Frame Removal
1. Remove the door.
2. 3ODFHWKHGRRURQDVRIWDQGÀDWVXUIDFHZLWK
the door frame facing upward.
3. Remove the ten #2 Phillips from the perimeter of
the door frame.
NOTE7KHUHDUHWZRGLȺHUHQWVFUHZOHQJWKVWKDWDUH
used on the door frame. If the shorter screws are re-
moved, the screws must be put back in their proper
positions to avoid damaging the door assembly.
4. Grasp the hinge and lift the door frame to re-
move.
Door Hinge
Th e d oo r h in ge i s at t a ch ed t o t h e f r on t p an el b y t w o
T- 2 5 scr ew s. In a dd i t i on t o t h ese t w o scr ew s, t h er e
is another screw that holds the door hinge in place
when the T-25 screws are removed. This screw can
be installed in either the "W" or "D" position. "D" is
used for right swinging doors and "W" is used for left
swinging doors.
Th e d oo r a ssem b ly p ivo t s o n f o ur b ush in gs (sho w n
above). The hinge bushings are sandwiched be-
tween the hinge bracket and hinge plate as shown
on the next page.
Short
Long
Long
Long
Long
Long
Long
Long
Long
Long
Long
Short
Short
Short
Short
Short
Bushing
Bushing Bushing
Bushing
Hinge
Holding Screw
See D o o r Hi n g e L o c a t i o n o n p a g e 28 .
See D o o r Fr a m e L o c a t i o n o n p a g e 28 .
See D o o r Rem o v a l o n p a g e 2 8 .