35
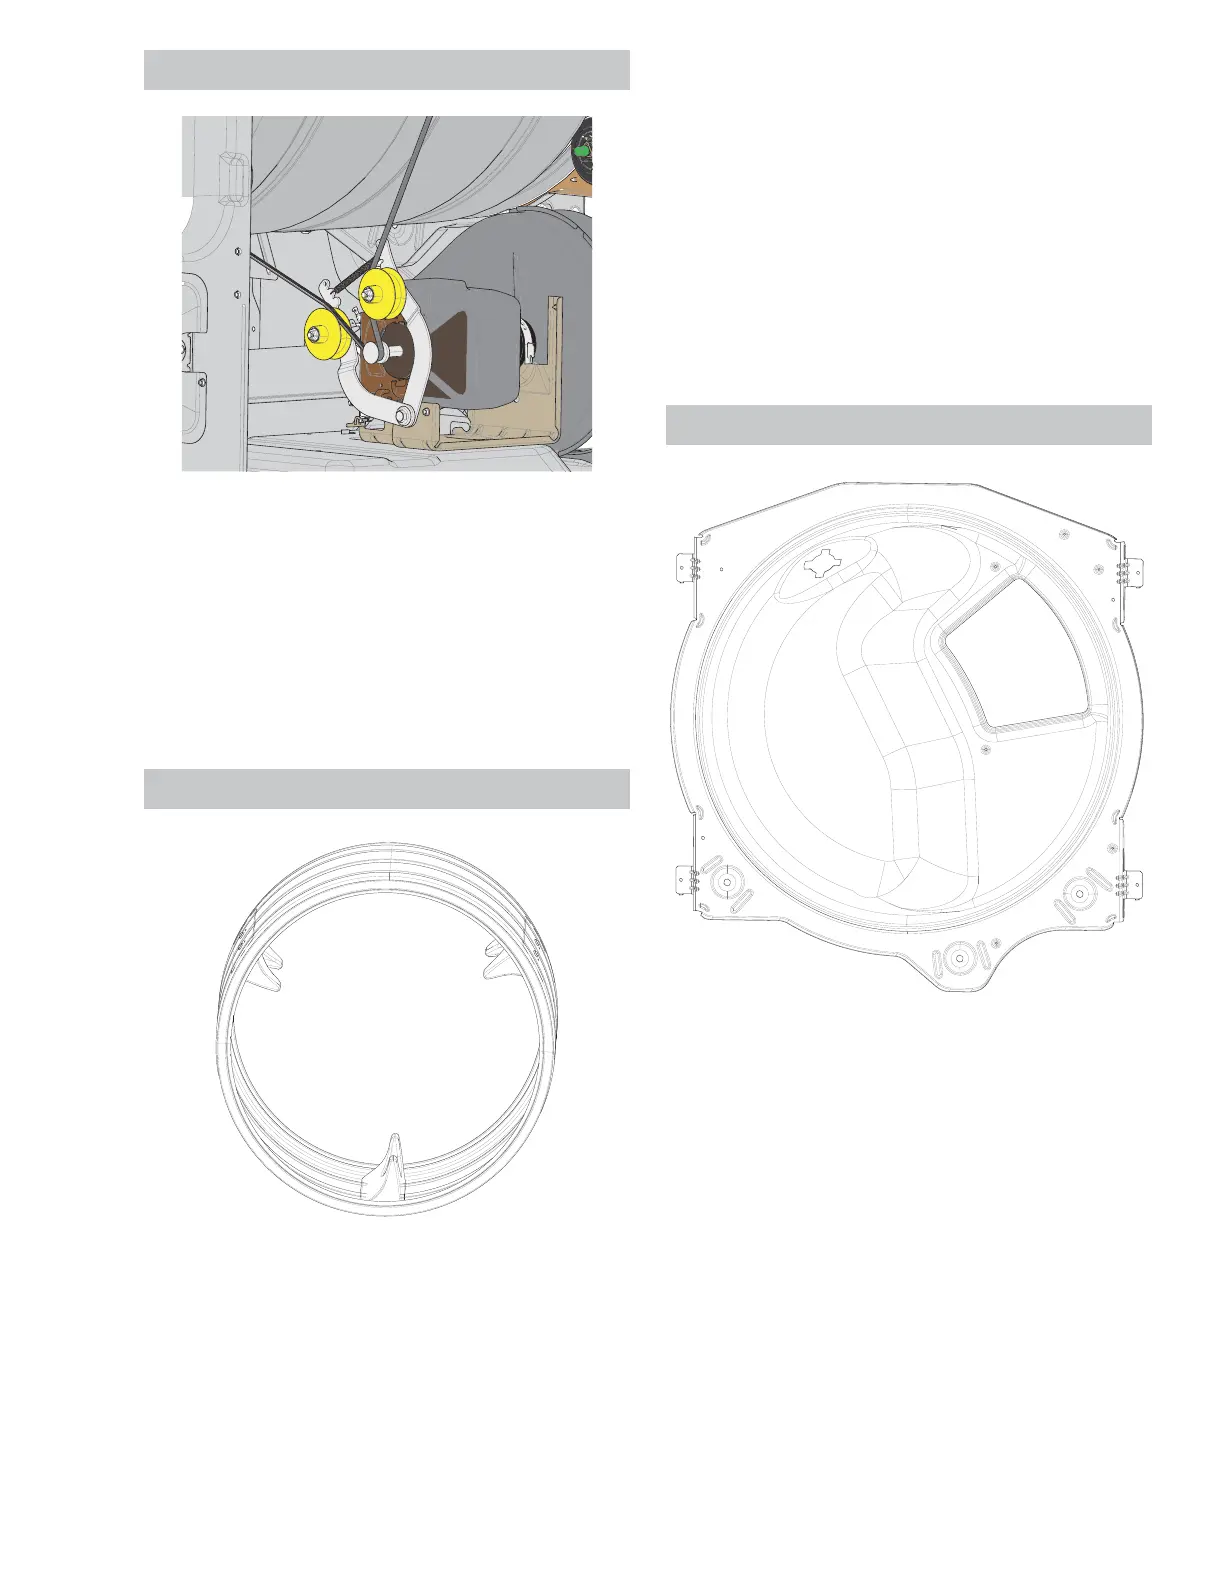
Drive Belt
Drive Belt Removal
1. Disconnect power from the unit .
2. Remove the control panel.
3. Remove the front panel.
4. Remove the front drum support .
Drum
Th e d r um f el t i s a p a r t o f t h e d r u m an d ca n n ot
be replaced separately. The drum can be installed
backward. When viewing from the front of dryer, the
EDȼHZLOOVORSHIURPLWVORZHVWSRLQWRQWKHOHIWWR
its highest point on the right as shown in the picture
above.
Drum Removal
1. Disconnect power from the unit .
2. Remove the control panel.
3. Remove the front panel.
4. Remove the trap duct .
5. Remove the drum lamp.
6. Remove the front drum support .
7. Remove the belt .
8. Pull the drum out from the front of the dryer.
Rear Drum Support
Re a r Dr u m Su p p o r t Rem o v a l
1. Disconnect power from the unit .
2. Remove the control panel.
3. Remove the front panel.
4. Remove the trap duct .
5. Remove the drum lamp.
6. Remove the front drum support .
7. Remove the belt .
8. Pull the drum out from the front of the dryer.
9. Remove the rear panel.
10. Remove the rear duct .
See Co n t r o l Pa n e l Rem o v a l o n p a g e 2 0 .
See Fr o n t Pa n e l Re m o v a l o n p a g e 2 4 .
See Co n t r o l Pa n e l Rem o v a l o n p a g e 2 0 .
See Fr o n t Pa n e l Re m o v a l o n p a g e 2 4 .
See Tr a p D u c t Rem o v a l o n p a g e 38 .
See L ED D r u m L a m p Re m o v a l o n p a g e 3 3.
See I n c a n d es c en t D r u m La m p Rem o v a l o n
page 34.
See Fr o n t D r u m Su p p o r t Rem o v a l o n p a g e 34 .
See Re a r Pa n el Rem o v a l o n p a g e 26 .