37
5. Remove the drum lamp.
6. Remove the front drum support .
7. Remove the belt .
8. Pull the drum out the front of the dryer.
9. Remove the inlet ring.
10. Remove the 14 mm reverse thread blower wheel
back-up nut .
11. Unscrew the reverse thread blower wheel.
12. Unhook the idler pulley spring and spread the
pulley apart .
13. Remove the motor wire harness.
14. Remove the two motor mounting clips.
15. Remove the motor.
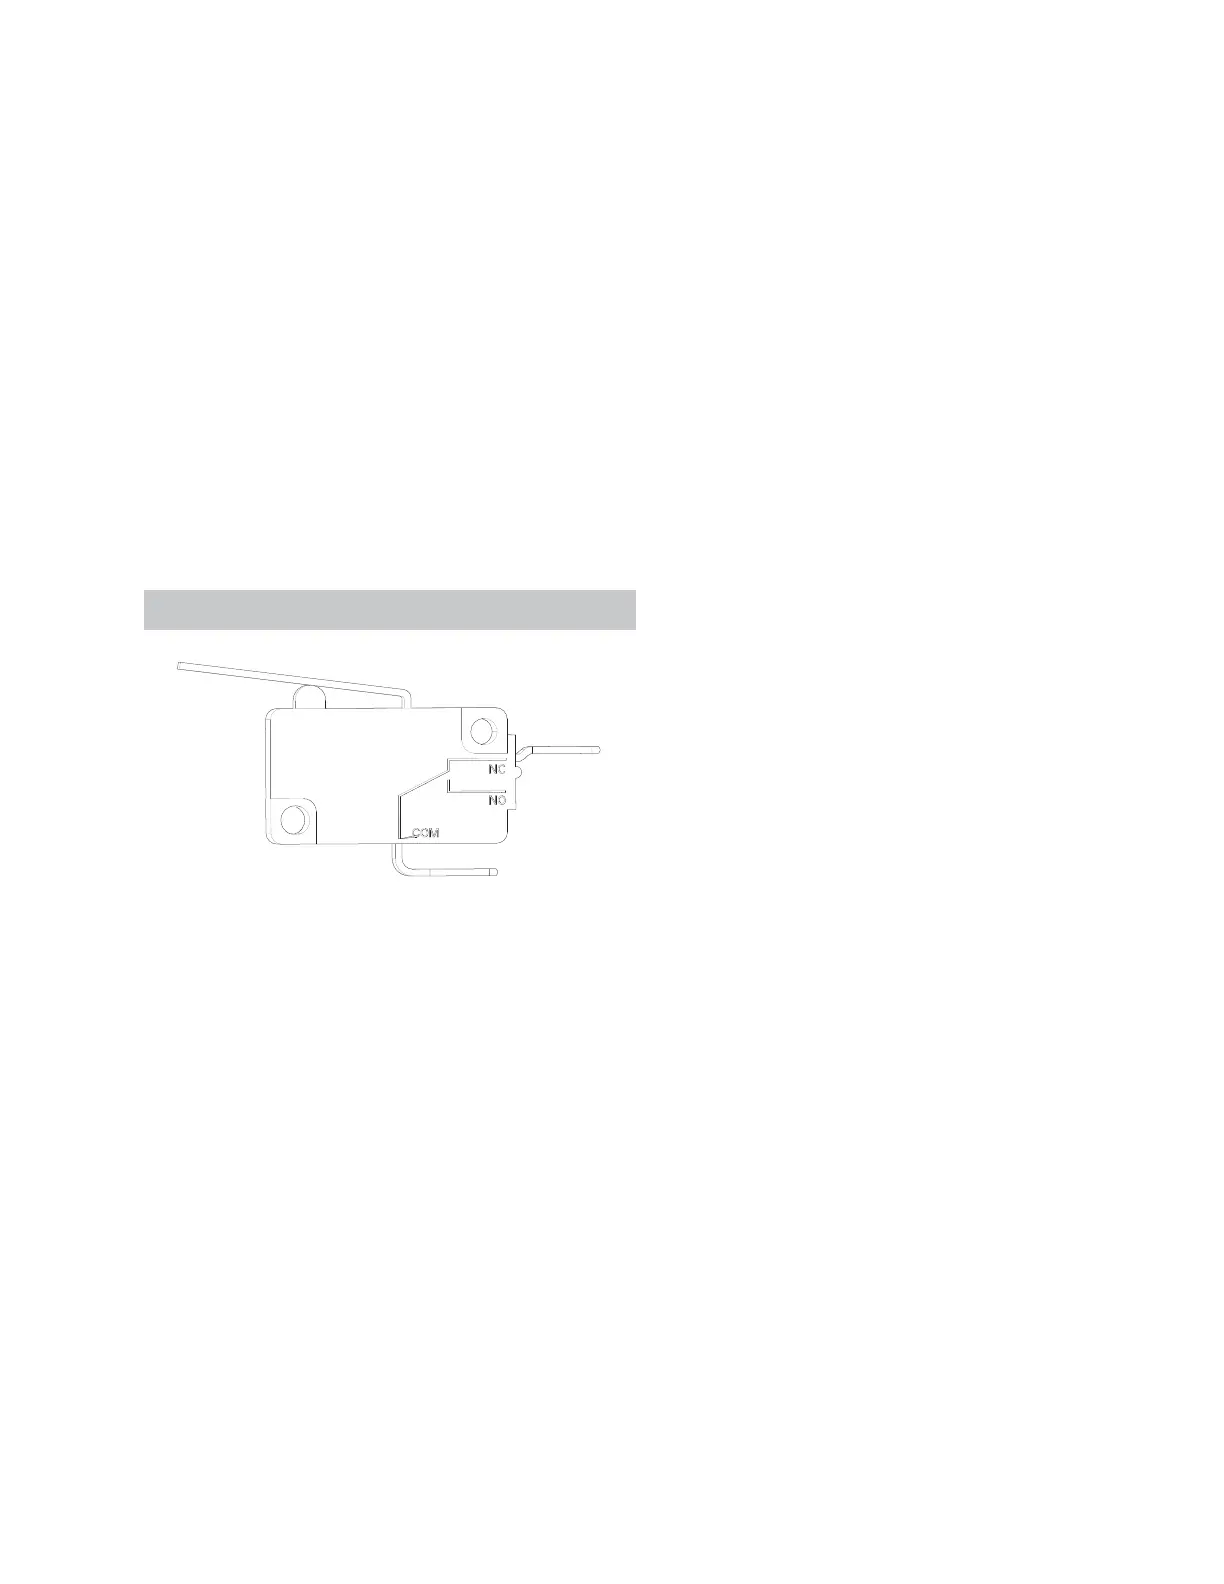
Bel t Swi t ch
Bel t Sw it ch Removal
1. Disconnect power from the unit .
2. Remove the control panel.
3. Remove the front panel.
4. Remove the trap duct .
5. Remove the drum lamp.
6. Remove the front drum support .
7. Remove the belt .
8. Pull the drum out from the front of the dryer.
9. Remove the two idler switch wires.
10. Remove the T-8 mounting screw.
11. Remove the belt switch.
12. NOTE: When reinst alling, make sure t he align-
ment pin is in the second hole of the belt switch.
See Tr a p D u c t Rem o v a l o n p a g e 38 .
See L ED D r u m L a m p Re m o v a l o n p a g e 3 3.
See I n c a n d es c en t D r u m La m p Rem o v a l o n
page 34.
See Fr o n t D r u m Su p p o r t Rem o v a l o n p a g e 34 .
See I n l e t Ri n g Rem o v a l o n p a g e 3 9 .
See Co n t r o l Pa n e l Rem o v a l o n p a g e 2 0 .
See Fr o n t Pa n e l Re m o v a l o n p a g e 2 4 .
See Tr a p D u c t Rem o v a l o n p a g e 38 .
See L ED D r u m L a m p Re m o v a l o n p a g e 3 3.
See I n c a n d es c en t D r u m La m p Rem o v a l o n
page 34.
See Fr o n t D r u m Su p p o r t Rem o v a l o n p a g e 34 .