GE Analytical Instruments ©2010 124 of 226 DLM 74001-04 Rev. A
Chapter 6: Calibration and System Protocols
Accuracy, Precision, and Calibration Verification
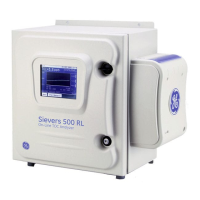
The Sievers 500 RL On-Line TOC Analyzer automatically calculates accuracy, precision, and calibration
verification values. Use this procedure to confirm that the Analyzer’s current calibration is accurate.
GE Analytical Instruments recommends performing a verification after replacement of consumables, such as
the pump heads (with pump tubing), DI water cartridge, or UV lamp, and after calibration. If your configuration
does not measure conductivity, you will not be using the conductivity standard for this protocol.
To perform accuracy, precision, and calibration verification, follow this procedure:
1. If the Analyzer is taking measurements, press the Stop Analysis button.
2. Press the Menu button, select the Maintenance tab, press the Cal/Ver/Validate button, and press the
Acc/Prec/Ver button.
1. If the Analyzer is taking measurements, press the Stop Analysis button.
2. If you have a Super iOS System, the Select Rinse screen appears. Otherwise, go to step 10.
3. Select one of the following rinse options, and then press the Next button.
•No Rinse
•Before
•After
• Before and After
4. If you have selected No Rinse or After, and there are vials in the Super iOS, remove them now. Press
Next to continue. Wait for the Analyzer to drain each of the Super iOS vial chambers (about 2 minutes).
5. If you have selected to run a rinse, the Analyzer will prompt you to do one of the following:
• Insert the Super iOS Rinse vial set into the Super iOS.
• Or, if using individual rinse vials, press Next for additional instructions. Insert the individual vials in
the Super iOS, and then press No Set to proceed.
6. Do one of the following:
• If you have a purchased vial set, insert the Accuracy, Precision, an Calibration Verification standards
cartridge into the Super iOS System with the label facing away from the Analyzer and press Next.
• If you have purchased individual vials rather than a vial set in a cartridge, confirm the value shown
on the Conductivity Standard label. Next, make sure the vials are inserted into the iOS System vial
ports in the following order:
Port 1=empty
Port 2 = Verification Blank
Port 3 = Accuracy/Precision and Verification Standard
Port 4 = Conductivity Standard
Press the Next button, and then press the No Set button.
 Loading...
