T
1
B
1
1
2
2
3
CF-9 User's Guide
14 GPD Global 09/30/92
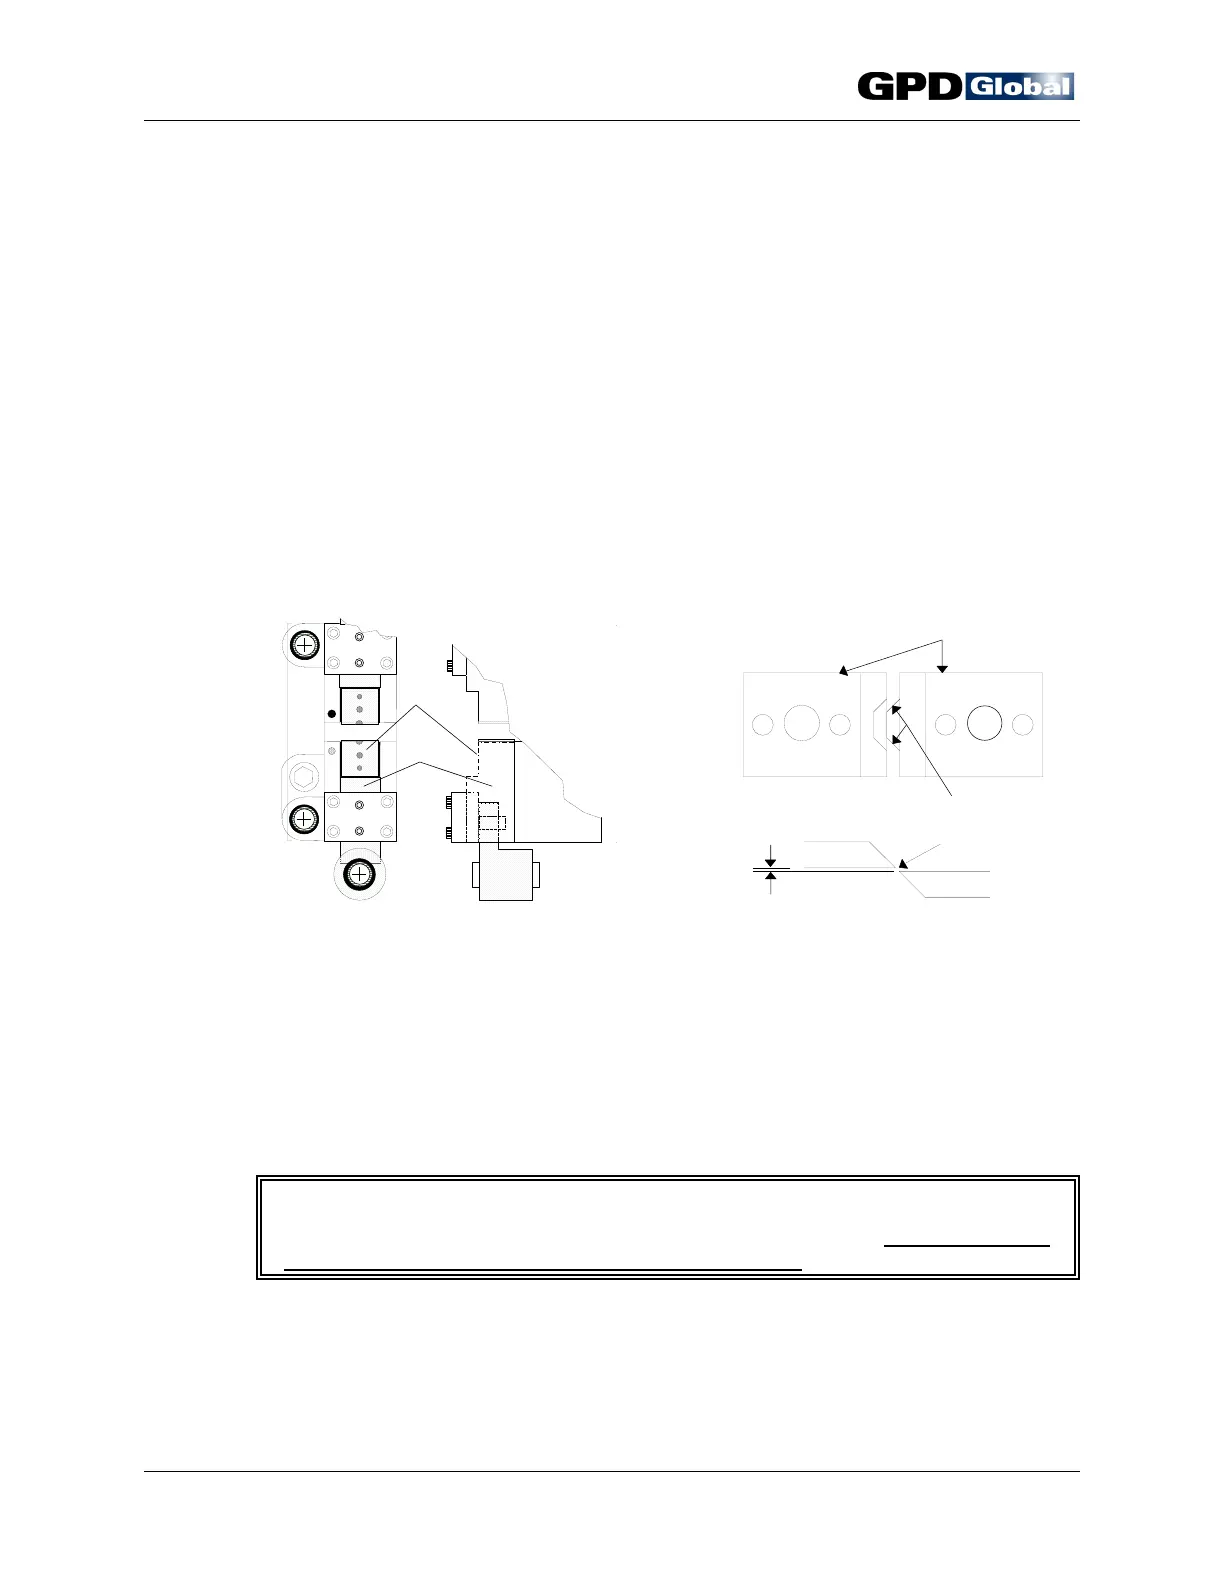
Figure 8 Die Mounting Surface & Die Block
Slide
Figure 9 Die Alignment & Knife Clearance
Die Installation
To properly position dies in Stations 1 and 2 and insure efficient machine use, follow
the die installation steps below. Be sure to test all adjustments with the manual hand
crank to verify that component body will not be damaged by forming dies or knives
and that the component is centered between the die station tooling.
1. Select dies. Refer to CF-9 Component Forming Die Catalog.
2. Clean dies and die slide locating surfaces per Preventive Maintenance "Daily"
instructions.
3. Install dies:
a. Refer to Die Markings (page 9) for proper locations.
b. Carefully place each die on proper die mounting surface (Figure 8, Item
1) and bolt in place with a 5/8" (15.75 mm) screw. Then manually turn
machine's hand crank (page 6) until die block slides (Item 2) are in their
fully closed position.
c. Visually inspect alignment of die forming area to insure equal spacing on
both sides (Figure 9, Item 2).
d. Properly align die edges (Item 1) in relation to each other, centering each
die and knife in its station.
e. Adjust air gap clearance between dies (Item 3) to an even distance.
4. Check die alignment with hand crank prior to powering on machine.
I M P O R T A N T
The hand crank can be used to move mechanisms in reverse only during setup
and only when no components are loaded in machine.
5. Adjust die stations as necessary to obtain desired form and cut by aligning
components with dies and adjusting each station's height per the following
Station Adjustment and Component Alignment instructions.