T
1
B
1
3
2
1
1
CF-9 User's Guide
26 GPD Global 09/30/92
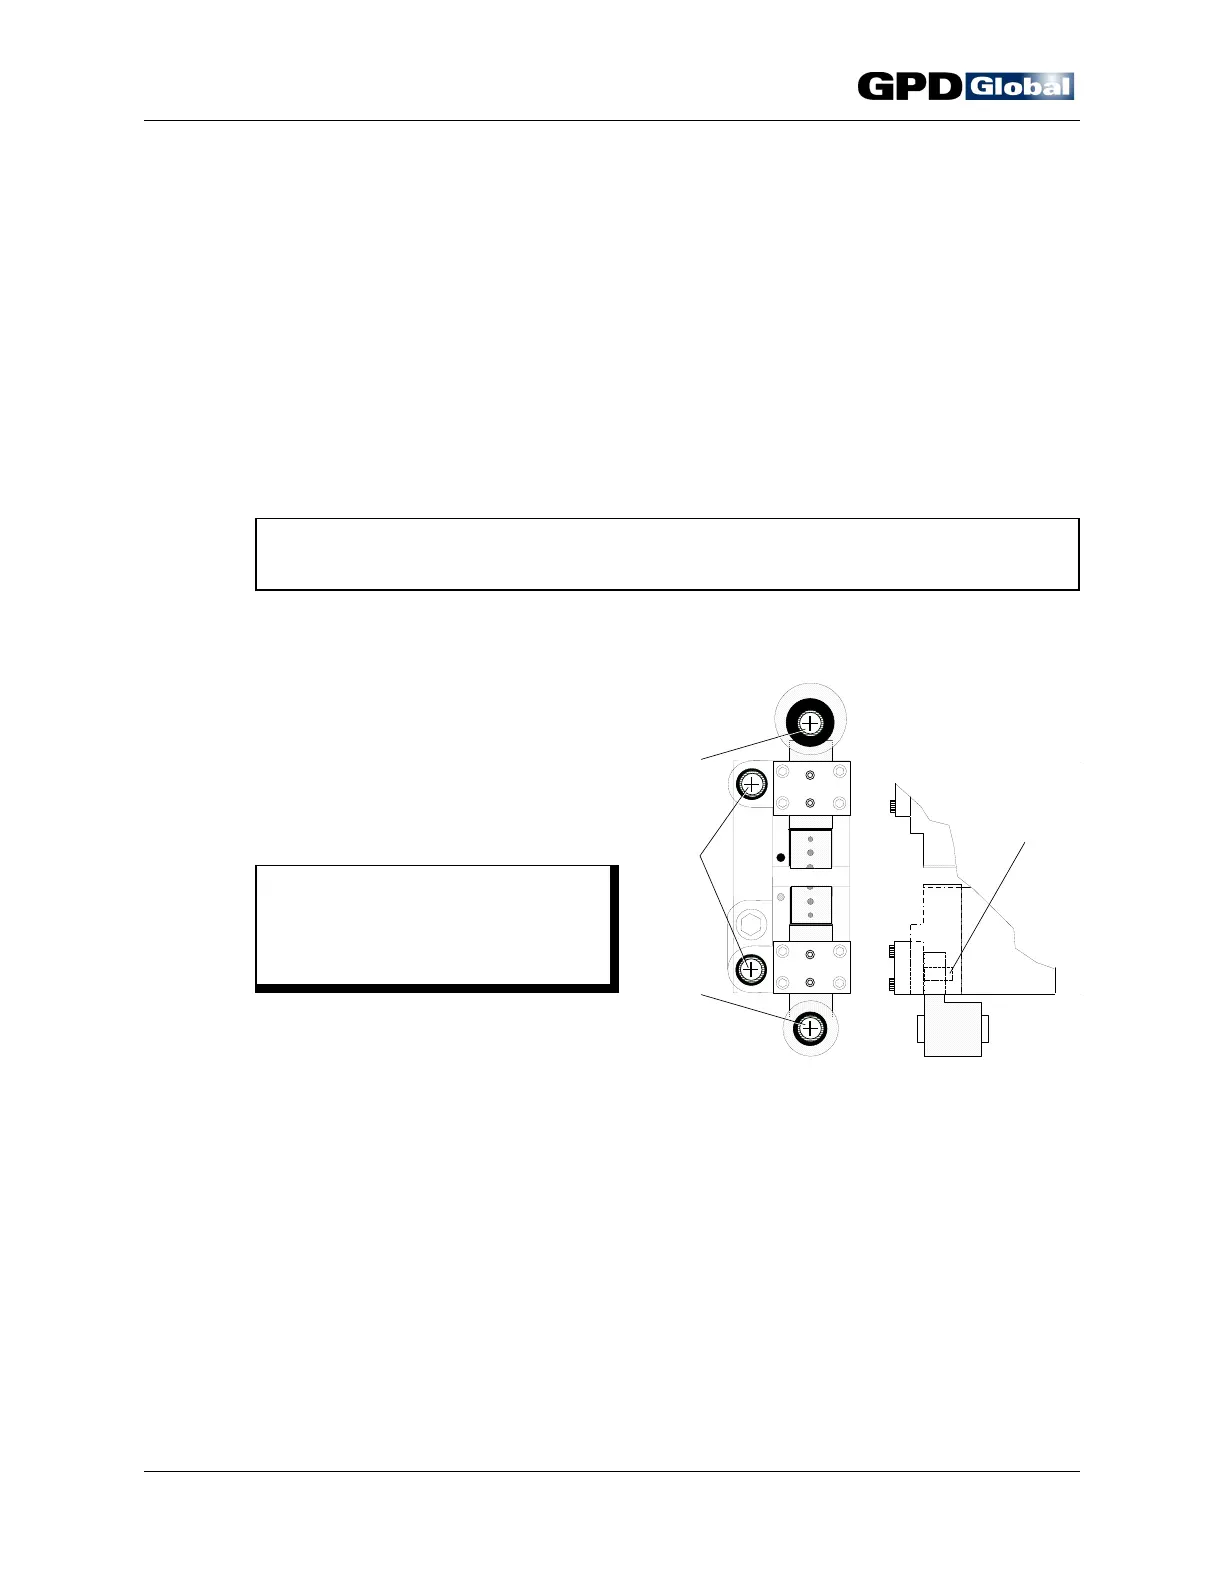
Figure 21 Die Block Assembly Lubrication
8) and compare heights. For mated dies to function together properly, replace dies
and/or slide blocks if heights are not within .0005" (0.0127 mm) of each other.
4. Set clearance.
a. Loosen cover plate's inner set screw (Figure 20, Item 4) approximately a quarter turn.
b. Slowly loosen outer set screw (Item 5) just until slide moves freely.
c. Tighten inner set screw until a slight drag is felt.
d. Install die screw in slide to prevent slide from slipping out of die block.
e. Position slide flush with back side of die block.
f. Locate a dial indicator on the slide's die mounting surface and set the clearance to
.0007 - .001" (.0178 - .0254 mm) by pulling up on die screw. After clearance is set,
verify that slide moves freely.
NOTE
If slide does not move freely, loosen outer set screw slightly. Recheck clearance.
g. Secure screws by applying modest amount of penetrating thread locker (Loctite
#290).
h. Repeat step 4. for remaining slides.
5. Lubricate parts.
a. Generously apply 5 weight oil (3-in-1)
to all sides of slide and crank pin
(Figure 21, Item 3), working in
thoroughly.
C A U T I O N
D
O NOT USE A PENETRATING OIL
(WD-40)
AS THIS WILL CAUSE DIE
BLOCK SEIZURE
.
b. Sparingly apply oil to eccentric crank
shafts (Item 1) and die block guide
shafts (Item 2).
6. Reinstall die block assembly.
a. Slide die block assembly straight onto machine until die block adjusting bolt reaches
hole.
b. Thread die block adjusting bolt into hole.
c. Replace mounting screws for digital scale's lower mounting block.