Maintenance Procedures
18 313527ZAD
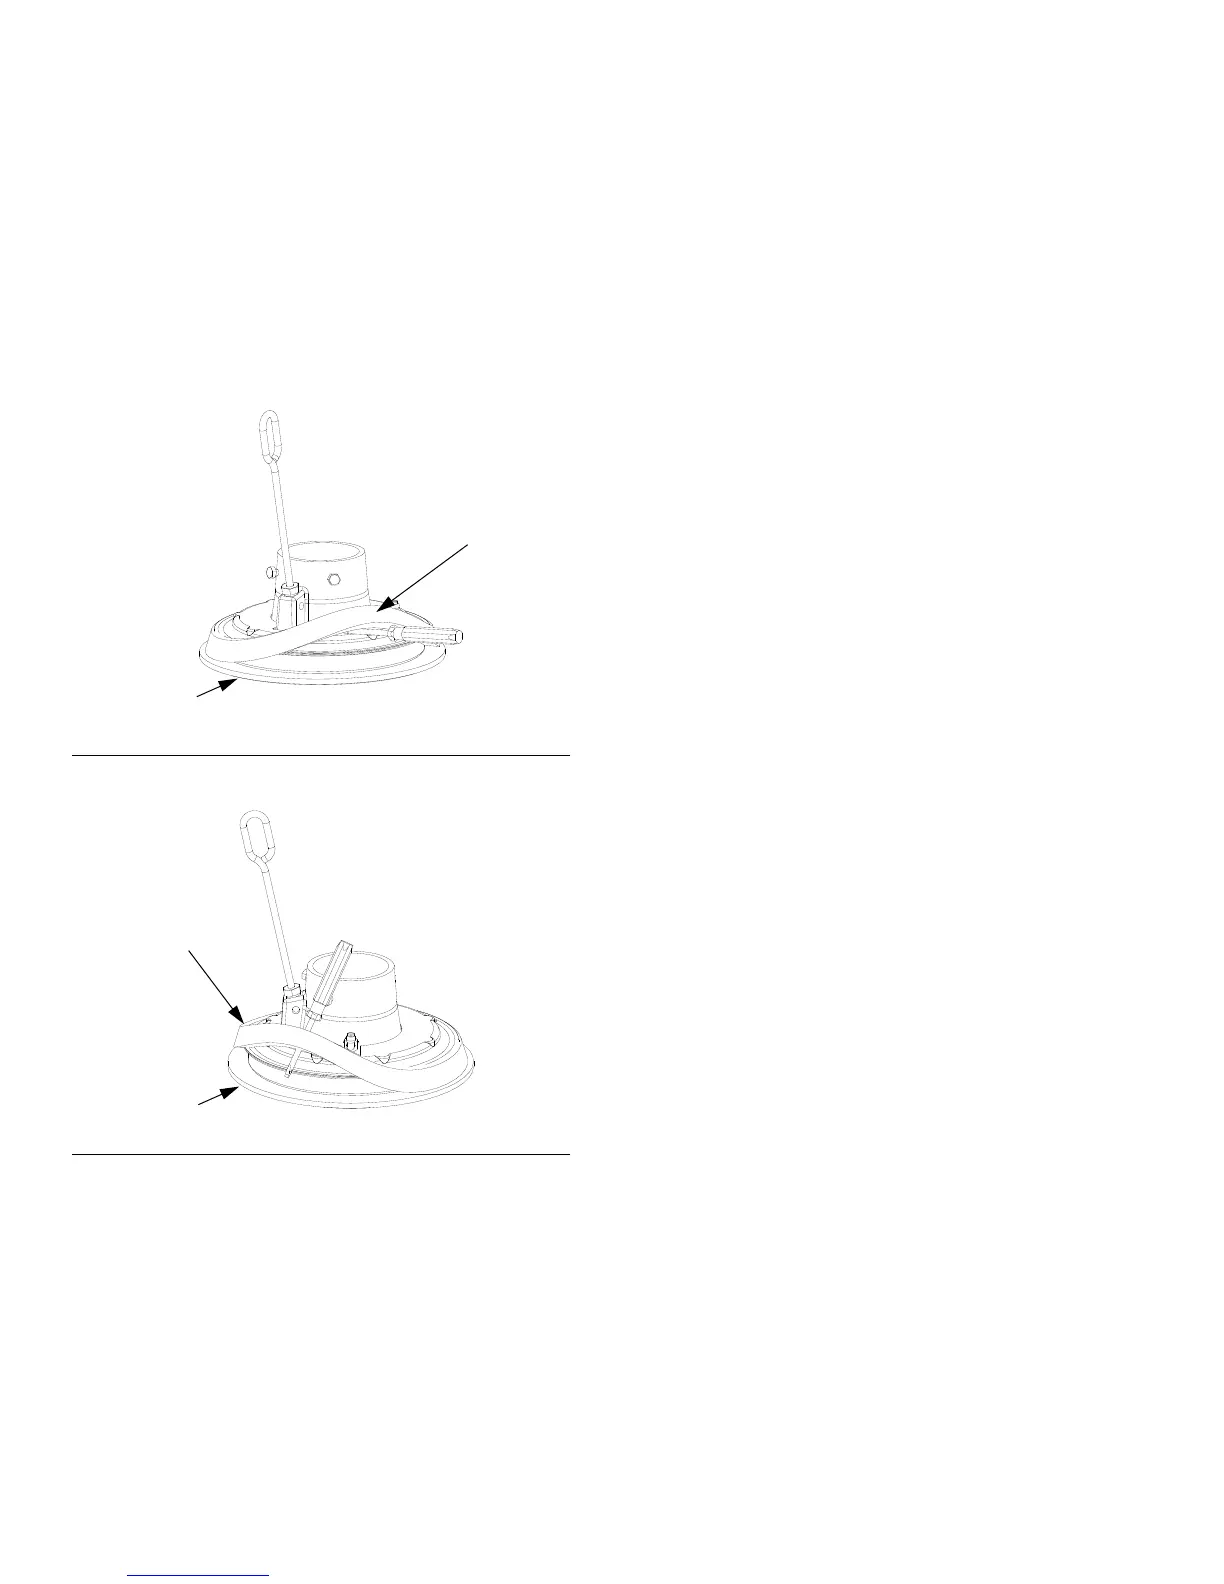
Use platen with straight sided pail
1. Ensure large diameter of spacer (EG) is facing
down. Work spacer (EG) up over the platen by
hand completely above the flange of the platen. See
FIG. 12.
2. Working from the top, use screwdriver to position
spacer (EG) between flange and wipers (EB). See
F
IG. 13.
Remove and Reinstall Wipers
Disassemble 20, 30, and 60 Liter Wiper
Assemblies
1. Remove wiper assembly; see FIG. 14:
a. For all single wiper platens: Remove two clips
(470) with needle nose pliers and remove platen
cover (469).
b. Remove eight nuts (459) that hold wiper assem-
bly to platen casting (451) and remove wiper
assembly.
c. See Reassemble 20, 30, and 60 Liter Wiper
Assemblies to change wiper sizes, styles, or a
complete wiper assembly.
2. Remove eight nuts (459) on wiper assembly.
3. Separate top plate (457), spacer (452), wiper(s)
(453), wiper support (454), and bottom plate (455).
4. Clean, inspect, and replace worn components.
F
IG. 12: Sliding spacer
FIG. 13: Installing Spacer
EG
EB
r_255468_313527_30a
EG
EB
r_255468_313527_32a