EasyManua.ls Logo

Graco PR70 - User Manual

Graco PR70
82 pages
Print Icon
To Next Page IconTo Next Page
Loading...
312759W
EN
Operation - Maintenance
PR70
and PR70v
with Advanced Display Module
Fixed or variable ratio systems. For accurate metering, mixing, and dispensing of
two-component materials. For professional use only.
Not approved for use in European explosive atmosphere locations.
3000 psi (21 MPa, 207 bar) Maximum Working Pressure
100 psi (0.7 MPa, 7 bar) Maximum Air Inlet Pressure
Important Safety Instructions
Read all warnings and instructions in all sup-
plied manuals. Save these instructions.
PR70v Shown with Advanced Display Module
ti12385b

Other manuals for Graco PR70

Questions and Answers

  • A
    allendwayneSep 1, 2025
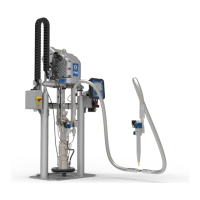
    What to do if my Graco PR70 Dispenser is not dispensing the correct amount of material?
    • A
      Anita ParksSep 1, 2025
      If the Graco Dispenser isn't dispensing material, or the amount is incorrect, there might be several reasons. First, ensure the tank ball valve is open. Next, check if the tank is empty or clogged. If not, there may be air in the material, so prime the machine to remove it. A malfunctioning check valve may also be the cause; try removing, cleaning, or replacing it. Lastly, a worn or broken piston can cause this issue, so remove and replace the piston if necessary.
  • H
    hayesmichaelAug 31, 2025
    How to fix significant material leaking from pump rear seal on Graco PR70 Dispenser?
    • D
      Derek JonesAug 31, 2025
      If there is significant material leaking from the pump rear seal of your Graco Dispenser, it is likely that the pump shaft is worn. Remove the pump shaft assembly and reinstall the rear pump rebuilt kit.
  • N
    Nancy PageAug 30, 2025
    What causes pumps drawing material back from valve hose on Graco PR70?
    • S
      shelley98Aug 30, 2025
      If the pumps are drawing material back from the valve hose on your Graco Dispenser, the check valve might be stuck open. Remove the check valve and clean or replace it as necessary.
  • S
    Sarah DuranAug 29, 2025
    Why is my Graco PR70 Dispenser not dispensing the correct amount of material?
    • J
      johnharrisAug 29, 2025
      If the Graco Dispenser is not dispensing the correct amount of material from either side, make sure the tank ball valve is open (if installed). Check if the tank is empty and fill it with material if needed. Ensure there are no obstructions in the tank. Prime the machine to remove any air in the material. Remove, clean, or replace the check valve if it's malfunctioning. If the piston is worn, remove and replace it.
  • T
    Tammy NolanAug 28, 2025
    How to fix a completely dark display module on Graco PR70?
    • A
      Amber MoralesAug 28, 2025
      If the Display Module of your Graco Dispenser is completely dark, first verify that the rear AC Power switch is ON. If it's on and the display is still dark, replace the machine fuses. Check and tighten the 5-pin cable on the Display Module to ensure a secure connection. If the problem persists, the Display Module may be faulty and require replacement.
  • T
    twilliamsonAug 27, 2025
    What to do if the piston is stalled on my Graco Dispenser?
    • T
      Tiffany MartinezAug 27, 2025
      If the piston in your Graco Dispenser is stalled, reconnect the input air line to the machine and increase the air pressure regulator adjustment. Replace the static mixer, and consider incorporating a purge timer or decreasing its delay to prevent mixer blockage. Readjust the Open Dispense Valve (ODV) setting to occur sooner. Remove, clean, and replace any blocked check valves. If these steps don't resolve the issue, the air cylinder may have failed, requiring you to remove and reinstall the air cylinder parts as necessary.
  • T
    Tracy WatkinsAug 27, 2025
    What to do if my Graco PR70 is dispensing off ratio?
    • A
      Amy DoyleAug 27, 2025
      If your Graco Dispenser is dispensing off ratio, start by checking the tank levels and adding material if necessary. Ensure the tank ball valve is open and prime the machine. If the machine is out of phase, rephase it. Also, check the valve for any malfunctions, and clean or replace it as needed. Finally, replace the piston if it's worn or broken.
  • E
    escottAug 25, 2025
    Why is the material dispensed from my Graco Dispenser not the correct weight?
    • B
      brownnicholasAug 26, 2025
      If the Graco Dispenser is dispensing material that is not the correct weight, first, recalibrate the machine if the specific gravity of the materials has changed or if the air pressure has changed since the last calibration. Also, ensure there is enough material in the tanks, filling and priming as needed. If there's a slight obstruction in the mixer, replace it and prime the machine. Finally, inspect the check valve for malfunctions, cleaning or replacing it if necessary, and replace the piston if it's worn or broken.
  • D
    Darren MooreAug 25, 2025
    What does error code E24 mean on Graco PR70 Dispenser?
    • A
      Ariana SandersAug 25, 2025
      If you receive an E24 Improper Calibration Error on your Graco Dispenser, it indicates that the machine's calibration is invalid, preventing the requested shot from being executed. To resolve this, correct the calibration on the machine.

Summary

Product Configurator

Warnings

ELECTRIC SHOCK HAZARD

Hazards related to electrical shock during operation.

SKIN INJECTION HAZARD

Risks of high-pressure fluid injection and necessary precautions.

TOXIC FLUID OR FUMES HAZARD

Dangers from toxic fluids and fumes, requiring safety measures.

PERSONAL PROTECTIVE EQUIPMENT

Essential protective gear for safe operation and maintenance.

FIRE AND EXPLOSION HAZARD

Risks of flammable fumes igniting or exploding in the work area.

EQUIPMENT MISUSE HAZARD

Dangers and injuries resulting from improper equipment operation.

MOVING PARTS HAZARD

Risks of injury from moving mechanical components during operation.

BURN HAZARD

Danger of severe burns from hot equipment surfaces or fluids.

Moisture Sensitivity of Isocyanates

Component Identification

Advanced Display Module (ADM)

Screen Navigation Diagram

Grounding

Installation

Machine Installation

Steps for physically mounting the machine and connecting utilities.

Electrical Requirements

Necessary electrical power and wiring considerations for installation.

Ground System

Importance and procedure for grounding the equipment for safety.

Startup

Setup

Setup Screens

Overview of the different setup screen categories.

Calibration Screen

Screen for performing various calibration procedures.

Options Screens

Screens for configuring fluid and system options.

Heat Options, Screen #2

Settings for tank and hose heater temperature control.

System Options, Screen #3

Configuring general system behavior and run screen options.

Dispense Check Options, Screen #4

Settings for monitoring dispense accuracy.

Piston Position Calibration

Calibrating the piston's extended and retracted positions.

Extended Piston Position

Procedure to set the extended position of the piston.

Retracted Piston Position

Procedure to set the retracted position of the piston.

Engaged Piston Position

Procedure to set the piston position when engaging the cylinder.

Prime the Dispense Head

Procedure to fill the dispense head with material and remove air.

Phasing Adjustment

Adjusting the timing of material delivery for correct ratio.

Adjust Dispense Quantity

Fine-tuning the dispense amount for accurate phasing.

Adjust Phasing

Detailed steps for adjusting material phasing.

Adjust Dispense Valve Snuff Back

Adjusting the valve to prevent material drip or air intake.

Adjust Open Dispense Valve (ODV) Timing

Setting the timing for the dispense valve opening.

Calibrate Dispense Weight Ratio (PR70 v only)

Calibrating the machine for accurate dispensing ratios.

Perform Weight Ratio Check Shot

Performing shots to verify and adjust the dispensing ratio.

Shot Calibration

Performing small and large shots to calibrate dispensing quantities.

Perform Small Calibration Shots

Executing and recording small calibration shots.

Perform Large Calibration Shots

Executing and recording large calibration shots.

Flow Meter Calibration, Screen #5

Calibrating flow meters for accurate ratio.

Perform Flow Meter Calibration Shot

Executing shots to measure and record flow meter data.

External Control Interface Setup

Connecting and configuring external machine controls.

Operation

Operation Screens

Overview of the main operational screens.

Error Screens

Viewing a log of system errors.

Auto-Refill

Configuring and initiating automatic tank refilling.

Temperature Control

Managing tank and hose heater temperatures.

USB Data

Pressure Relief Procedure

Shutdown

Maintenance

Schedule

Recommended maintenance tasks and their frequencies.

Troubleshooting

Error Codes

System Behavior Descriptions

Technical Data

Graco PR70 Specifications

General IconGeneral
Hose LengthCustomizable
Power SourceElectric
Ratio Range1:1 to 12:1
Viscosity RangeUp to 1, 000, 000 cps
MaterialsEpoxies, polyurethanes, silicones, and other two-component materials
ApplicationsPotting, encapsulation, gasketing, sealing, bonding
Dispensing CapacityVariable, based on configuration
WeightApproximately 150 lbs
DimensionsVaries based on configuration

Related product manuals