Repair
Gun Gun
Gun
Barrel Barrel
Barrel
Removal Removal
Removal
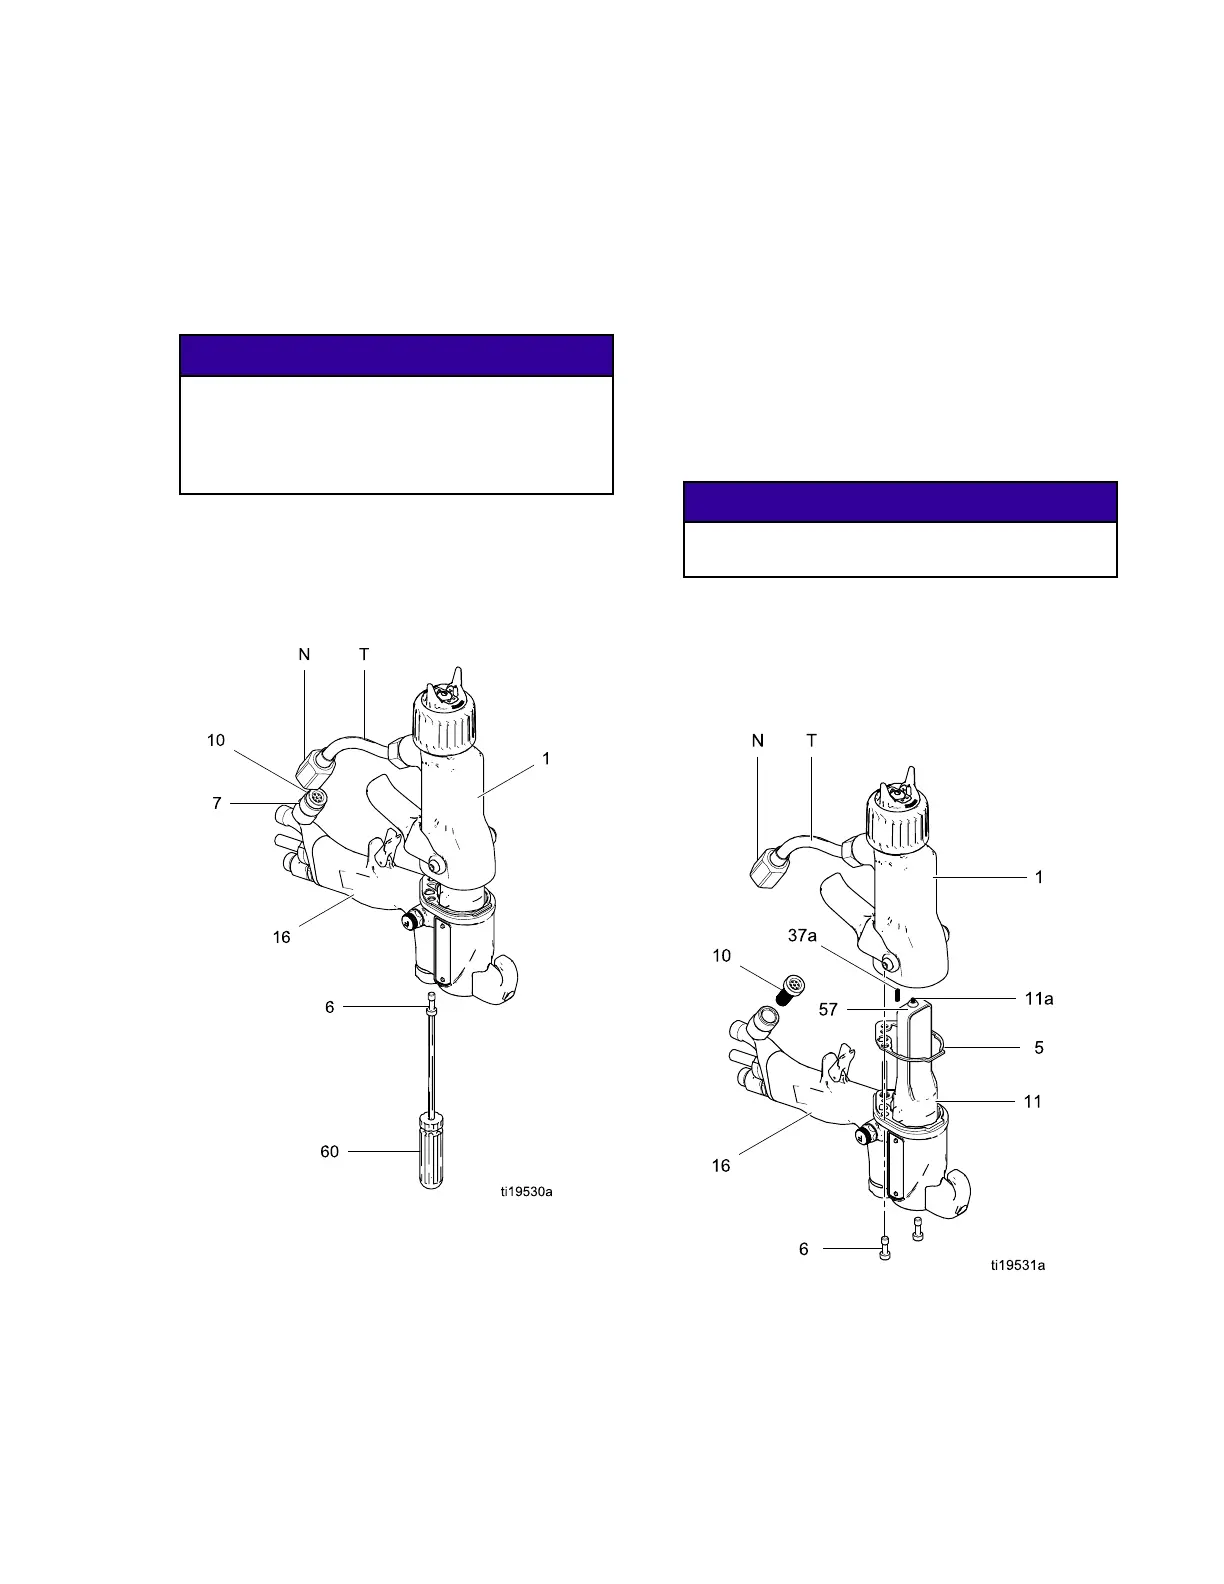
1.SeePreparetheGunforService,page39.
2.Disconnectthebottomuidtubenut(N).
Carefullyseparatethetubeassembly(T)from
thebracket(7).
3.Loosenthetwoscrews(6).
NOTICE NOTICE
NOTICE
Toavoiddamagingthepowersupply(11),
pullthegunbarrelstraightawayfromthegun
handle.Ifnecessary,gentlymovethegun
barrelfromsidetosidetofreeitfromthegun
handle.
4.Holdthegunhandle(16)withonehandandpull
thebarrel(1)straightoffthehandle.
NOTE: NOTE:
NOTE:
Ifthepowersupplyremainsinthebarrel,
removethealternator/powersupplyassemblyfrom
thebarrel.
Figure27GunBarrelRemoval
Gun Gun
Gun
Barrel Barrel
Barrel
Installation Installation
Installation
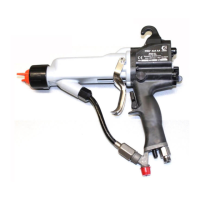
1.Besurethegasket(5*)andgroundingspring
(37a)areinplace.Makesurethegasketair
holesarealignedproperly.Replacethegasketif
damaged.
2.Makesurethespring(11a)isinplaceonthe
tipofthepowersupply(11).Liberally Liberally
Liberally
apply
dielectricgrease(57)tothetipofthepower
supply.Placethegunbarrel(1)overthepower
supplyandontothegunhandle(16).
3.Tightenthetwoscrews(6)oppositelyandevenly
(aboutahalfturnpastsnug,or20in-lbs,2.3
N•m).
NOTICE NOTICE
NOTICE
Toavoiddamagingthegunbarrel,donot
over-tightenthescrews(6).
4.Makesuretheuidlter(10)isinplaceinthe
uidtting.Tightenthebottomnut(N)ontothe
ttingandtorqueto140–150in-lb(15.8–16.9
N•m).Makesurethetopnutremainstight.
5.FollowthestepsinTestGunResistance,page32.
Figure28GunBarrelInstallation
3A2495K43