Repair
Power Power
Power
Supply Supply
Supply
Removal Removal
Removal
and and
and
Replacement Replacement
Replacement
•Inspectthegunhandlepowersupplycavityfordirt
ormoisture.Cleanwithaclean,dryrag.
•Donotexposegasket(5)tosolvents.
1.SeePreparetheGunforService,page39.
2.SeeGunBarrelRemoval,page43.
NOTICE NOTICE
NOTICE
Becarefulwhenhandlingthepowersupply
(11)toavoiddamagingit.
3.Graspthepowersupply(11)withyourhand.
Withagentlesidetosidemotion,freethepower
supply/alternatorassemblyfromthegunhandle
(16),thencarefullypullitstraightout.
OnSmart
Modelsonly,
disconnecttheexiblecircuit(40)
fromthesocketatthetopofthehandle.
4.Inspectthepowersupplyandalternatorfor
damage.
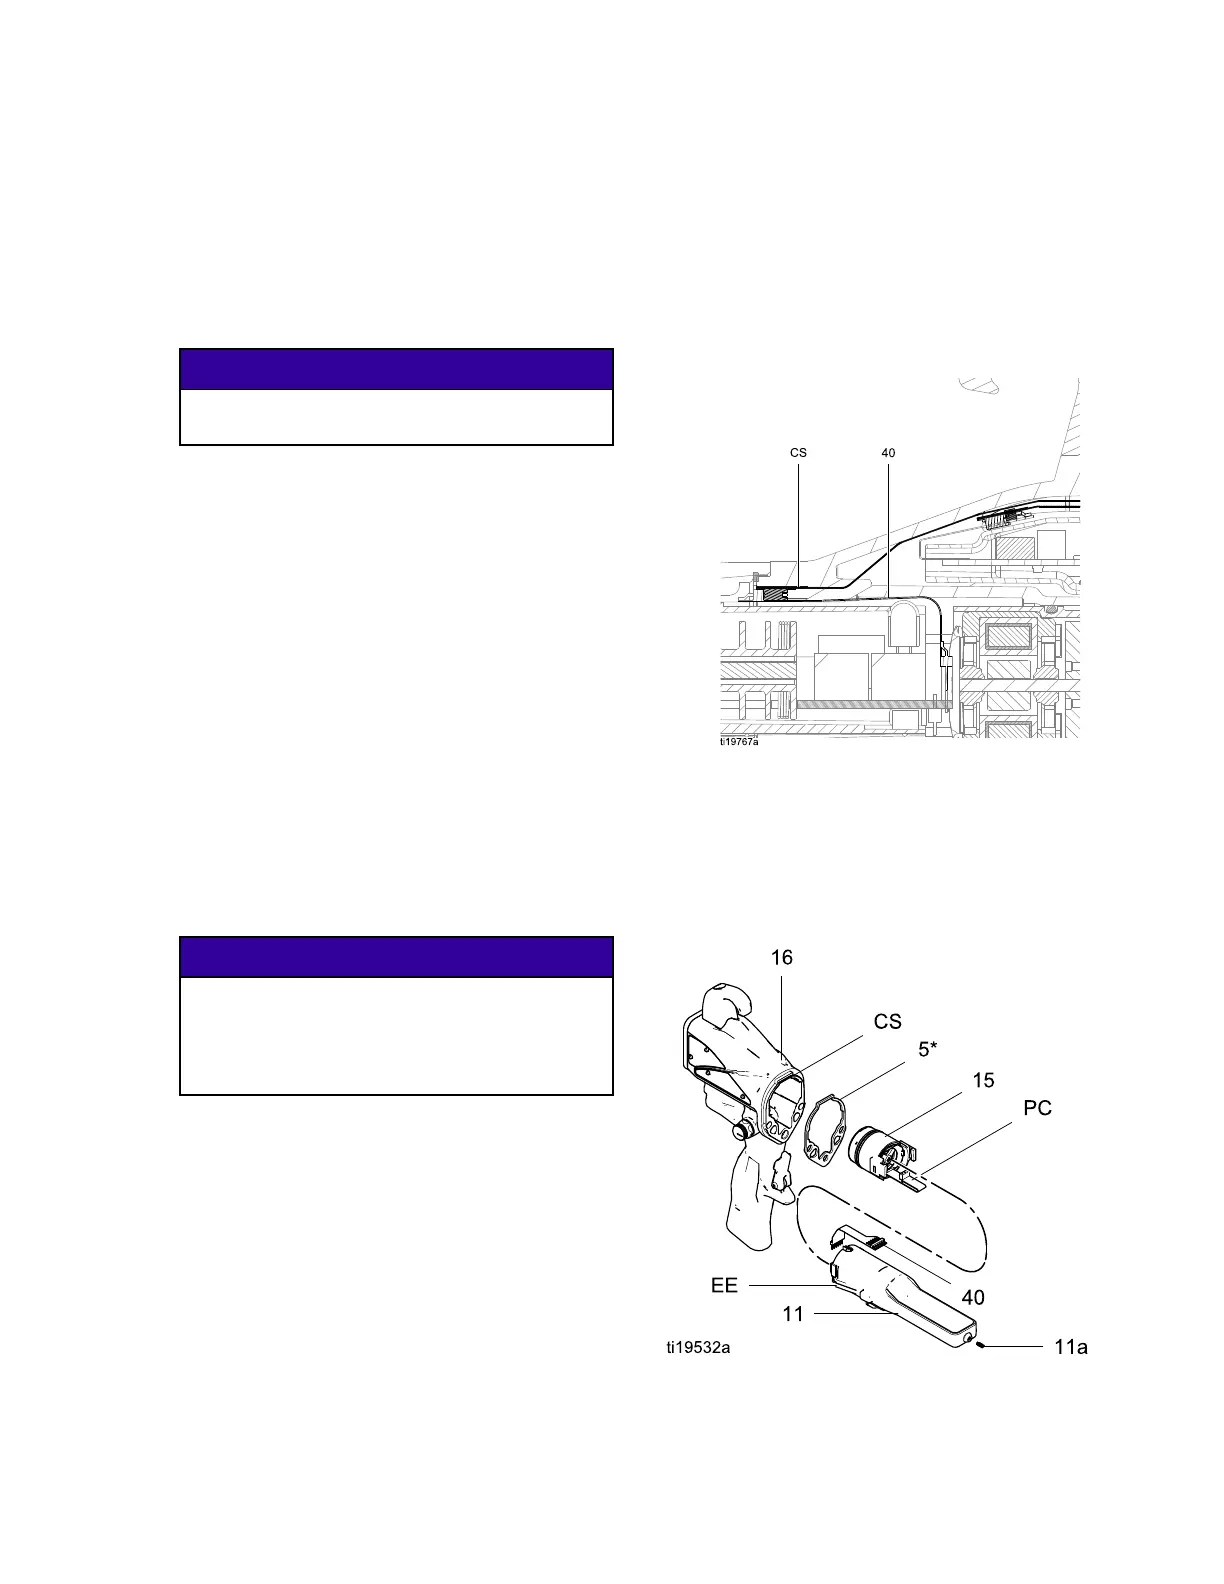
5.Toseparatethepowersupply(11)fromthe
alternator(15),disconnectthe3-wireribbon
connector(PC)fromthepowersupply.
OnSmart
Modelsonly,
disconnectthe6–pinexiblecircuit
(40)fromthepowersupply.Slidethealternator
upandoffthepowersupply.
6.SeeTestPowerSupplyResistance,page33.
Replacethepowersupplyifnecessary.
Torepairthealternator,see
AlternatorRemovalandReplacement,page46.
7.
Smartmodelsonly:
connectthe6–pinexible
circuit(40)tothepowersupply.
NOTICE NOTICE
NOTICE
Topreventdamagetothecableandpossible
interruptionofthegroundcontinuity,bendthe
alternator’s3-wireribboncable(PC)upward
andback,sothebendfacesthepowersupply
andtheconnectorisatthetop.
8.Connectthe3-wireribbonconnector(PC)tothe
powersupply.Tucktheribbonforward,under
thepowersupply.Slidethealternator(15)down
ontothepowersupply(11).
9.Insertthepowersupply/alternatorassemblyin
thegunhandle(16).Makesurethegroundstrips
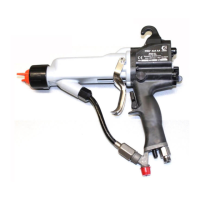
(EE)makecontactwiththehandle.OnSmart
models,aligntheconnectorofthe6–pinexible
circuit(40)withthesocket(CS)atthetopofthe
handle.Pushtheconnectorsecurelyintothe
socketasyouslidethepowersupply/alternator
assemblyintothehandle.
Figure32ConnectFlexibleCircuit
10.Makesurethegasket(5*),groundspring
(37a),andpowersupplyspring(11a)are
inplace.Replacegasket(5*)ifdamaged.
Assemblethebarrel(1)tothehandle(16).See
GunBarrelInstallation,page43.
11.SeeTestGunResistance,page32.
Figure33PowerSupply
3A2495K45
 Loading...