Repair
Alternator Alternator
Alternator
Removal Removal
Removal
and and
and
Replacement Replacement
Replacement
NOTE: NOTE:
NOTE:
Replacealternatorbearingsafter2000hours
ofoperation.OrderPartNo.24N706BearingKit.
Partsincludedinthekitaremarkedwithasymbol(♦).
1.SeePreparetheGunforService,page39.
2.Removethepowersupply/alternatorassembly
anddisconnectthealternator.SeePowerSupply
RemovalandReplacement,page45.
3.Measureresistancebetweenthetwoouter
terminalsofthe3-wireconnector(PC);itshould
be2.0–6.0ohms.Ifoutsidethisrange,replace
thealternatorcoil(15a).
4.Usingaatbladescrewdriver,prytheclip(15h)
offthehousing(15d).Removethecap(15f),
usingathinbladeorscrewdriver.
5.Ifnecessary,rotatethefan(15e)soitsblades
clearthefourbearingtabs(T)ofthehousing
(15d).
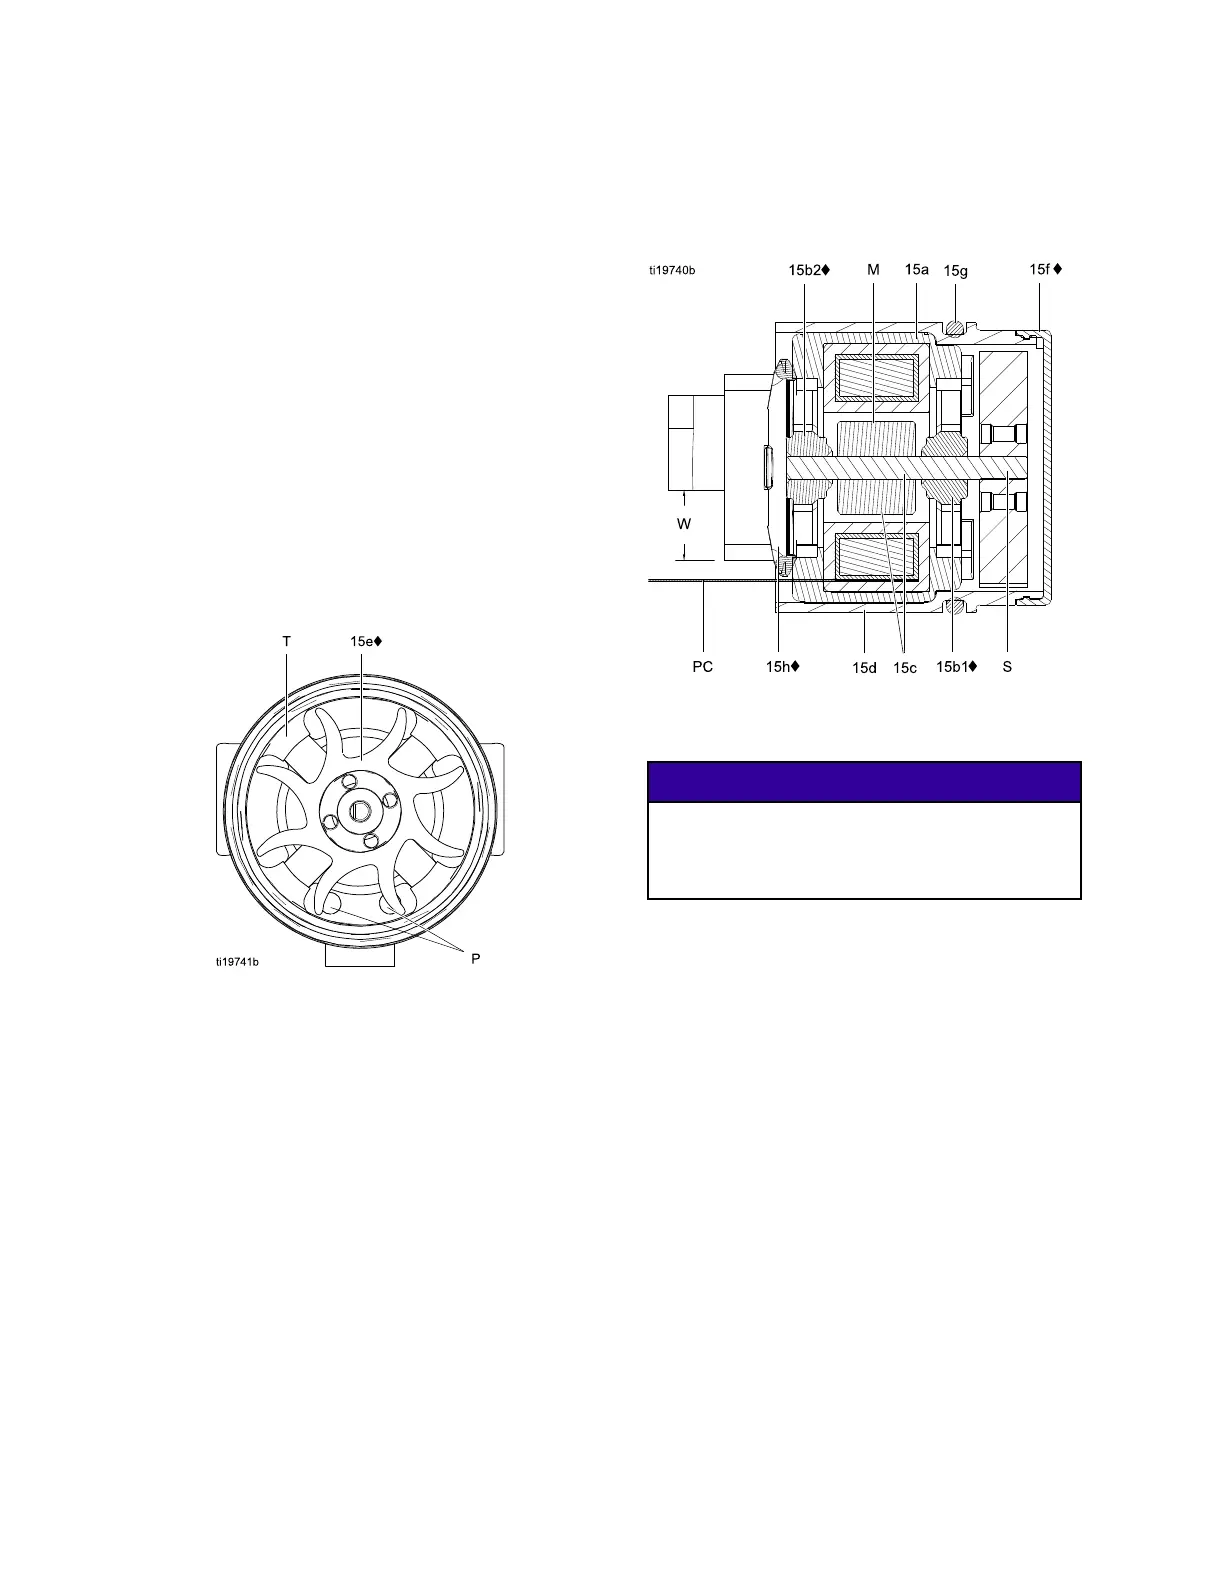
Figure34FanOrientation
6.Pushthefanandcoilassembly(15a)outthe
frontofthehousing(15d).
Figure35AlternatorCross-Section
♦5isnotshownintheillustration.
NOTICE NOTICE
NOTICE
Donotscratchordamagethemagnet(M)or
shaft(S).Donotpinchordamagethe3–wire
connector(PC)whendisassemblingand
reassemblingthebearings.
7.Holdthecoilassembly(15a)onaworkbench
withthefanendfacingup.Usingawideblade
screwdriver,prythefan(15e)offtheshaft(S).
8.Removethetopbearing(15b2).
9.Removethebottombearing(15b1).
10.Installthenewbottombearing(15b1♦)onthe
longendoftheshaft(S).Theattersideofthe
bearingmustfaceawayfromthemagnet(M).
Installinthecoil(15a)sothebearingbladesare
ushwiththesurfaceofthecoil.
11.Pressthenewtopbearing(15b2♦)ontotheshort
endoftheshaftsothebearingbladesareush
withthesurfaceofthecoil(15a).Theatterside
ofthebearingmustfaceawayfromthecoil.
463A2495K