Repair
NOTICE NOTICE
NOTICE
Donotovertightentheuidseathousing(24).
Overtighteningmaydamagethehousingand
thegunbarrel,resultinginimproperuid
shutoff.
6.Triggerthegunandinstalltheuidseathousing
(24).Tightenuntilsnug,then1/4turnmore.
7.Checkthatthespraytipgasket(27a)isinplace.
Alignthespraytiptabwiththegrooveintheair
cap(25).Installthespraytip(27)intheaircap.
8.Makesurethattheelectrode(25a)isinstalled
correctlyintheaircap.
9.Checkthattheaircapo-ring(25b)isinplace.
10.Checkthattheu-cup(22a)isinplaceonthe
retainingring(22).Thelipsoftheu-cupmust
faceforward.
NOTICE NOTICE
NOTICE
Toavoiddamagingthetipguard,orientthe
aircapassembly(25)beforetighteningthe
retainingring(22).Donotturntheaircap
whentheretainingringistight.
11.Orientatetheaircapandtightentheretaining
ringsecurely.
12.SeeTestGunResistance,page32.
Electrode Electrode
Electrode
Replacement Replacement
Replacement
Toreducetheriskofre,explosion,orelectric
shock,donotoperatethespraygunwithoutthe
electrodeinstalledintheaircap.
1.Followthestepsin
PreparetheGunforService,page39.
2.Removetheaircapassembly(25).See
AirCap,SprayTip,andFluidSeatHousing
Replacement,page40.
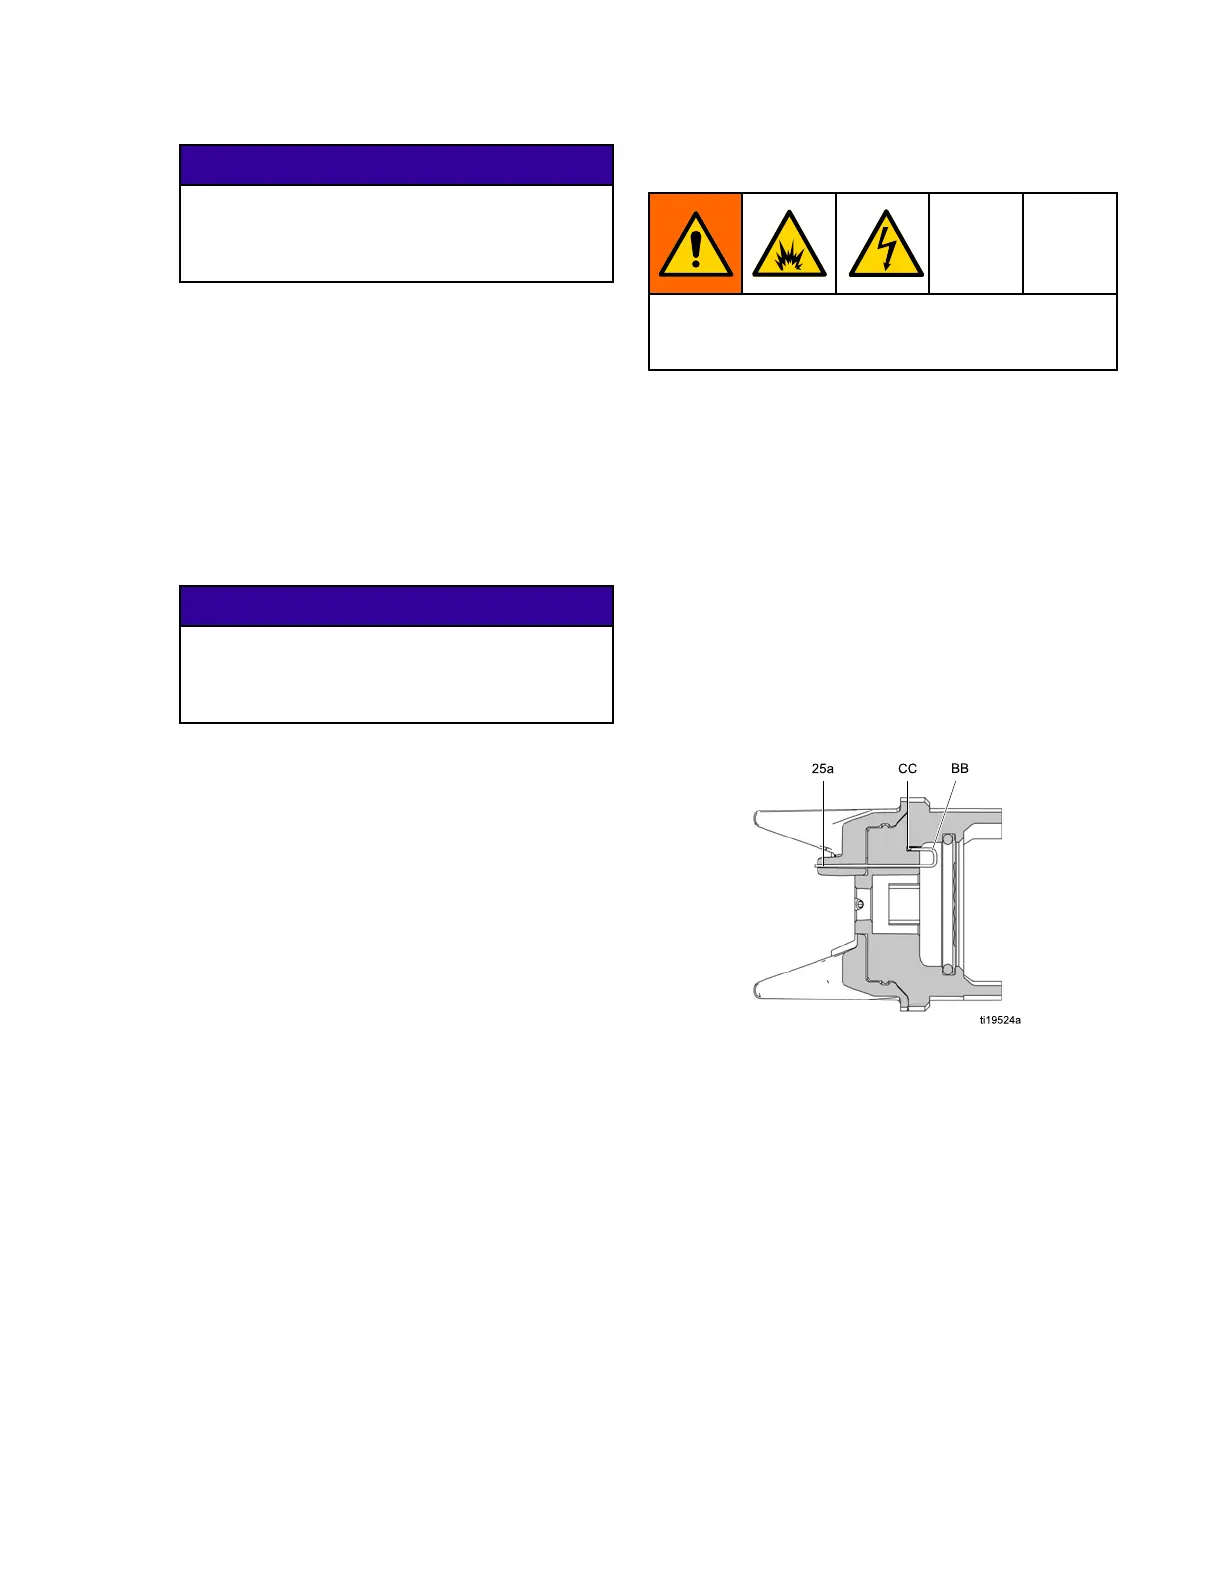
3.Pulltheelectrode(25a)outofthebackoftheair
cap,usinganeedle-nosepliers.
4.Pushthenewelectrodethroughtheaircaphole.
Makesuretheshortend(BB)oftheelectrode
engagesthehole(CC)inthebackoftheair
cap.Presstheelectrodeinplacermlywithyour
ngers.
5.Installtheaircapassembly.
6.FollowthestepsinTestGunResistance,page32.
Figure24ReplaceElectrode
3A2495K
41
 Loading...