Repair
Fluid Fluid
Fluid
Needle Needle
Needle
Replacement Replacement
Replacement
1.SeePreparetheGunforService,page39.
2.Removetheaircapassemblyanduidseat
housing.SeeAirCap,SprayTip,andFluidSeat
HousingReplacement,page40.
3.Removethegunbarrel.See
GunBarrelRemoval,page43.
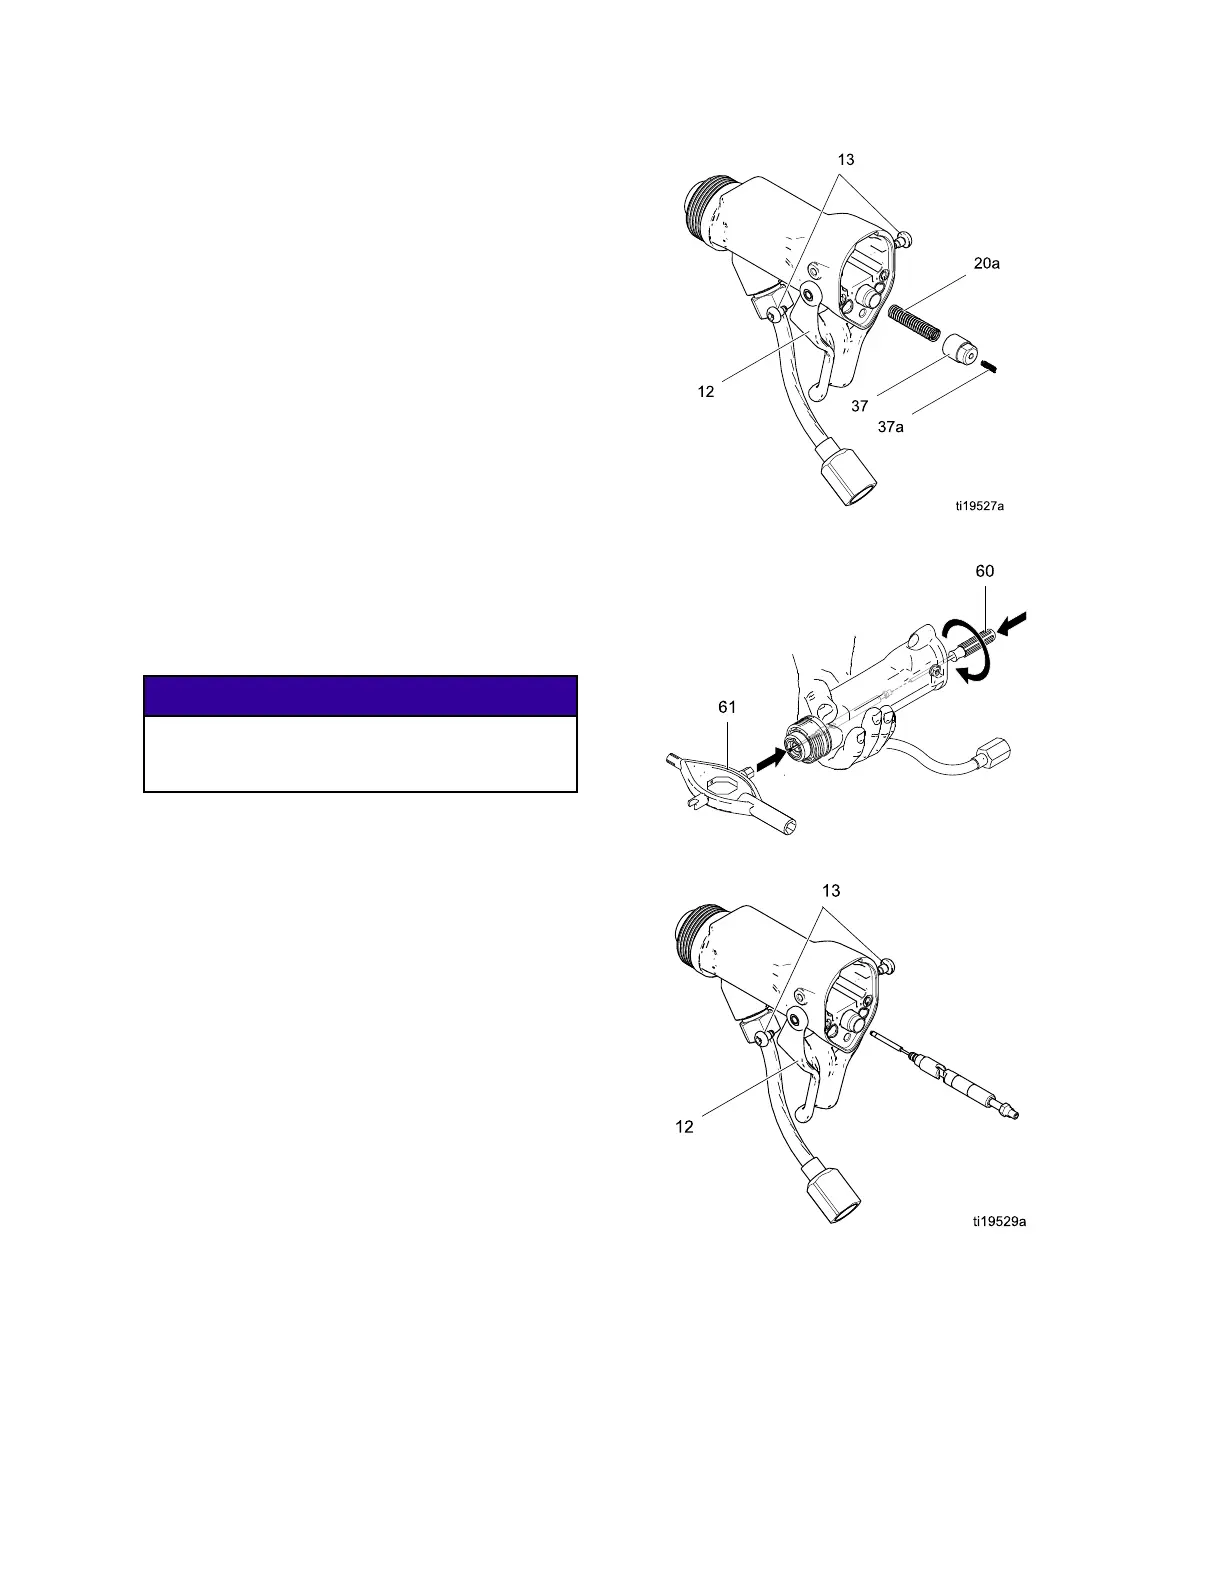
4.Removethetriggerscrews(13)andtrigger(12).
5.Unscrewthespringcap(37).Removethespring
(20a).
6.Besuretheseathousing(24)isremoved.Place
the2mmballendwrench(60)inthebackof
theuidneedleassembly.Pushthetoolforward
sothetwosegmentsoftheneedleengage,and
turnitcounterclockwiseabout12fullturnsto
unthreadtheneedle.
7.Usingtheexternalhexendoftheplasticmulti-tool
(61),carefullypushstraightontheuidneedle
ballfromthefrontofthebarreluntiltheuidseals
releasefromthebore.
NOTICE NOTICE
NOTICE
Topreventneedleassemblyseparationor
damage,becertainneedleisdisengaged
beforeremoving.
8.Removetheuidneedleassemblyfromtheback
ofthegunbarrel.
9.Installtheuidneedleassemblyinthegunbarrel.
Pushinontheneedlewiththedriver(60)and
tighten.
10.Installthespring(20a).
11.Installthespringcap(37).Makesurethe
groundingspring(37a)isinplace.
12.Installthetrigger(12)andscrews(13).
13.Installthegunbarrel.See
GunBarrelInstallation,page43.
14.Installtheseathousingandaircapassembly.
SeeAirCap,SprayTip,andFluidSeatHousing
Replacement,page40.
15.SeeTestGunResistance,page32.
Figure29RemoveCapandSprings
Figure30RemoveFluidNeedle
Figure31ReplaceFluidNeedle
44
3A2495K