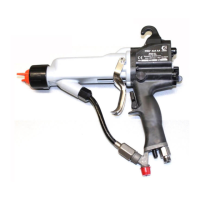
Repair
Fan Fan
Fan
Air Air
Air
Adjustment Adjustment
Adjustment
Valve Valve
Valve
Repair Repair
Repair
1.Followthestepsin
PreparetheGunforService,page39.
2.Placeawrenchontheatsofthevalveassembly
(30)andunscrewitfromthehandle(16).
NOTE: NOTE:
NOTE:
Youmayreplacethevalveasan
assembly(gotostep9)orasindividualparts
(steps3-9).
3.Removetheretainingring(30d).
4.Turnthevalveshaft(30b)counterclockwiseuntil
itcomesfreefromthevalvehousing(30a).
5.Removetheo-ring(30c).
6.Cleanallpartsandinspectforwearordamage.
NOTE: NOTE:
NOTE:
Usenon-siliconegrease,PartNo.
111265.Donotover-lubricate.
7.Whenreassemblingthefanairvalve(30),lightly
lubricatethevalvethreadsandscrewtheshaft
(30b)fullyintothehousing(30a)untilbottomed.
Installtheo-ring(30c*),lubricate,andunscrew
thevalvestemuntiltheo-ringentersthehousing.
8.Reassembletheretainingring(30d).Unscrew
thevalvestemfromthehousinguntilitisstopped
bytheretainingring.
9.Screwthevalveassembly(30)intothegun
handle(16),usingawrenchontheatsofthe
housing.Torqueto15in-lb(1.7N•m).
Figure37FanAirAdjustmentValve
Atomizing Atomizing
Atomizing
Air Air
Air
Adjustment Adjustment
Adjustment
Valve Valve
Valve
Repair Repair
Repair
1.Followthestepsin
PreparetheGunforService,page39.
2.Placeawrenchontheatsofthevalveassembly
(29)andunscrewitfromthehandle(16).
3.Inspectthevalveassembly.Ifdamaged,install
anewvalve(29).
4.Beforeinstallingthevalveassemblyinthe
handle,unscrewthevalvestem(29b)fromthe
housing(29a)untilitstops.
5.Installthevalveassemblyintothegunhandle.
Torquethevalvehousing(29a)to15in-lb(1.7
N•m).
Figure38AtomizingAirAdjustmentValve
483A2495K