Repair
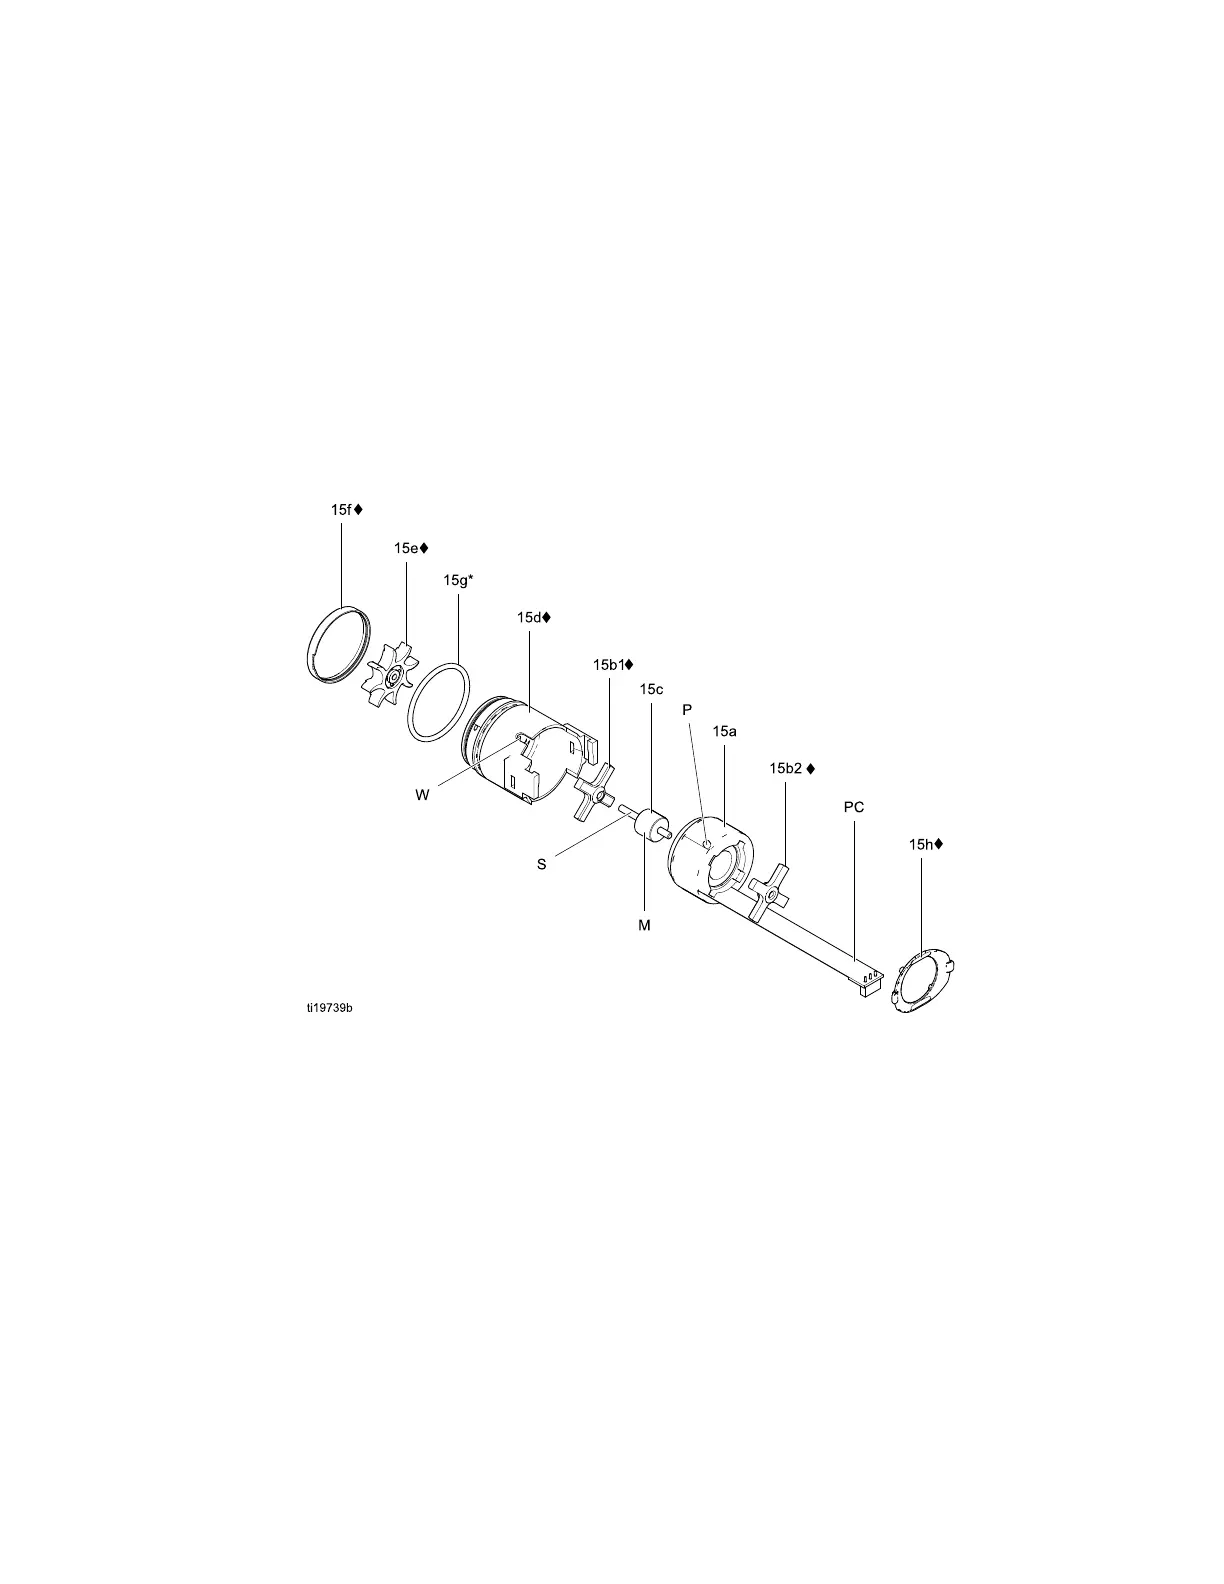
12.Holdthecoilassembly(15a)onaworkbench
withthefanendfacingup.Pressthefan(15e♦)
ontothelongendoftheshaft(S).Thefanblades
mustbeorientedasshown.
13.Carefullypressthecoilassembly(15a)intothe
frontofthehousing(15d♦)whilealigningthe
pinonthecoilwiththeslotinthehousing.The
3–wireconnector(PC)mustbepositionedbelow
thewidernotch(W)ofthehousingtabs,as
showninFig.35.Besurethecoilalignmentpins
(P)arepositionedasshowninFig.34.
14.Rotatethefan(15e)soitsbladesclearthefour
bearingtabs(T)atthebackofthehousing.
Ensurethatthebladesofthebottombearing
(15b1♦)alignwiththetabs.
15.Seatthecoilfullyintothehousing(15d♦).Secure
withtheclip(15h♦),ensuringthatitstabsengage
theslotsinthehousing.
16.Ensurethattheo-ring(15g)isinplace.Install
thecap(15f).
17.Installthealternatoronthepowersupply,and
installbothpartsinthehandle.SeePower
SupplyRemovalandReplacement,page45.
Figure36Alternator
3A2495K
47
 Loading...