3.2 Cursor measurement
The cursor can be used for quickly measuring the time and voltage of the waveform.
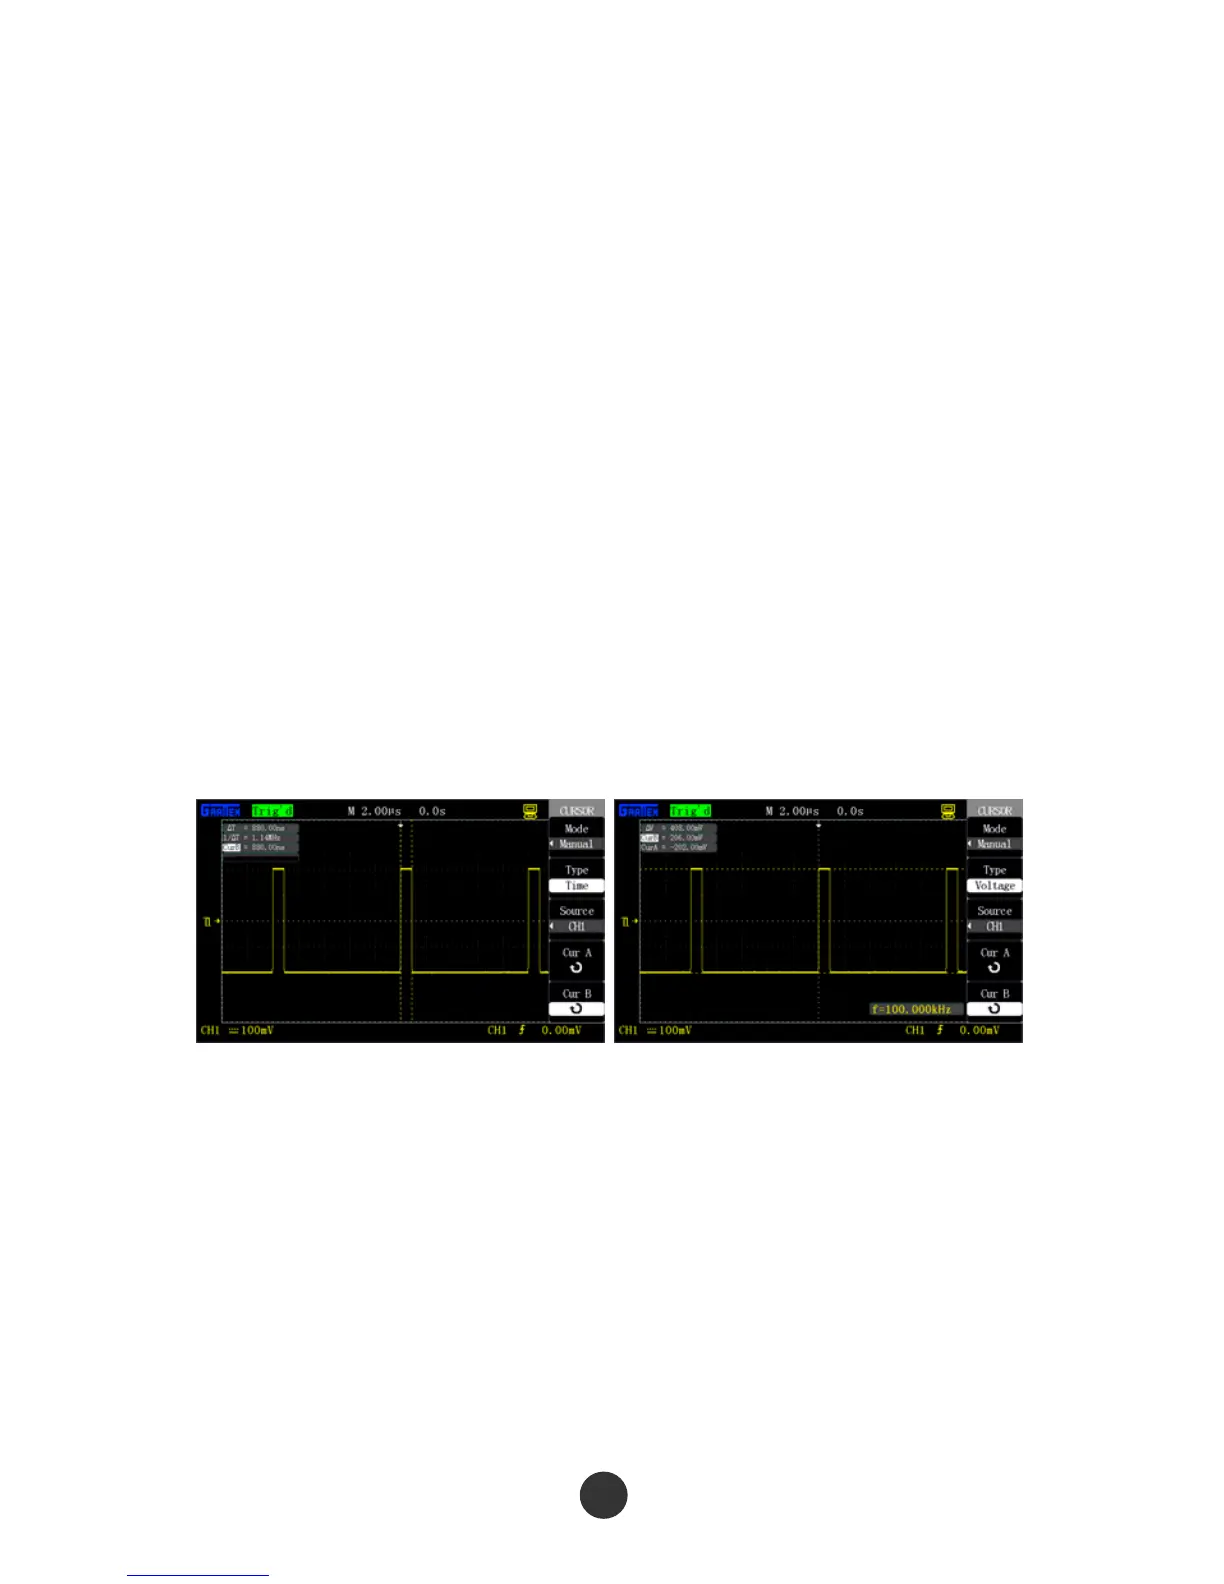
3.2.1 Measurement of the width of spike pulse
Carry out the following steps to measure the width of a spike pulse of a certain signal:
1. Press [CURSORS] to display the “CURSOR” menu.
2. Select “CURSOR MODE” as “MANUAL”.
3. Press the option “TYPE” key, and select “TIME”.
4. Press the “SIGNAL SOURCE” option key, and select [CH1].
5. Press the “CurA” option key, and revolve the [UNIVERSAL] knob to place the cursor A
at an edge of the spike pulse.
6. Press the “CurB”option key, and revolve the [UNIVERSAL] knob to place the cursor B
at an edge that is clearest to the spike pulse.
As shown in figure 3-1,time increment Delta T and frequency increment 1/Delta T
(measured the width of spike pulse) will be displayed in the left upper corner of the
display screen.
Figure 3-1 Width measurement Figure 3-2 Amplitude measurement
of spike pulse of spike pulse
3.2.2 Amplitude measurement of spike pulse
Carry out the following steps to measure the amplitude of the spike pulse:
1. Press [CURSORS] to display “CURSOR”.
2. Select “CURSOR MODE” as “MAUNAL”.
3. Press the“TYPE”option key, and select “TIME”.
4. Press the“SIGNAL SOURCE”option key, and select [CH1].
84