36 / 64
33040_mc32exHoTT_V1.00_en
37 / 64
33040_mc32exHoTT_V1.00_en
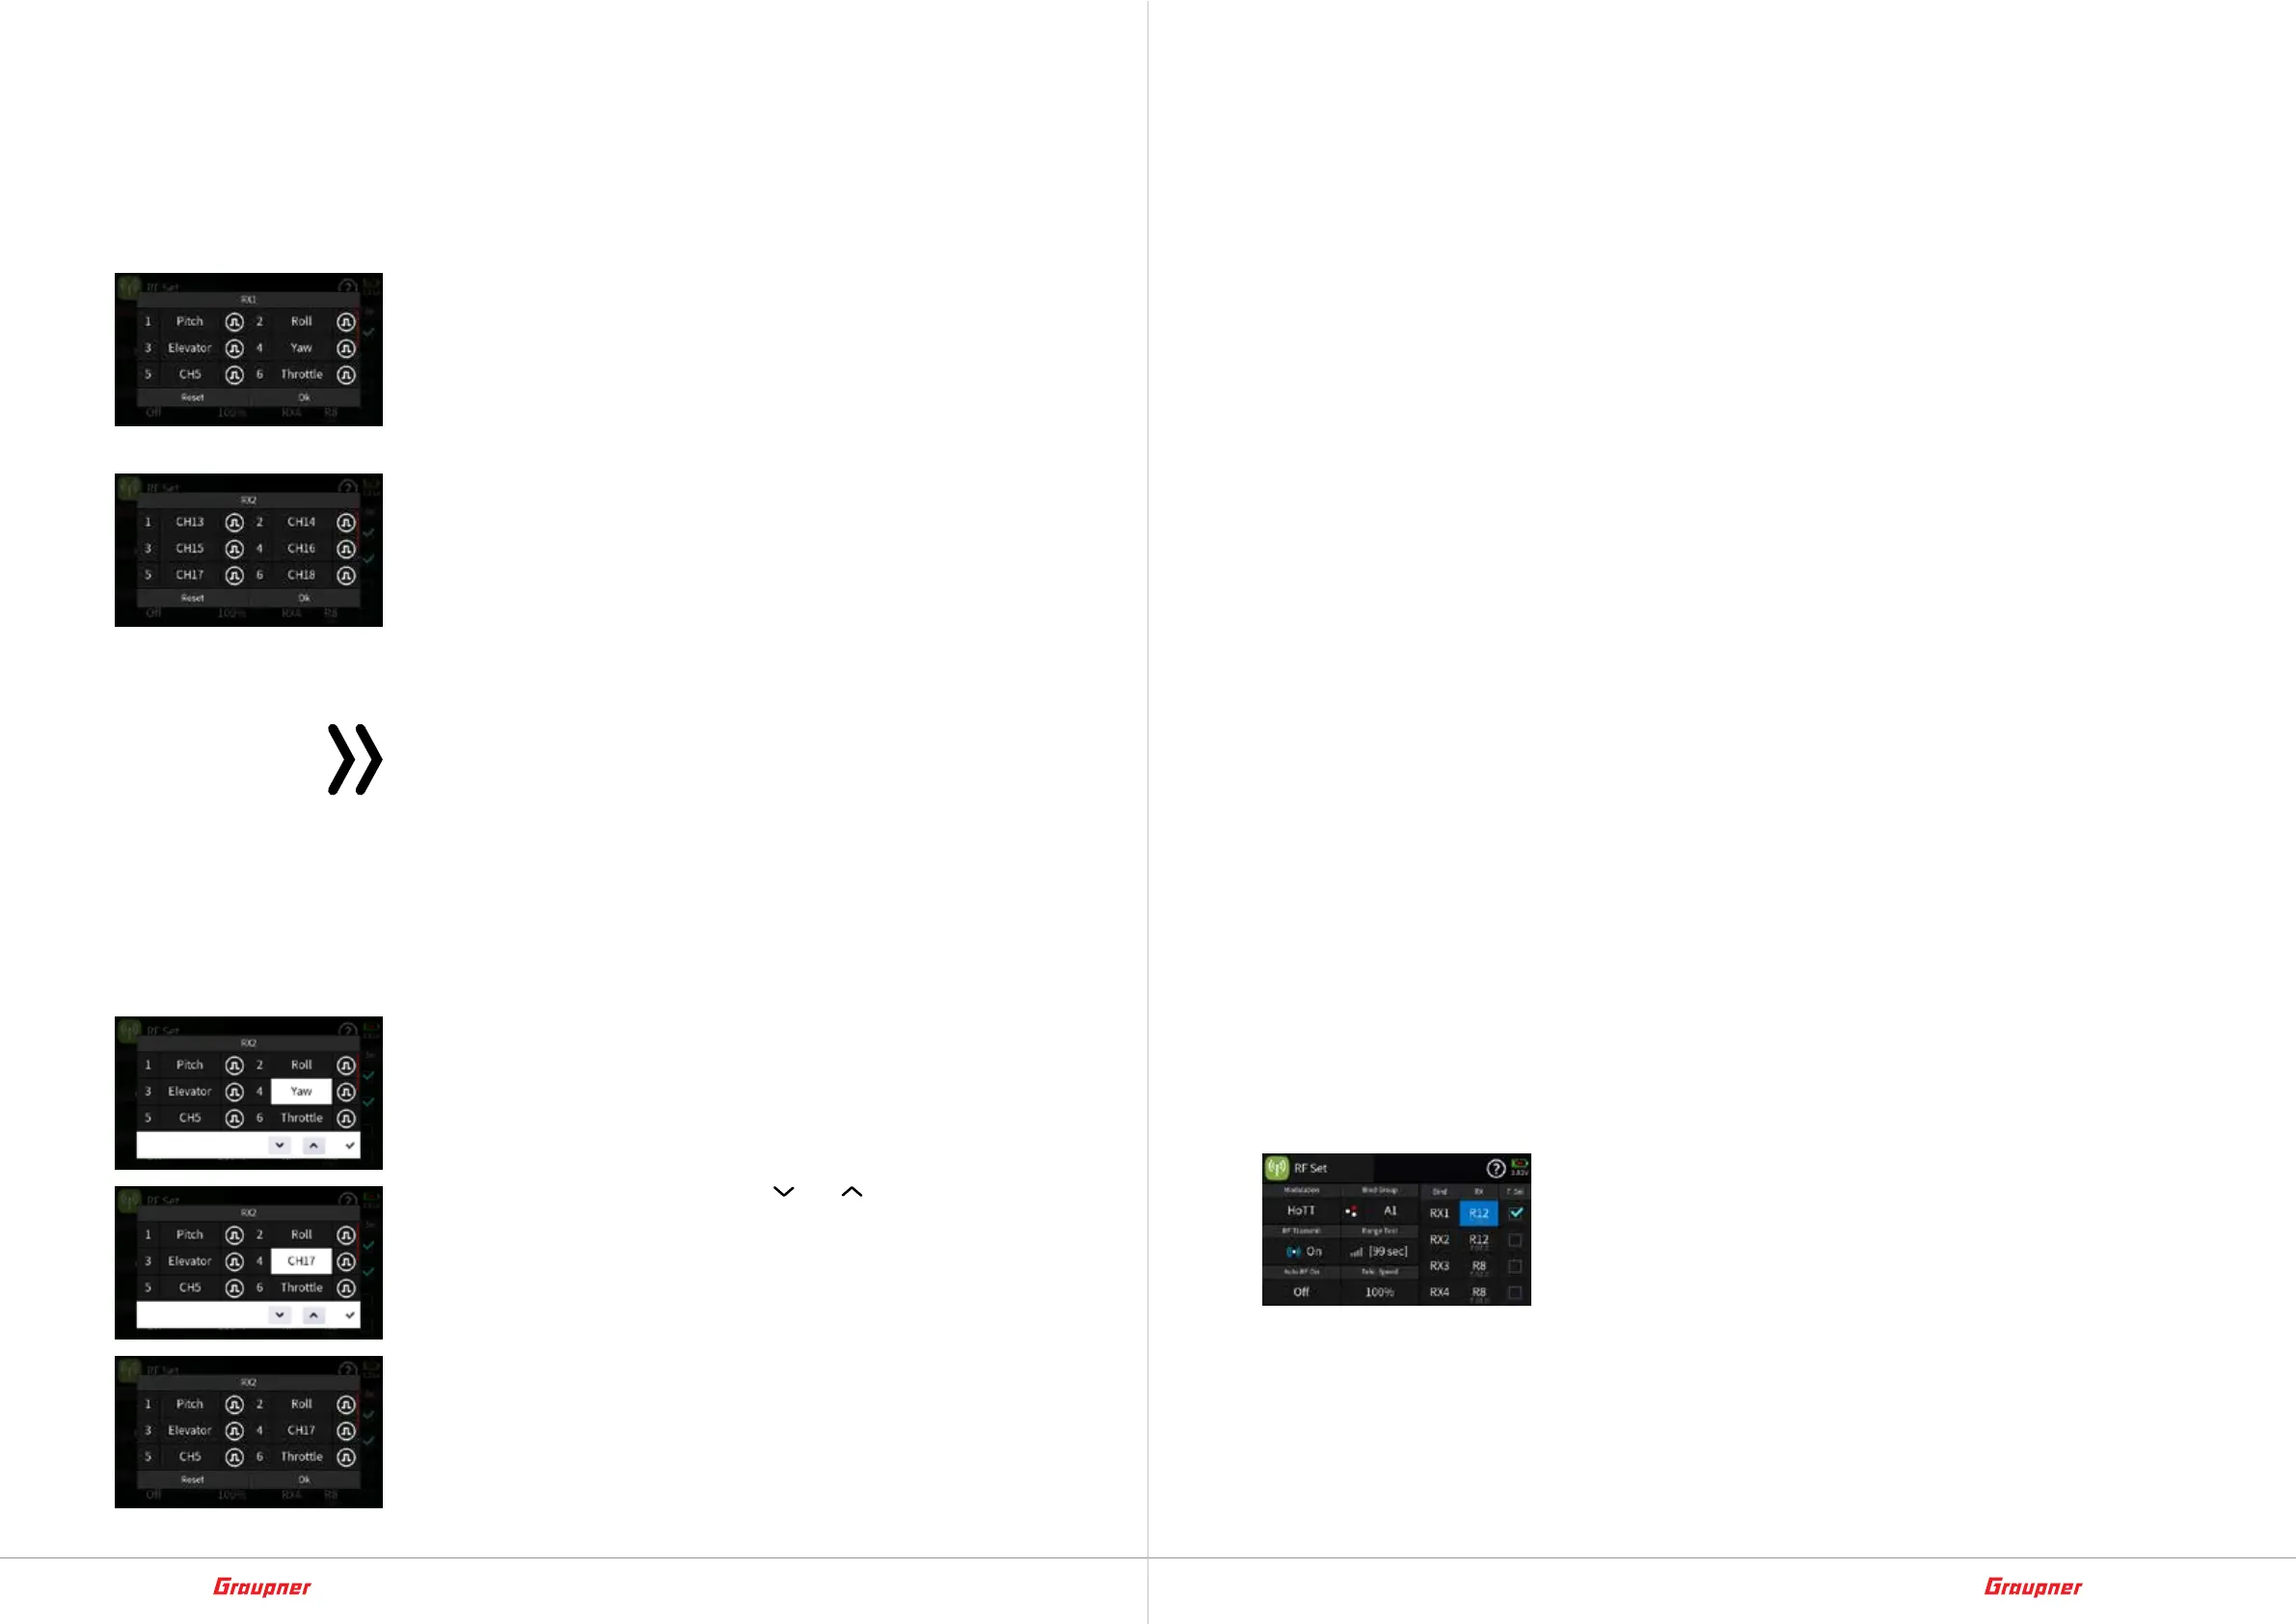
starting with channel 1, is assigned the same control channels as
standard. This assignment can be changed manually:
Adjust channel order
Set the order of channel to „consecutive“ automatically
1. Tap on the value field of the desired receiver in the „RX“ column,
for example receiver „E12“ in the „Rx2“ line. The „Channel Assign-
ment“ display appears, see left.
2. Tapping „Reset“ sets the channel assignment as „continuous“.
‖ In the example left on channels 17 ... 28, channels 1 ... 16
are covered by the 16-channel GR-32 HoTT receiver used as
an example on Rx1.
3. Tapping “Reset” again sets the channel assignment back to the
default order.
4. Tapping „OK“ closes the „Channel assignment“ display.
5. The same procedure may apply to other recipients.
6. If needed, the original definition of the main recipient can be
changed by moving the checkmark in the „T. sel.” to restore.
Notes
• If the total of all channels on the receiver side exceeds the
maximum of 32 channels of the transmitter, channel 32 is
assigned to the “surplus” channels.
• The automatic assignment described above is only possi-
ble with compatible receivers. According to the current
firmware status, these are all receivers whose firmware sta-
tus is displayed below the receiver ID.
Adjust channel order manually step-by-step
1. As described above, call up the „Channel assignment“ display
by touching the corresponding receiver identifier.
2. Tap on the channel assignment to be changed. The value field
is displayed in reverse video and a control panel is displayed at
the bottom edge of the display.
3. Select desired channel by tapping „
“ or „ “ button.
4. Tapping the check mark on the right edge of the control panel
completes the process.
5. If needed, proceed in the same way with other channels.
6. Tapping “Reset” resets changed assignments to the default val-
ues.
7. Tapping „OK“ completes the process.
Delete Binding
Delete existing binding step-by-step
1. With the receiving system switched off, switch on the Graupner
mc-32ex HoTT transmitter without RF or, set the RF module
to “OFF” in the “RF transmit” field of the “RF Set” menu
2. In the transmitter display, touch the desired value field „RX1 ...
RX4“ in the „Bind“ column to trigger a binding process on the
transmitter side.
The existing binding is deleted in the course of the binding
attempt.
3. Changing the bind group deletes all bindings.
Range test
When the range test is triggered, the output power of the trans-
mitter is significantly reduced. A practical function test can there-
fore be carried out at a distance of less than 100 m. After the end
of the range test, the transmitter switches back to full output
power and the range test signal tone stops.
If needed, ask a helper for support.
Range test step-by-step
1. Install the receiver, which is preferably already bound to the
transmitter, ready for operation in the model.
2. Switch on the remote control and wait until the receiver signals
a correct radio connection according to its instructions. It should
now be possible to move connected servos.
3. Set up the model on level ground (pavement, short lawn or
earth) so that the receiver antennas are at least 15 cm or about
6 inch above the ground. Therefore it may be necessary to
underlay the model during the test.
4. Hold the transmitter at hip height and away from your body.
5. Make sure that no person(s) be between the transmitter and
the model during the range test.
6. Start the range test in the „RF Set“ submenu of the „green“ basic
menu by touching the value field.
– The time display begins to run backwards and a signal tone
sounds throughout the range test.
– If, on the other hand, the message „Switch on RF first“ is dis-
played, the RF module must be switched on at the transmit-
ter end and the range test must be triggered again.