50 / 64
33040_mc32exHoTT_V1.00_en
51 / 64
33040_mc32exHoTT_V1.00_en
If only an angle bracket can be seen, then the respective first
or last page in the display is active. Changing sides is then only
possible in the indicated direction.
• upper and lower selection keys
Menu lines in which parameters can be changed are marked
by a preceding angle bracket (
). Tapping the lower or upper
button moves this “
” pointer one line down or up.
Lines that cannot be navigated to cannot be changed.
• middle „ENTER“ button
Tapping the center button activates or deactivates the value
field of an editable parameter.
As long as a parameter is displayed inversely, the selected
value can be changed within the possible setting range using
the upper or lower button.
• “RECEIVER“ button
If a sensor was connected before switching on the relevant
receiver power supply, or if several sensors were connected to
the receiver, it is indicated by a green bar at the bottom of the
display of the „telemetry“ menu, as shown on the left.
To access the telemetry displays of these devices, open the
„SETTING & DATAVIEW“ display, then tap the value field labelled
„Receiver“ in the lower right corner and select the desired
device in the selection window that appears The operation of
these displays is the same as described above under „function
of the cross-shaped keypad“.
Note
All settings made via the „telemetry“ menu in the
receiver, such as, fail-safe, servo reverse, end points
adjustment, mixer and curve settings, etc. are stored exclu-
sively in the receiver‘s settings. Most of these settings can
be made directly on the transmitter which is the proper way
for setting up your model memories. In case you choose to
do this on the receiver you must reinitialize the receiver
when installing into another model to avoid taking over
settings that may not work with another model.
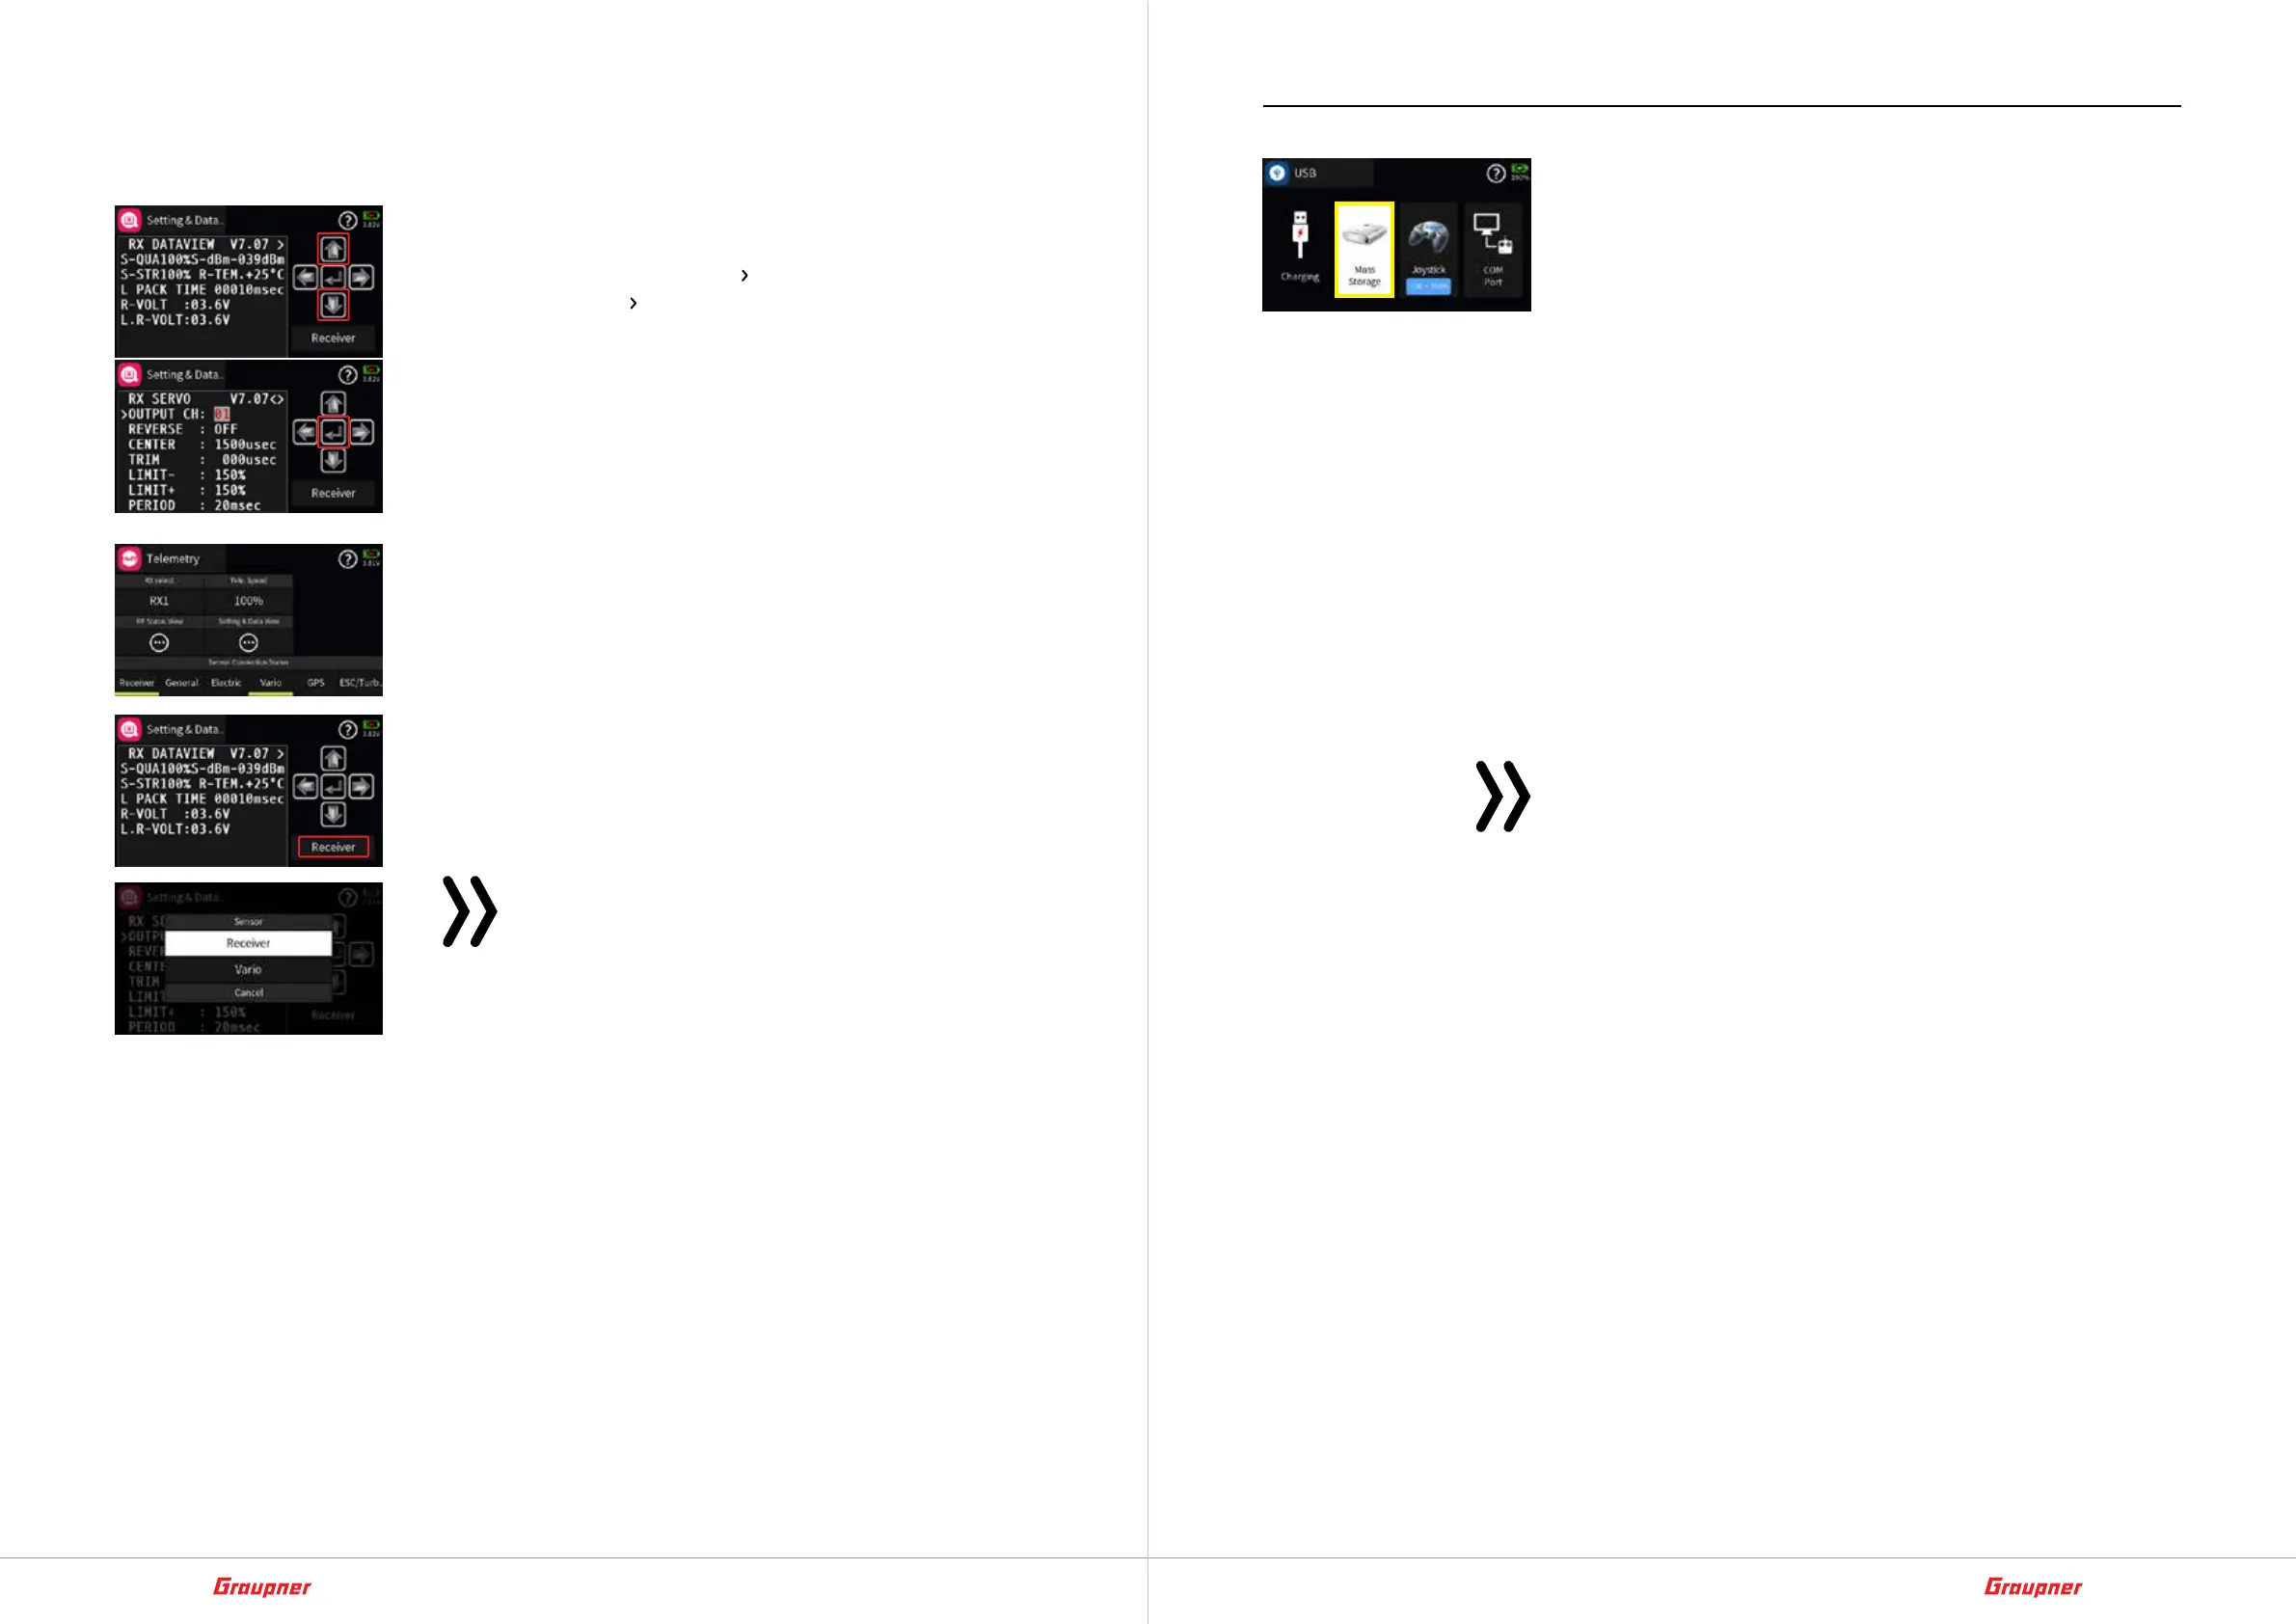
Import and export of model data
Saving and exchanging model data between compatible trans-
mitters is carried out via the USB C socket on the front and the
„mass storage“ setting on the transmitter side using a standard
laptop or PC file explorer or manager. The individual model mem-
ories can be found on the Graupner mc-32ex HoTT transmitter
under the path \\mc-32\Model\mc-32.
Exchange of model data
The model memories of the hand-held transmitters Graupner
mz-16 HoTT, mz-32 HoTT and the console transmitter
Graupner mc-32ex HoTT are basically compatible, BUT:
• The mandatory prerequisite for an import into the other trans-
mitter is that the desired model memory is copied or moved
to the other directory using a PC or laptop. For example, from
„\\mz-16\Model\mz-16“ to „\\mc-32\Model \mc-32“ etc. or
vice versa.
• If, for any reason, the model name on the PC or laptop is
hanged or added, its length must not exceed 16 characters.
Otherwise the model memory will not be displayed in the
model list.
Attention
• The Graupner mc-32ex transmitter is largely identical to
the Graupner mc-32 transmitter, which come into the
market around 2012 with two SW displays, is NOT compa-
tible with ANY of the current transmitters.
• The exchange of model memories between the transmitter
Graupner mz-16/32 and Graupner mc-32ex is possible
due to the identical data structure of the respective model
memories. There are even no restrictions between the two
hand-held transmitters Graupner mz-16 and mz-32 as
long as the number of channels is sufficient for the model
memory. However, due to design-related physical differ-
ences in the transmitter and switch structure, this is not the
case when exchanging model memories between a hand-
held and a console transmitter. As soon as the concerned
transmitter detects these differences when used with
imported model memory, all control assignments with
physical switches‘ are deleted. After loading the imported
model memory for the first time, all these assignments
must be reset in the transmitter. Possibly the same applies
to programmed digital switches.