Page 15 of 48 S1047.mz-16-V1.0-EN
DATA Connection
COM Connection
DSC Connection
Micro USB Connection
Charging the
TransmiƩer
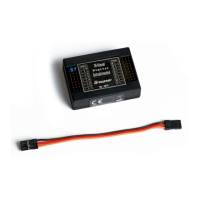
The DATA connecƟon is suitable for connecƟon of a smart box or an external
module. If necessary, this port can also be switched to out- put a digital
SUMD digital signal.
The corresponding seƫŶgs are made in the submenu "I/O conĮg." of the
system menu, see below under DSC connecƟon.
Serial interface for future use
Through a DSC cable this port can be used for a simulator or for wired
Teacher/Student mode.
If necessary, switch to the required DSC operaƟŶg mode in the "I/O ConĮg."
submenu of the system menu.
To ensure a correct DSC connecƟon, observe the following
1. Perform any necessary seƫŶgs in the menu.
2. Connect one end of the DSC cable in the DSC port of the switched
oī transmiƩer and the other end to the device to be connected.
3. Turn the transmiƩer on.
The USB cable supplied with the transmiƩer is plugged into this socket.
N
ote
Once connected to a PC or other USB power source, a yellow LED should be
lit solidly to the leŌ of the
mz-16 HoTT
's micro-USB port. If this LED ŇĂshes
yellow or is even dark, the power source is too weak to charge the
transmiƩer.
T
ransmitter switched off
Once the transmiƩer is connected to a suitable USB power source the
charging process begins.
Depending on the current charge status of the transmiƩer baƩery, the bezel
of the ON / OFF switch will ŇĂsh approximately every 2 seconds in diīerent
colors and with varying frequency. As soon as the bezel glows solid green,
the baƩery is fully charged. The charging process is complete.
 Loading...