22
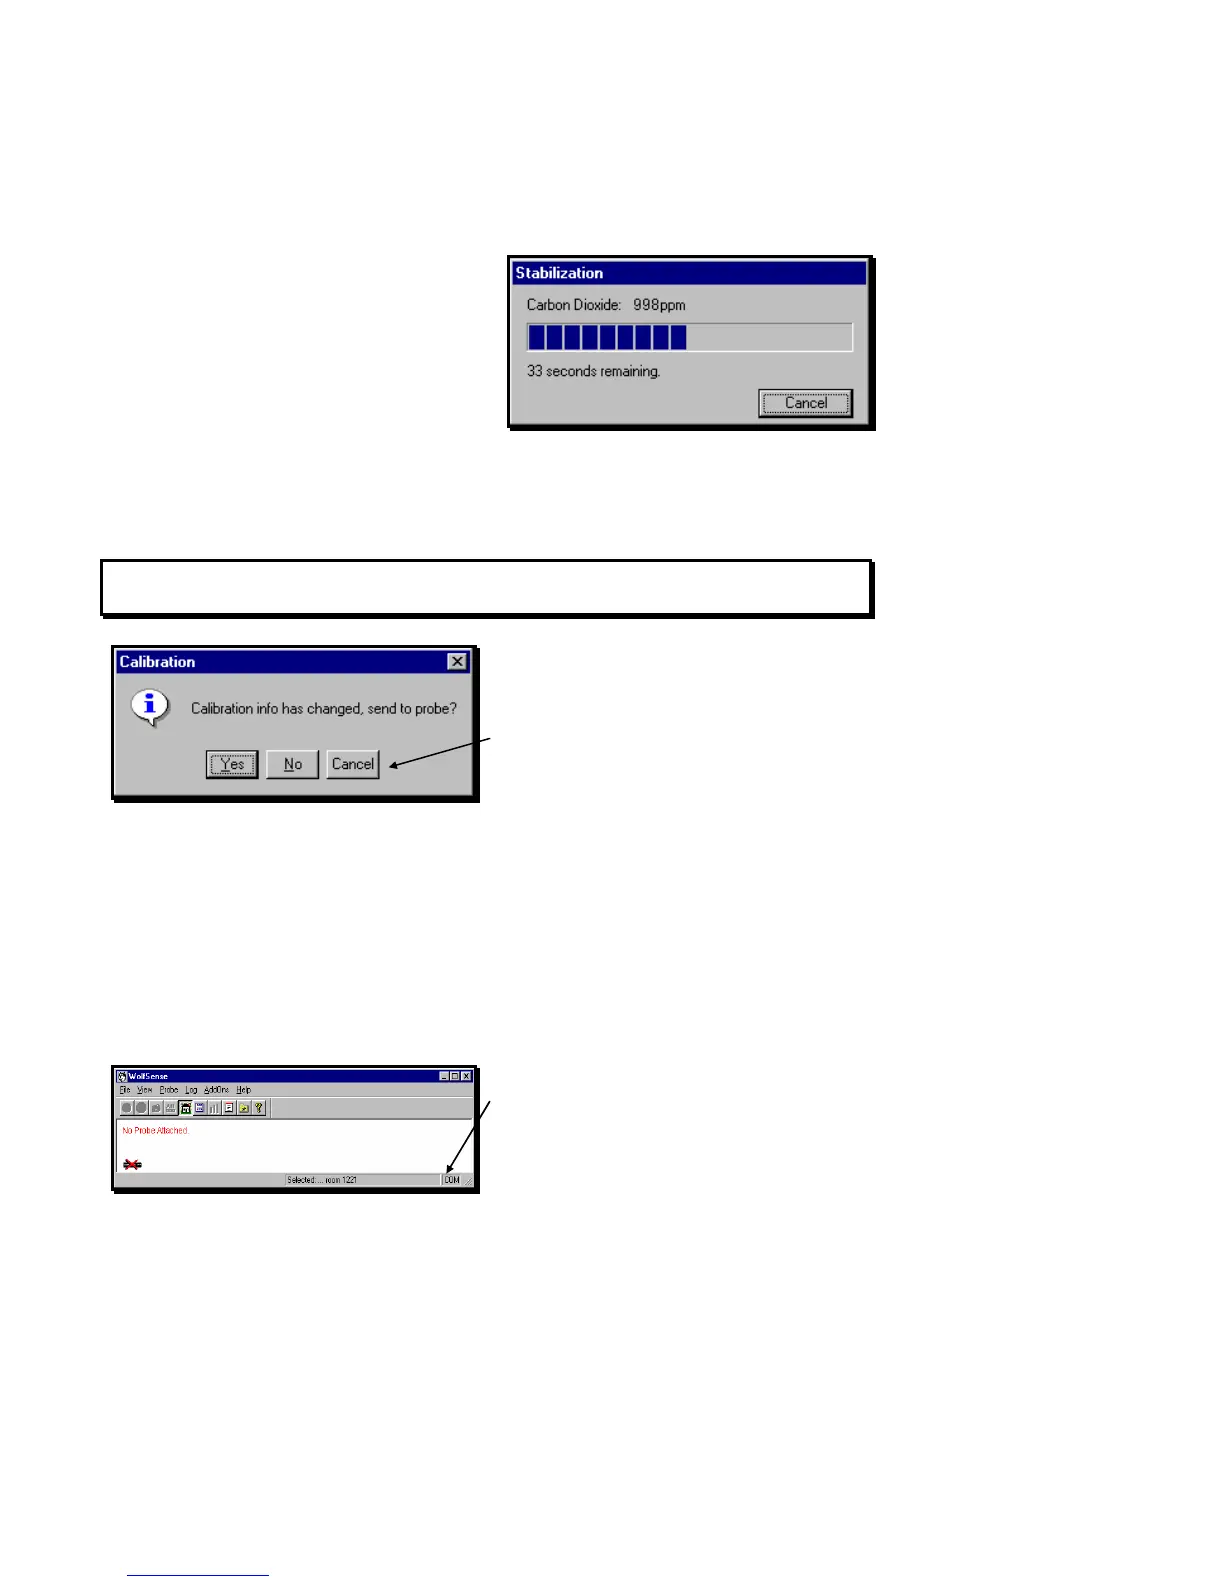
A countdown screen shows the additional
stabilization time allowed and remaining for this
measurement.
Once the stabilization time has elapsed, the software
will automatically record the current value of the
measurement. You may then continue with the
other calibration point or other measurement
parameters.
All calibration information is stored in the
probe so that each probe “remembers” its correct calibration values. You will be
prompted to send the updated calibration information to the probe.
NOTE: No changes to the calibration information are confirmed to the probe until you
click on or tap OK to exit the calibration dialog box.
Click on or tap OK in the lower right-hand corner of
the CALIBRATION INFO dialog box (Figure 37).
Click on or tap Yes to send the new calibration
information to the probe,
No to abandon your changes, or
Cancel to return to the calibration dialog box.
Probe Setup
The probe is attached to the Lap PC through the serial port. You may attach only one
probe at a time (as in Figure 2). Use Probe Setup if you need to change the serial
port where you will connect the probe.
Before attaching the probe to the Lap PC, be sure
the COM port is clear and that the COM indicator
flickers in the lower right-hand side of the WolfSense
LAP window. If it does not appear, the serial port
you have selected is not available.
Attach the probe to the serial port.
Figure 40 - Calibration Countdown screen
Figure 41- Last Chance to Stop Changes to Calibration
Settings of Probe
Figure 42 – COM Indicates Port Available for Probe