Model G0623X/G0623X3 (Mfg. Since 5/12)
-55-
5"
5"
4" Slot
(Top View)
(Side View)
3
/
8
"
Countersink on Bottom
1
/
4
" Hole
Figure 103. Miter bar pattern.
5. Cut a miter bar that will fit in the table miter
slot approximately 5" long, as shown in
Figure 103.
Tip: Consider making the miter bar longer for
larger featherboards—approximately half the
length of the total featherboard—to support
the force applied to the featherboard during
use.
6. Drill a
1
⁄4" hole in the center of the bar, then
countersink the bottom to fit a
1
⁄4"-20 flat head
screw.
7. Mark a 4" line through the center of the coun-
tersunk hole in the center, then use a jig saw
with a narrow blade to cut it out.
8. Assemble the miter bar and featherboard
with a
1
⁄4"-20 x flat head screw, flat washer,
and a wing nut or a star knob (see Figure
104). Congratulations! Your featherboard is
complete.
4. Rout a
1
⁄4"–
3
⁄8" wide slot 4"–5" long in the
workpiece and 1"–2" from the short end of the
featherboard (see Figure 102).
Figure 102. Slot routed in featherboard.
1"-2"
4"-5"
1
/
4
"-
3
/
8
" Slot
(Side View)
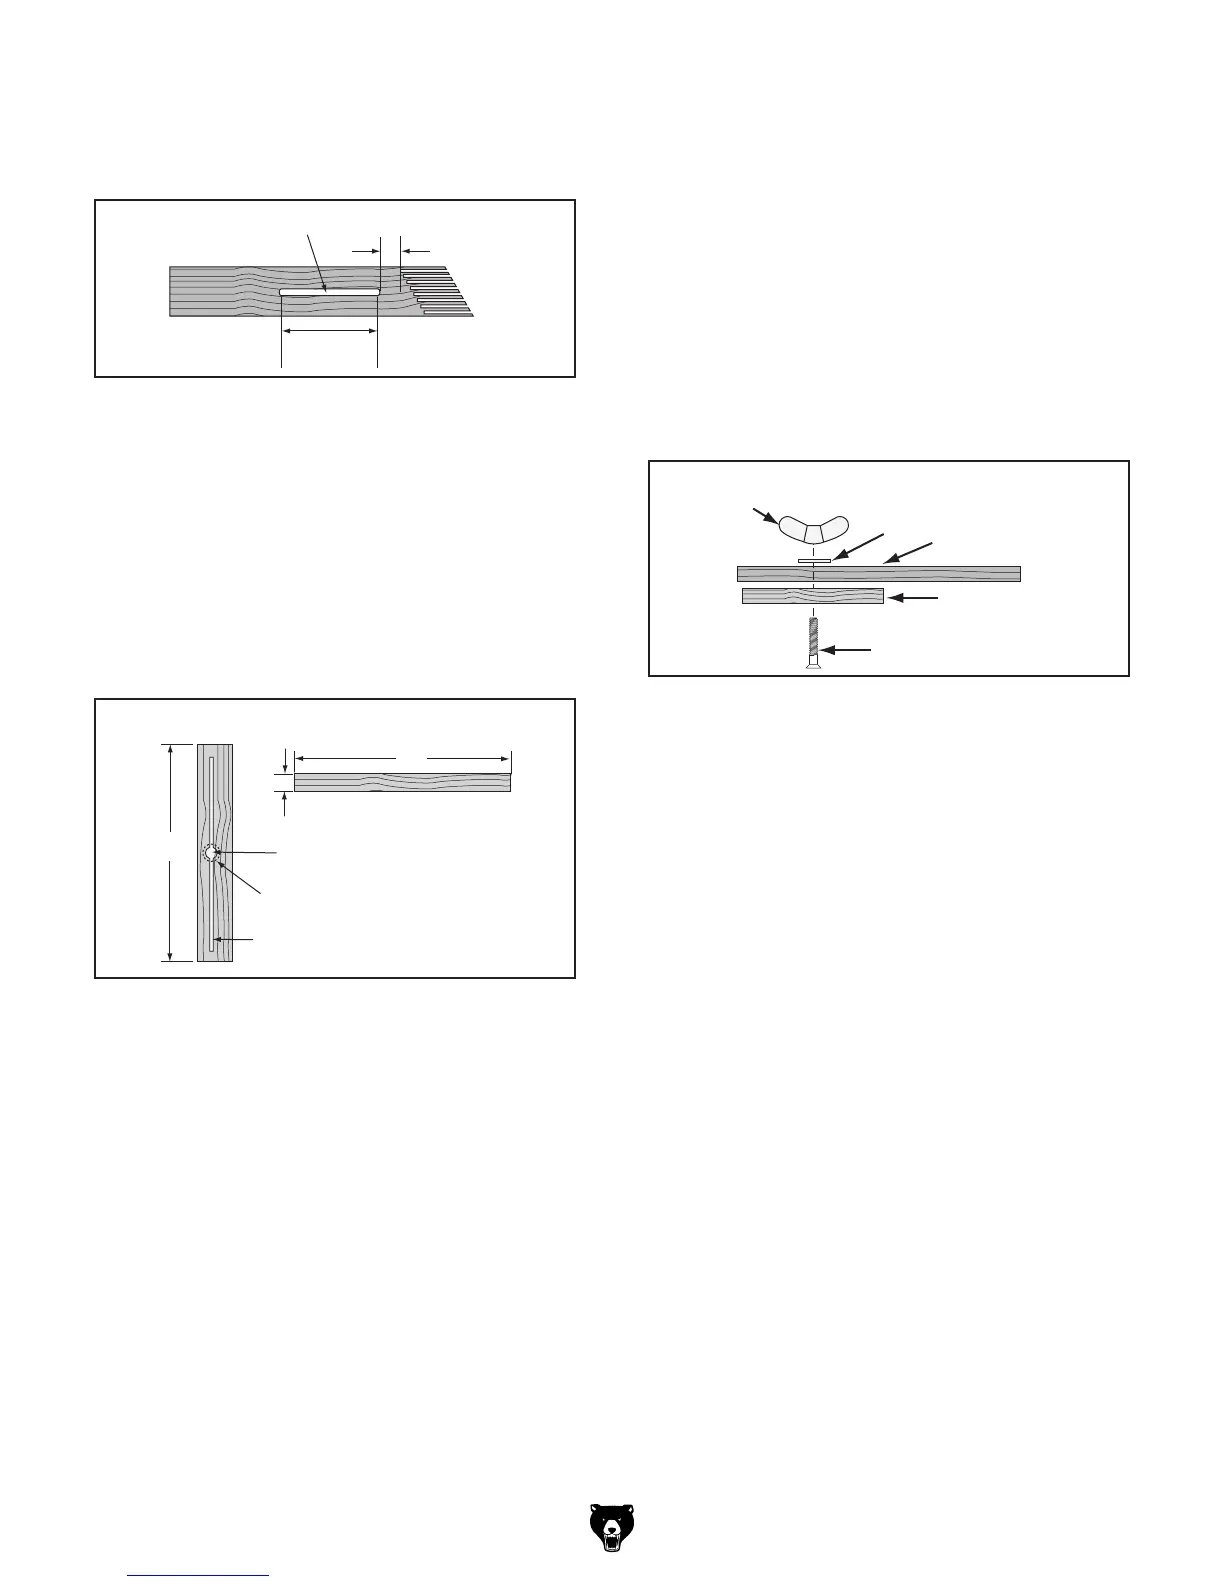
Wing Nut
Miter Bar
Featherboard
Flat Head Screw
Flat Washer
Figure 104. Assembling miter slot featherboard
components.
Tip: The length of the flat head screw depends
on the thickness of the featherboard—though
1
1
⁄2" to 2" lengths usually work.
Now, proceed to Mounting Featherboard in
Miter Slot on Page 56.

 Loading...