-70-
Model G0623X/G0623X3 (Mfg. Since 5/12)
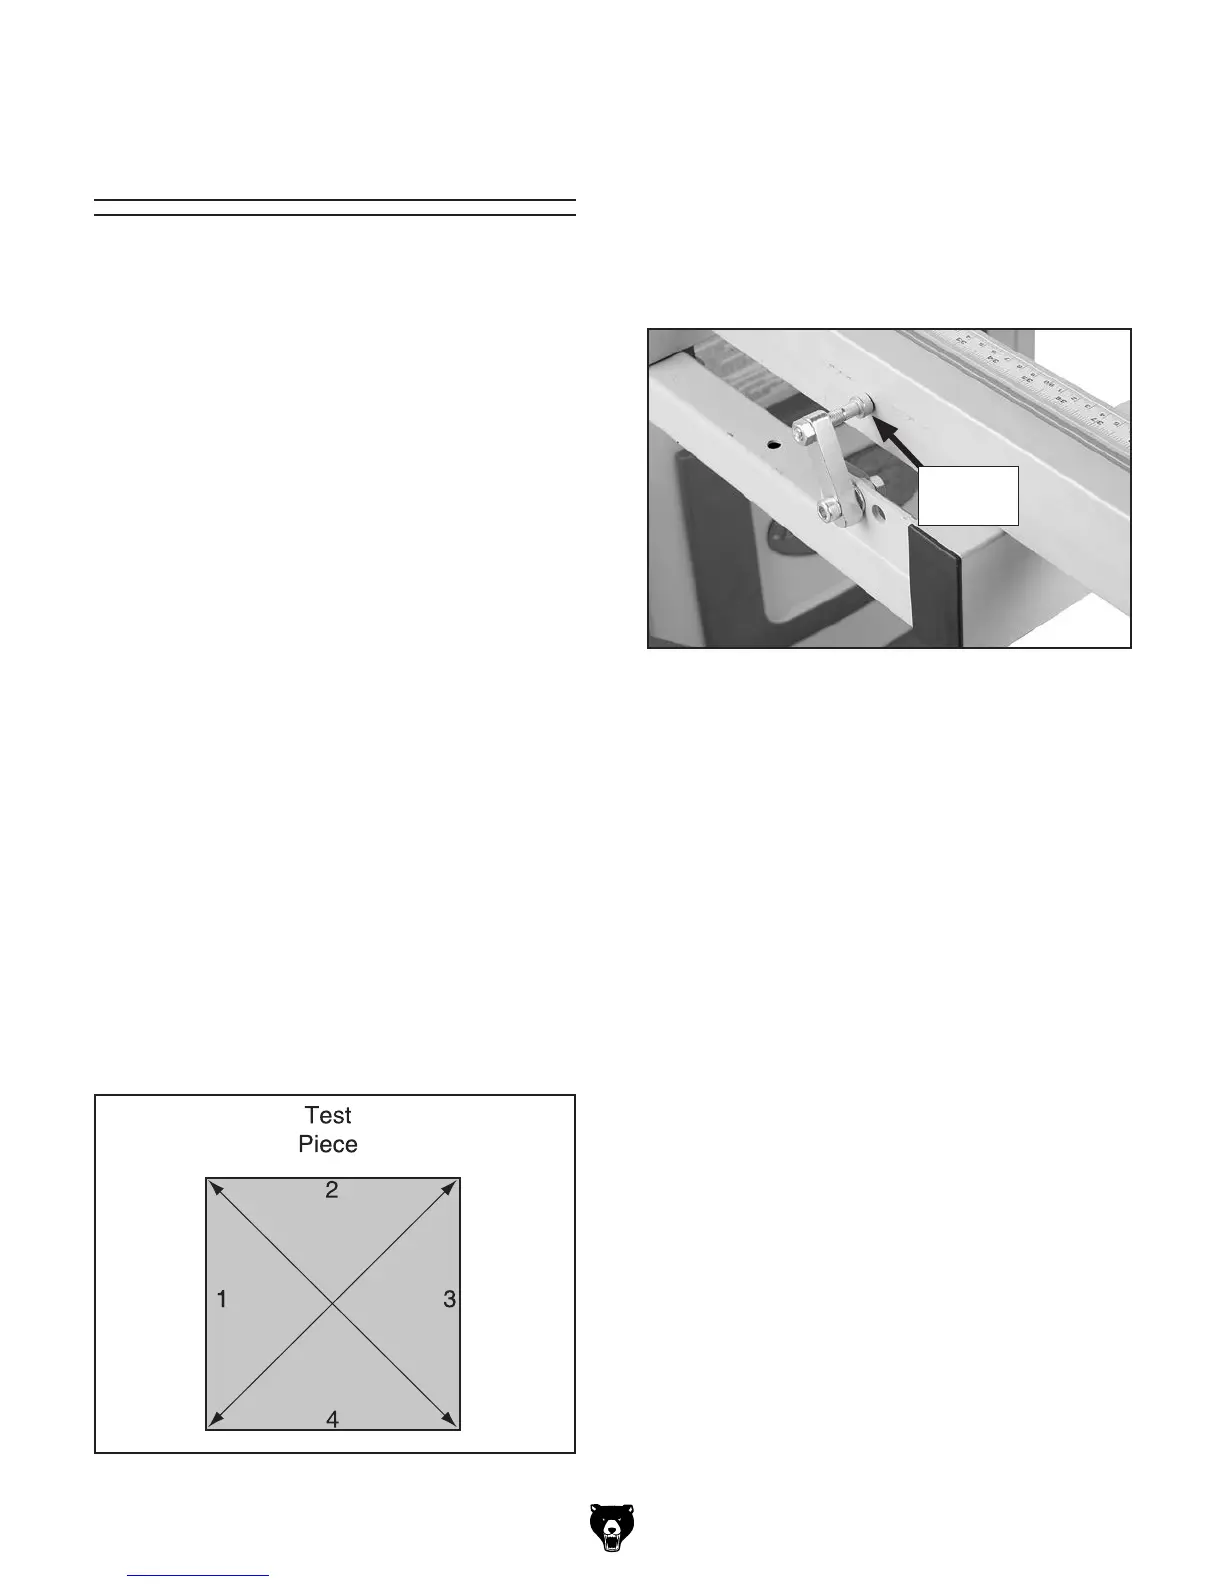
Figure 132. Fence adjustment test piece.
5. Loosen the knob on the crosscut fence to
allow it to pivot (make sure 90° stop bolt
remains against the fence during adjust-
ments).
6. Loosen the hex nut on the 90° stop bolt
shown in Figure 133, and rotate the 90° stop
bolt to square the crosscut fence.
7. Tighten the hex nut on the 90° stop bolt, then
tighten the crosscut fence knob, making sure
the block is touching the 90° stop bolt.
8. Repeat Steps 3-4.
Squaring the crosscut fence to the blade ensures
that cuts made with the crosscut fence will be
square. This procedure can be done by using a
piece of scrap plywood as a test piece and mak-
ing five test cuts, then adjusting the fence as
necessary.
To square the crosscut fence with the blade:
1. Make sure the blade is parallel with the slid-
ing table and that the crosscut fence is rest-
ing against the 90° stop bolt (see Figure 133
for locations).
2. Prepare the scrap test piece by cutting it to
32" x 32", then number all four sides of the
test piece.
3. Use the crosscut fence to cut
1
⁄2" off of each
side of the test piece, then cut side 1 again
(make five cuts total).
4. Measure the test piece diagonally from cor-
ner-to-corner as shown in Figure 132.
— If both measurements are not within
1
⁄16",
then the crosscut fence needs to be adjust-
ed. Proceed to Steps 5–8.
— If both measurements are within
1
⁄16" then
no adjustments need to be made. You are
finished with this procedure.
Squaring Crosscut
Fence to Blade
Figure 133. Crosscut fence adjustment cam.
90° Stop
Bolt

 Loading...